Work with Logi Widgets
Logi Widgets are fully-functional reports that can be embedded within HTML pages that are unrelated to Logi applications. Developers can therefore make the functionality of Logi reports available within independent web pages, including blogs. This topic guides developers through the process of creating and using widgets.
- About Logi Widgets
- Create a Widget Definition
- Embed the Widget Code in an HTML Page
- Current Widget Limitations
- Widgets and Load-Balancing
- Sample Definition
About Logi Widgets
The Logi Widget, which debuted in v9, is a Logi report with special properties that uses a special type of definition. In Logi Studio, widget definitions reside in a special Widgets folder in the Application panel. Widgets represent a new approach to integrating Logi reports with other web pages and is an excellent alternative to using i-Frames or .NET program integration.
![]() Our JavaScript-based Embedded Reports API, available since v10.2.110, is now the recommended technology for embedding Logi reports into other web pages and applications. Logi Widgets continue to be support for backward compatibility.
Our JavaScript-based Embedded Reports API, available since v10.2.110, is now the recommended technology for embedding Logi reports into other web pages and applications. Logi Widgets continue to be support for backward compatibility.
When a widget is constructed and then previewed in Studio, the report is displayed in the Workspace panel as usual but it's followed by the HTML and JavaScript code needed to embed it in another web page.
<FORM> <!-- The FORM element is required if there are INPUT elements in the Widget --> <!-- Include this once for each page. --> <SCRIPT src="http://localhost/testapp/rdTemplate/rdWidget/rdWidget.js"> </SCRIPT> <!-- Include this for each widget on the page. --> <DIV ID="myWidgetDiv" >Loading...</DIV> <SCRIPT> var myWidget= new rdLogiWidget; myWidget.definition="MyWidget"; myWidget.containerID="myWidgetDiv"; myWidget.setParameter("lgxPreview","70555"); myWidget.load(); </SCRIPT> </FORM> |
This script, shown in the example above, can be copied and pasted from Logi Studio into any HTML web page in order to display the widget there. The script consists of these four parts:
- The form container. If the widget(s) include any Input elements, then the script must be within <FORM></FORM> tags.
- The script declaration statement, within <SCRIPT></SCRIPT> tags. Only one of these statements is needed per HTML page, even if there are multiple widgets on a page.
- A division container for the actual script, one per widget occurrence, within <DIV></DIV> tags. If there are multiple widgets on a page, each division container must be given a unique ID.
- The actual script statement, one per widget occurrence, within <SCRIPT></SCRIPT> tags. If there are multiple widgets on a page, the myWidget.containerID value must be set to the appropriate division ID value.
The URL specified in the script declaration statement must be valid and available, from a connectivity and security perspective, to any consumers of the widget. In this respect, a Logi application that contains widgets is deployed to a production web server in exactly the same way as any Logi application and this URL must point to the production server. The file specified, "rdWidget.js", contains JavaScript code for facilitating the widgets and is static, i.e. it is not generated
or customized
for any specific widget.
Pass Parameters to the Widget
The myWidget.setParameter function is used to specify parameter name-value pairs, if any, to be passed to the widget, and you can add multiple function calls as desired. In the example above, the widget will be called with a Request variable named "lgxPreview" that has a value of "70555", appearing in the query string as "&lgxPreview=70555". This was included in the example because the widget was previewed in Studio but is not necessary in your production code. Parameters passed in this manner are available in the widget definition as @Request tokens and can be used to pass in security parameters, variables, etc.
The values passed in a parameter can be hard-coded:
myWidget.setParameter("UserName","JHarlan");
or set using a Token:
myWidget.setParameter("ReportDate","@Function.Date~");
or returned from a separate Javascript, PHP, or other script function in the HTML page:
myWidget.setParameter("UserName",<?php GetUser();?>");
As we have seen, the HTML and Javascript required to integrate a widget into an HTML page is simple and straightforward. In the next section, we'll explore how a widget definition is created.
Create a Widget Definition
As mentioned earlier, a widget definition is simply a different category of Logi report definition. In Logi Studio, these definitions appear in the Application panel in the Widgets folder.
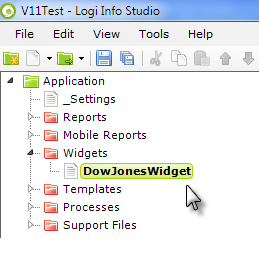
To create a new widget, right-click the Widgets folder and add a new definition. The new file, with an .lgx extension, will be created in the file system in this folder (the folder is not created until you add your first widget to the application):
<LogiApplicationFolder>\_Definitions\_Widgets
The widget definition can now be opened and edited in the Workspace panel, just like any report definition.
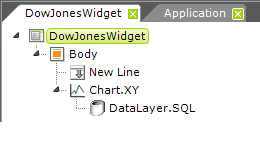
In the example above, a line chart that gets its data from an XML data file has been added to the widget.
While there are some elements that are excluded from use in a widget, generally most elements can be used. Widgets can be fully dynamic and support drill-downs, drill-through's, and links to other pages or applications. Sorting and paging of tables is also supported. Some of the limitations in widgets themselves can be overcome by providing a link in the widget to a Logi application page that provides the desired functionality.
Embed the Widget Code in an HTML Page
Once your have your widget definition created within Studio, the next step is to Preview it:
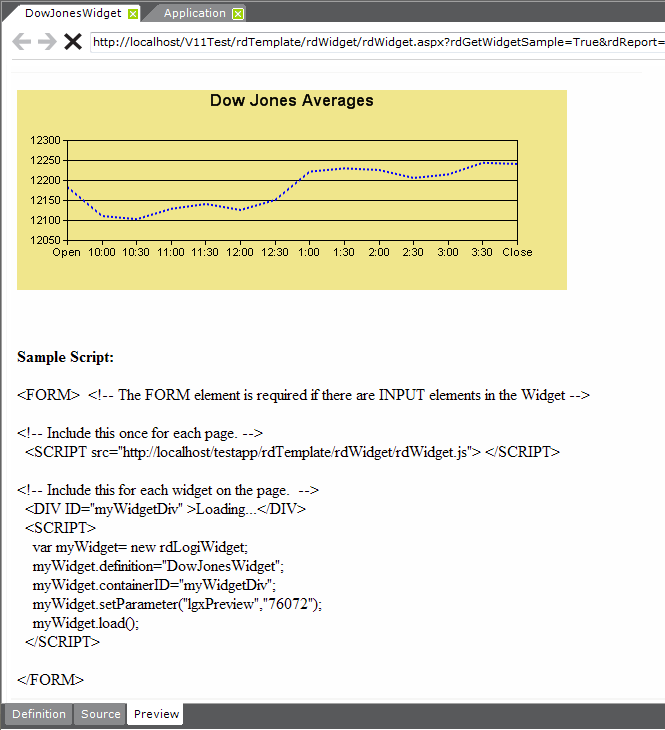
As shown above, the widget will be displayed in the Preview tab and, below it, the HTML and Javascript necessary to implement it will be displayed.
You can work with the widget as you would with a regular Logi report, refining and previewing it until satisfied. Debugging links can be turned on and will function as usual. When the widget is ready, preview it and then, right in the Preview tab, select and copy the sample script and paste it into the target external HTML page.
<body bgcolor="white" text="black" link="blue" vlink="purple" alink="red"> <!-- Include this once for each page. --> <!-- Include this for each widget on the page. --> <br><font face="Verdana"><span style="font-size:10pt;">know that this volatility is a |
As shown above, the code has been pasted into an HTML page. The example widget does not include any Input elements, so no <FORM> tags are required.
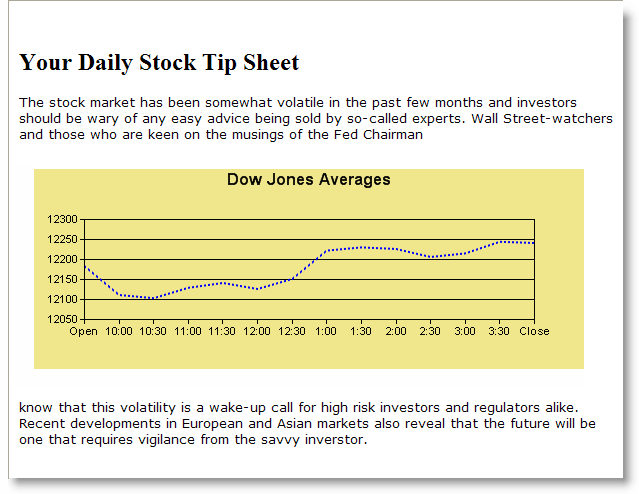
When displayed, as shown above, the widget is embedded in the HTML page and shows the data.
Multiple Widgets on a Page
To add multiple widgets to the page and make them all visible at the same time, you will need separate <DIV> statements in your HTML for each widget. Their scripts should then be combined within the <SCRIPT> tags.
<!-- Include this once for each page. --> <!-- Include this for each widget on the page. --> <SCRIPT> var myWidget2= new rdLogiWidget; ...(HTML removed for brevity in this exsample) |
The example above shows the code to include two widgets, one below the other, at the same time on the HTML page (the resulting page is not shown here).
Switching Between Widgets
It's also possible to add multiple widgets to a page and display them one-at-a-time, using links or buttons on the widgets themselves. To do this, use Action.Widget and Target.Widget elements in your widget definition, to call the next widget to be shown. You only need to add the script for the first widget to your HTML page; the Action.Widget element will cause other widgets to be displayed in the same <DIV> as the first one.
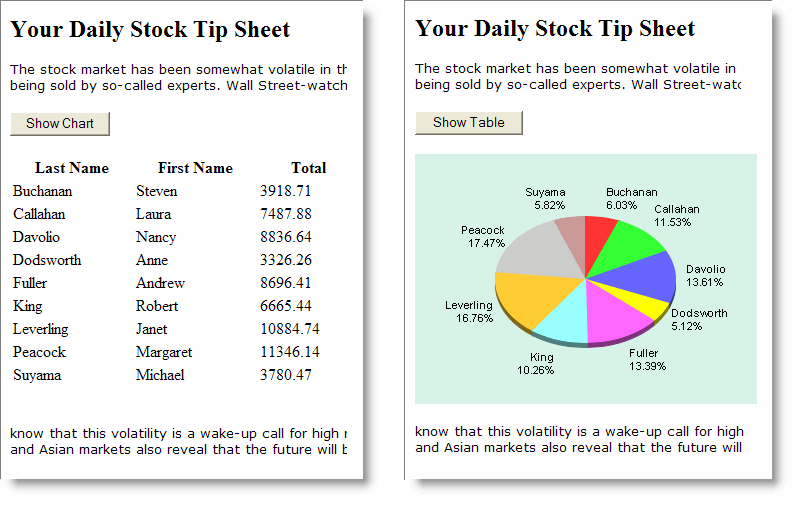
Only one of the two widgets shown above appears at a time. They alternate being visible when the button is clicked.
var myWidget2= new rdLogiWidget;
|
If multiple widgets on the page are from different servers, be sure to include the server URLs, shown above in red, by setting the serverURL property.
Current Widget Limitations
There are certain limitations for widgets and not all Logi report elements are available for use with them. As our Logi Widget technology continues to evolve, the following limitations may be reduced. These elements cannot be used with widgets:
- Action.AppDev
- Action.Exit
- Action.Export (all varieties)
- Action.GoogleSpreadsheet
- Action.Process
- Action.RefreshElement
- Action.Template
- Analysis Chart
- Analysis Grid
- Dashboard
- Interactive Data View
- Google Map
- Input Date
- Input File Upload
- OLAP Grid
- Procedure (all varieties)
- Security Filter
- Shapes (all varieties)
- Sub-Report
- Tabs
- UserRoles (all varieties)
The unsupported "super elements", including Analysis Chart, Analysis Grid, Dashboard, IDV, and Google Map, can be used by placing them in separate Logi application pages and accessing them via a drill-through link on the widget.
Also, note that widgets cannot use shared elements that are defined in other definition types. For example, shared elements created in a report definition are not available for use in a widget definition.
Widgets and Load-Balancing
Because they're actually embeddable JavaScript code, Widget definitions behave slightly differently than standard report definitions: their images are temporarily stored on the web server in a browser-accessible directory, which is the rdDownload folder.
This can be tricky when used with load-balancing, since the location (rdDownload) is specific to the individual server. It can be problematic for round-robin load-balance scenarios and may depend on the type of load balancer you're using and what type of persistence there is, if any, across unique requests. The only certain way to ensure problem-free operation is to enable "sticky sessions", or session affinity, for the load balancer. In this case, there would never be a file/request conflict or missing file error.
If you don't use complete session affinity, it may be possible to configure the load balancer "sticky time", also called "persistence", so that, for any request/session duration, you attach to one server node to ensure the operations that take longer to happen, or that require multiple requests, don't automatically jump to the next node. That means the user is persistent or sticky for a given time duration, and then can be sent to a different server for requests outside of the time duration. This setup would allow for multiple sequential requests to be made to the same server.
More information about load-balancing in general can be found in Load Balancing Configuration.
Sample Definitions
- Launch Logi Studio, create a new Widget definition file, and give it a new name.
- Open the new file in the Workspace and click its Source tab at bottom of the panel.
- Copy the text from this page to your clipboard and paste it into the Source tab in Studio, within the <Widget> </Widget> tags.
- Preview the widget.
|
Now copy the widget script from the Preview panel into an HTML page created outside of Studio and experiment.
keywords: integrate, integration