Assigning Themes and Style Sheet Classes
The presentation qualities of elements are set in two ways. In some cases presentation values, such as Color, may appear as element attributes that can be assigned directly. However, in most cases, this is achieved by assigning a theme to the application or definition, or by manually assigning style classes to an element's Class attribute.
Using Themes
Themes allow developers to instantly apply a consistent "look" to their applications. A theme is a collection of files (images, style sheet, template modifier file, etc.) that impart a specific appearance to a Logi application or definition. Several standard themes are provided for your use, and new ones are available in DevNet's Samples pages.
Themes do the work for you, assigning style classes and setting other appearance attributes, making
it easier to produce great looking reports without an in-depth knowledge of
style classes and style sheets. You can easily switch between themes in order to
experiment with them.
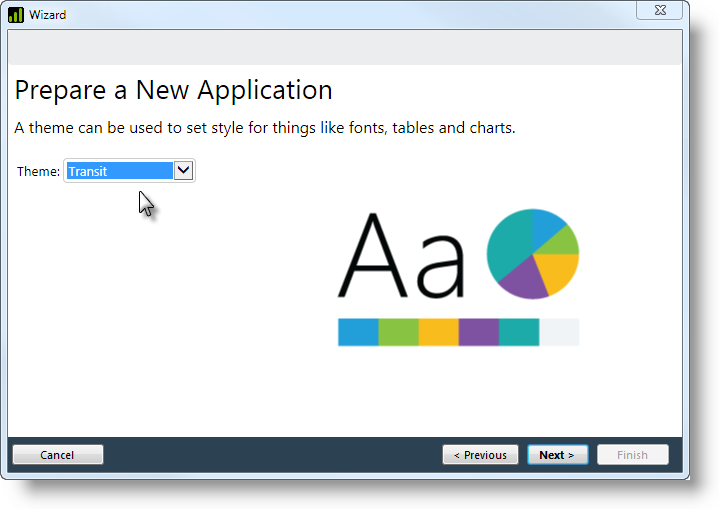
When you use the New Application wizard in Studio, one of the steps is the selection of a theme for the new application, as shown above.
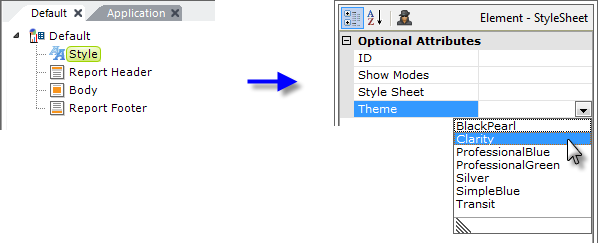
One way to apply a theme is to add a Style element to your report definition, then set its Theme attribute to the name of one of the available themes, as shown in the example above. The report will then have the theme applied to it. You can do the same for an entire application by using a Global Style element in the _Settings definition.
More information about themes is available in Themes.
You can modify standard themes to create your own custom themes using the Theme Editor wizard in Logi Studio. For more information, see Use the Theme Editor.
Using Style Classes
The first step in using style is to assign a style sheet. This .css file is typically placed (or created) in your application's _SupportFiles folder and assigned using the same Style or Global Style elements discussed in the previous example to assign a theme. Once the style sheet has been assigned to the definition, its style classes are available for use by elements.
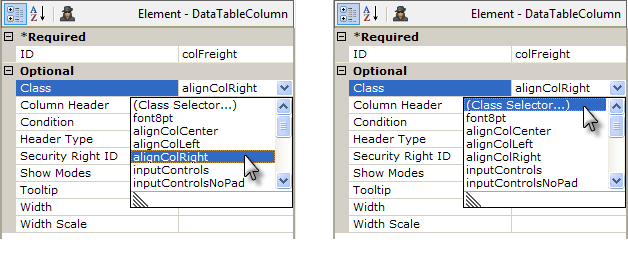
As shown in the example above left, classes from the currently assigned style sheet are available for selection from a drop-down list in the Class attribute value of an element. The classes in the list are drawn from the style sheet assigned to the report definition or the application. This is a quick way to select classes, although class names can also be typed-in directly. Multiple classes can also be assigned, separated by spaces or commas. A preview of the effect of the assignment is shown in Studio's Information panel.
The list of class choices includes a (Class Selector...) item, shown above right, which opens the Class Selector tool.
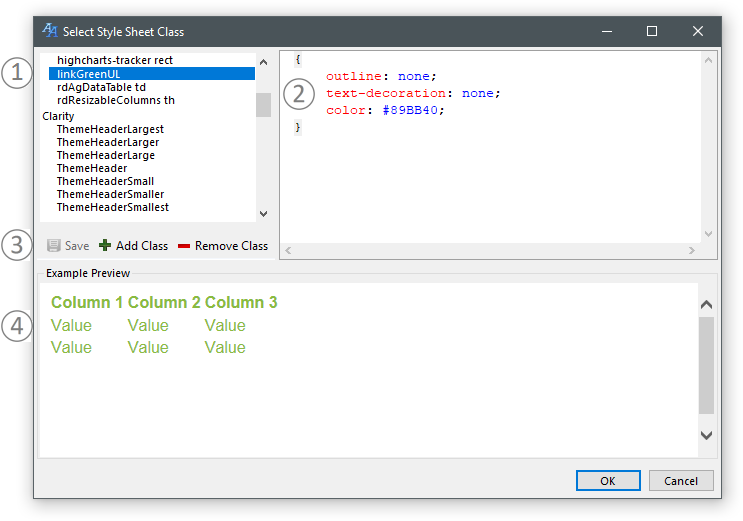
The Class Selector tool, shown above, allows a class to be assigned by selecting it in the class list (1) and clicking OK. The attributes of the class are shown in the upper right panel (2) and they can be edited there. Controls (3) allow you to save, add, and delete classes and the effect of the selected class is shown in the lower preview panel (4). This tool provides pretty comprehensive class management right within Studio.
A more convenient editing option is to open the style sheet, by double-clicking it in Studio's Application panel. It will open in a special editor in the Workspace panel and the intelligent editor will provide style selector choices and completion suggestions as you type.
Finally, you can use an external style sheet editor, if you've installed one:
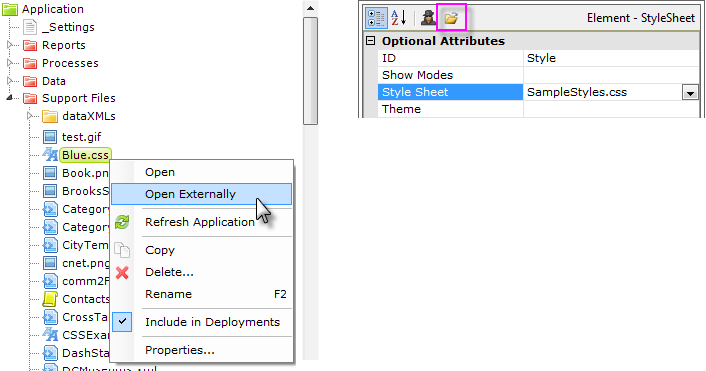
You can open and edit style sheets in an external style sheet editor by selecting and right-clicking the file in the Application panel, as shown above left, then selecting Open Externally from the pop-up menu. Another method is to select the Style element in the element tree, select its Style Sheet attribute, and click the Open File... icon that appears at the top of the Attributes panel, as shown above right. These actions will launch any style sheet editor application associated in the file system with the .css file extension and open the style sheet in it.
More information about working with style classes is available in Style Sheets.