Managing User Accounts
To manage user accounts, you must be a member of the administrator role in order to access the Administration menu in the Logi JReport Server console.
Before managing users, you need to first select the realm in which the users are, then in the server console, point to Administration on the system toolbar and select Security > User from the drop-down menu to display the User page.
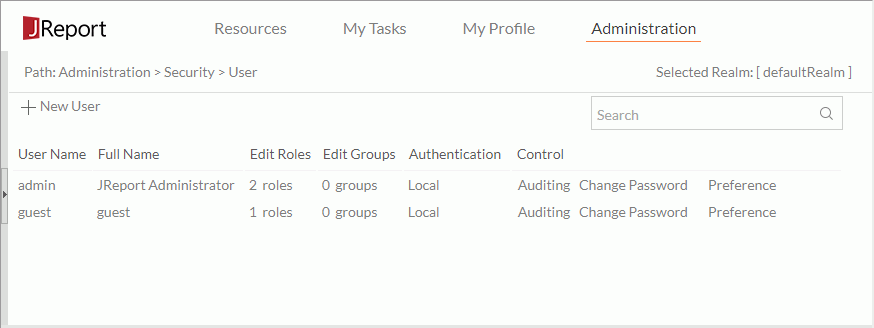
The following lists the user management tasks. To add or delete a user, you can also use URL commands directly.
- Creating a new user account
- Select New User on the task bar. The New User dialog appears.
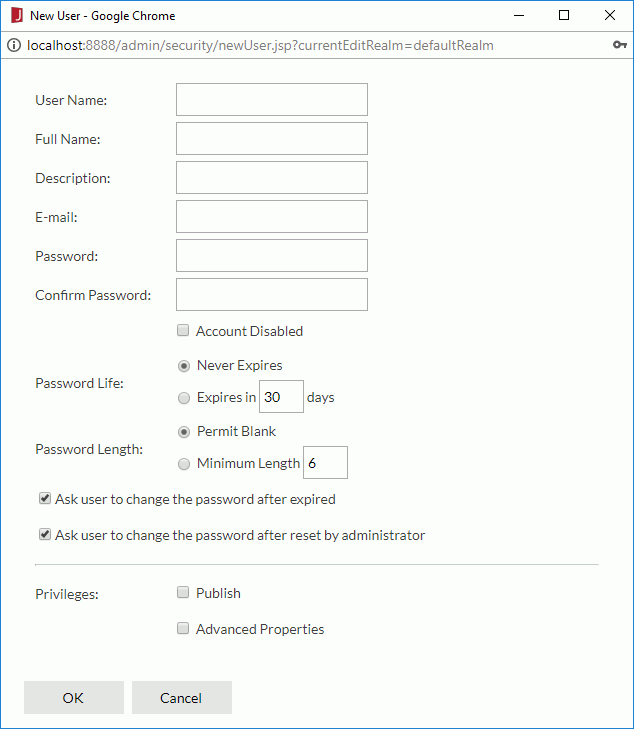
- Provide the name, full name, description, e-mail address, and password for the new user as required.
- To disable the user, select the Account Disabled checkbox.
- The password never expires by default. If you want to make it expire after specified days, select Expires in N days and specify in how many days the password will get expired.
- The password can be blank and its length is unlimited by default. To limit the minimum number of characters allowed in the password, check Minimum Length and input a number for the allowed length (the number should be between 0 and 20).
- By default, Logi JReport will prompt the user to change the password after it gets expired or reset by the administrator. If you do not want such prompt for the user, uncheck Ask user to change the password after expired and Ask user to change the password after reset by administrator.
- To give the user the privilege of publishing resources to Logi JReport Server or of viewing advanced resource properties information, select the corresponding checkbox.
- Select OK to create the user.
The new user is now added in the user table, which contains the following columns:
Column Name Description User Name Lists the users' names. You can view and edit user properties in the Edit User dialog by selecting the underlined user names. Full Name Displays the user's full names. Full name is a property of a user. Edit Roles Edits the roles of the specified user. Select the underlined role(s) to edit the roles. - Name
Lists the name of the roles that the user holds. - Built-in
Shows whether the role is a built-in role. - Remove
Removes the specified roles from the role list. - Add Roles
Lists the roles that can be assigned to the user.- Add
Adds the specified roles to the user.
- Add
Edit Groups Edits the groups of the specific user. Select the underlined group(s) to edit the groups. - Name
Lists the name of the groups that the user belongs to. - Remove
Removes the user from the specified groups. - Add Groups
Lists the groups that the user can be added to.- Add
Adds the user to the specified groups.
- Add
Authentication Specifies users' authentication type: Local or LDAP. Control Controls the users. The following commands are available: Auditing, Change Password, Preference, Delete. - Select New User on the task bar. The New User dialog appears.
- Modifying a user account
- In the user table, select the name of the user. The Edit User dialog appears.
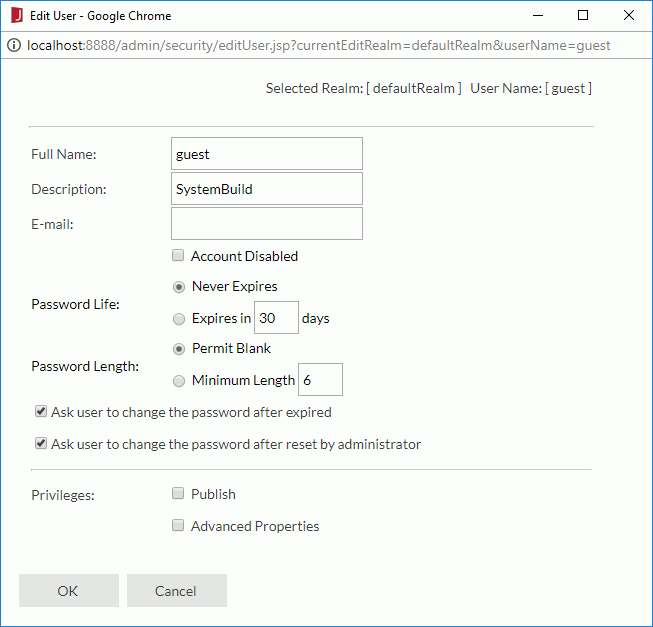
- Edit the user information as required.
- Select OK to accept the changes.
- In the user table, select the name of the user. The Edit User dialog appears.
- Searching for users
In the Search box above the user table, type in the text of the user names you want to search for and the users containing the matched text will be listed. After entering text in the Search box, you can select that appears in the box to specify the following search options: Highlight All, Match Case and Match Whole Word. To cancel the search operation, clear the text or select
  .
. - Adding roles to a user
A user can be assigned more than one role. A user that holds multiple roles has all the privileges that these roles have.- In the user table, select the role(s) link of the user.
- In the displayed page, select the Add Roles link.
- In the role table, check the roles that you want to add to the user, then select the Add button.
- Select Security > User to return to the user table.
- Adding a user to groups
A user can be assigned to more than one group. A user that belongs to multiple groups has all the privileges that these groups have. To add a user to some groups:- In the user table, select the group(s) link of the user.
- In the displayed page, select the Add Groups link.
- In the group table, check the groups that you want to add the user to, then select the Add button.
- Select Security > User to return to the user table.
- Removing roles/groups from a user
If you want to remove certain roles a user holds, or some groups a user belongs to from a user, follow the steps below:- In the user table, select the role(s)/group(s) link of the user.
- In the roles/groups table of the user, check the roles/groups you want to remove, then select the Remove button.
- Auditing a specific user
You can have the server to audit a user, and the resulting information will be written into the log files. To audit a user:- In the user table, select the Auditing link of the user in the Control column. The Auditing dialog appears.
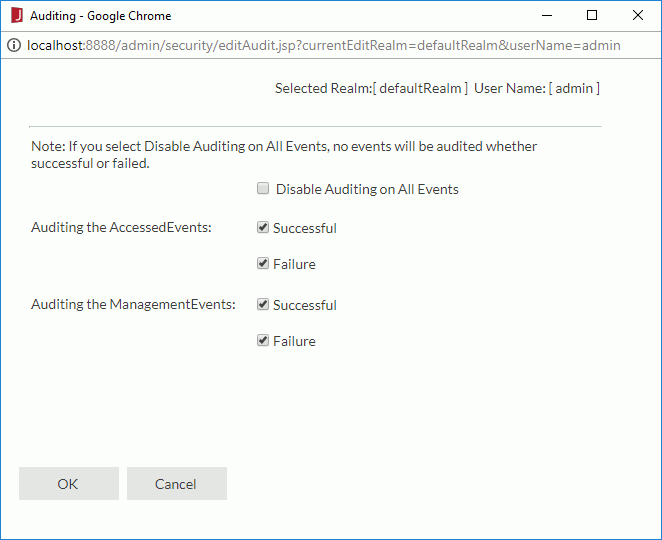
- Specify the events which you want to have audited for this user.
- Select OK to confirm the settings.
- In the user table, select the Auditing link of the user in the Control column. The Auditing dialog appears.
- Changing the password of a user
- In the user table, select the Change Password link of the user. The Change Password dialog appears.
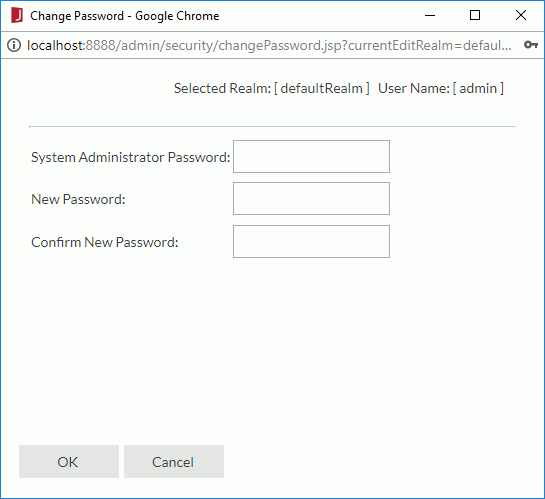
- In the System Administrator Password text box, enter the password of the currently logged in user.
- Specify the new password for the user and confirm it by entering it a second time.
- Select OK to accept the changes.
- In the user table, select the Change Password link of the user. The Change Password dialog appears.
- Setting user preferences
- In the user table, select the Preference link of the user. The Preference dialog appears.
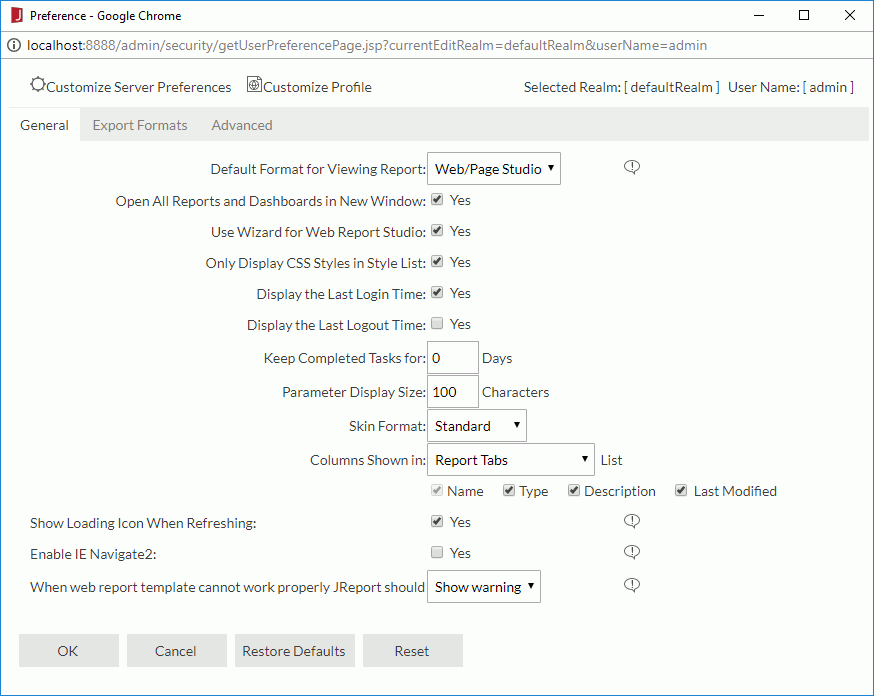
- Specify the server preferences and Page Report Studio preferences for the user accordingly.
- Select OK to accept the changes.
- In the user table, select the Preference link of the user. The Preference dialog appears.
- Deleting a user account
If you find a user account is no longer required, you can delete it by selecting the corresponding Delete link in the Control column of the user table. However, the built-in user accounts such as admin and guest, and users that hold roles other than the everyone role, or that belong to any group, cannot be deleted. A user cannot delete himself from the user table either. - Accessing a user's personal folders
You can access and fully control other users' personal folders including My Reports and My Components, for example, you can edit the properties of the folders, remove the redundant folders when necessary.- Open the file server.properties in the
<install_root>\bindirectory to add the property server.security.expose_my_folders=true manually. - Restart Logi JReport Server and go to the user table. The My Folders link is now available for each other user except yourself in the Control column of the table.
- Select the link for a user and the My Reports and My Components folders of the user are displayed. You can now perform on the folders with full permissions as the user does.
- Open the file server.properties in the
 Previous Topic