Managing Aliases
Logi JReport Server organizes its files and directories into a resource tree. Aliases are used to provide certain "views" of the tree, and allow different users to have different views. For example, you can set an alias resource tree (based on the resource tree) for Mary in Sales, which enables her to only see the Sales resource node, allowing her direct access to the report files she is interested in. An alias is a combination of users and the resource node.
To manage aliases, you must be a member of the administrator role in order to access the Administration menu in the Logi JReport Server console.
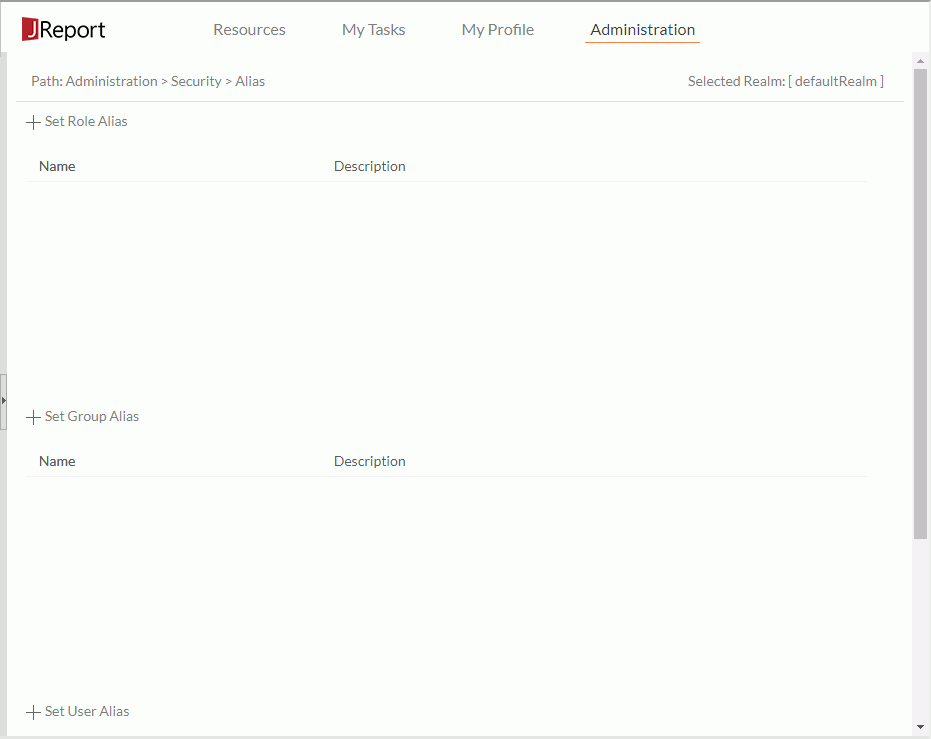
Before managing aliases, you need to first select the realm where the roles, groups, or users for which the aliases will be created are, then in the server console, point to Administration on the system toolbar and select Security > Alias from the drop-down menu to display the Alias page.

The following lists the alias management tasks:
- Setting an alias tree for a role, group, or user
- Select the corresponding set alias link.
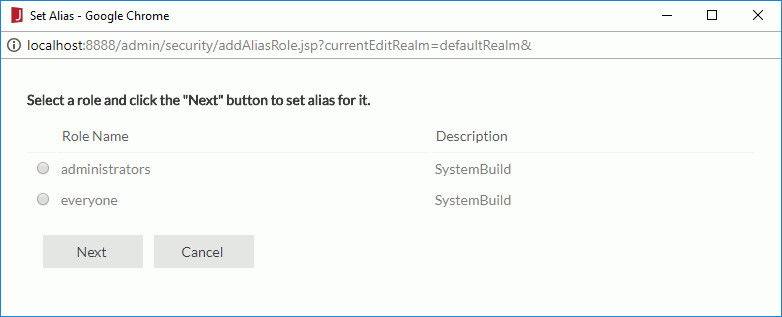
- In the Set Alias dialog for selecting role/group/user, check the required role/group/user for which you want to define the alias tree.

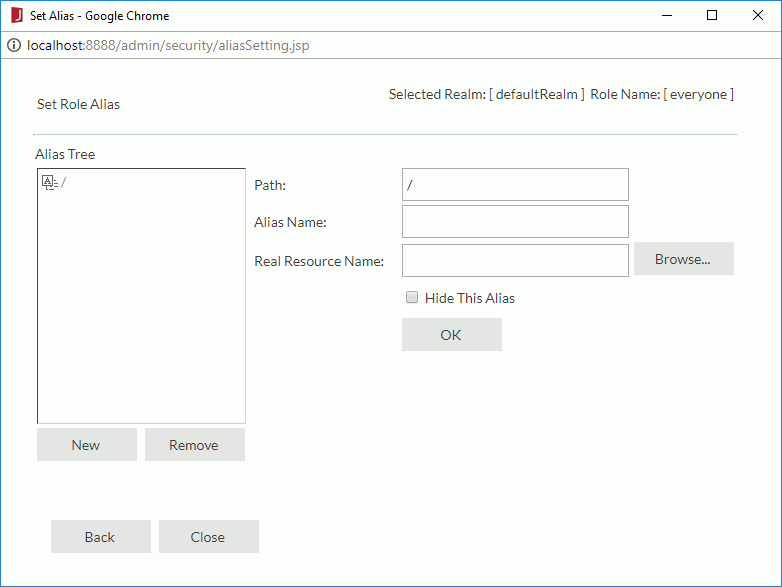
- Select the Next button and the Set Alias dialog for defining the alias tree is displayed.

- Select the New button to create a new alias node in the root node.
- In the Alias Name field, replace the default name newAlias with a name for the alias node.
- Select the Browse button to specify a destination resource from the server resource tree that is to be associated with the new alias node. If you do not want the alias node to be shown in the alias resource tree, check the Hide This Alias option.
- Select the OK button and the new alias node is then added to the alias tree.
- In the Alias Box, select the node under which you want to create a new alias node and repeat steps 3 to 6 to create a new alias node.
- Create more alias nodes for the role/group/user.
To remove any unwanted alias node, select it from the alias tree and then select Remove.
- When you finish the alias tree, select the Close button to exit the dialog.
You can now see that the just set role/group/user is listed in the corresponding alias table, which contains the following columns.
Option Description Name Lists the name of roles/groups/users that have been set an alias resource tree. Description Shows information about a role/group/user that has been assigned an alias.
- Viewing and editing the alias tree of a role, group, or user
- In the alias table, select the underlined name of the role/group/user. The Set Alias dialog is then opened.
- You can view the alias tree of the role/group/user and further edit the alias tree if needed. The steps for editing the alias tree are the same as those when creating it.
- Select Close the exit the dialog.
Notes:
- An alias tree is based on the resource nodes (not virtual resource nodes) of the resource tree.
- By default, the alias tree root for each user refers to the resource tree root.
- When an alias tree is activated for a user, all resource access is then controlled by the alias resource tree.
 Previous Topic