Managing Groups
To manage groups, you must be a member of the administrator role in order to access the Administration menu in the Logi JReport Server console.
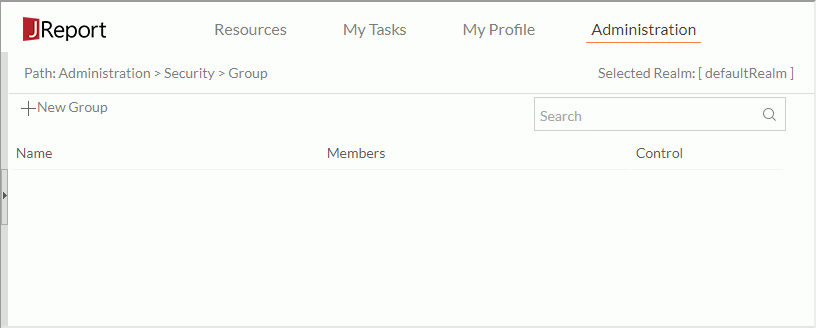
Before managing groups, you need to first select the realm in which the groups are, then in the server console, point to Administration on the system toolbar and select Security > Group from the drop-down menu to display the Group page.

The following lists the group management tasks.
- Creating a new group
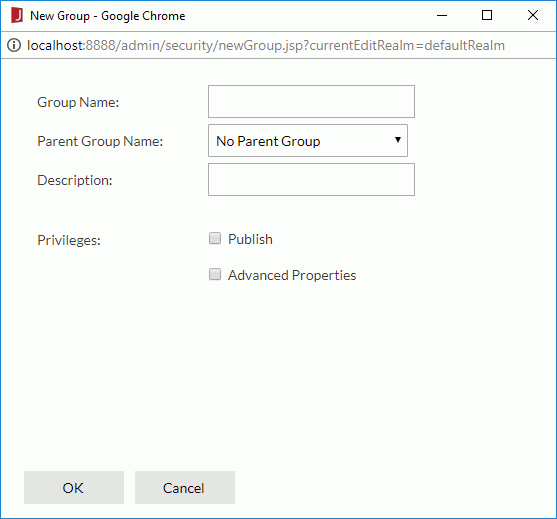
- Select New Group on the task bar. The New Group dialog appears.

- Provide the name and description and specify a parent group for the new group.
- To give the group the privilege of publishing resources to Logi JReport Server or of viewing advanced resource properties information, select the corresponding checkbox.
- Select OK to create the group.
The new group is now added in the group table, which contains the following columns:
Column Name Description Name Lists the group names. You can view and edit group properties in the Edit Group dialog by selecting the underlined group name. Members Edits members of the specified group. Select the underlined member(s) to edit the members. - Name
Lists the name of the members that the group holds. - Type
Specifies the type of the members that the group holds. - Authentication
Specifies the group members' authentication type: Local or LDAP. - Remove
Removes the specified members from the group. - Add Members
Shows the members that can be added to the group.
Control Controls the groups. - Delete
Deletes the specified group. Groups that have child members or parent members cannot be deleted.
- Select New Group on the task bar. The New Group dialog appears.
- Searching for groups
In the Search box above the group table, type in the text of the group names you want to search for and the groups containing the matched text will be listed. After entering text in the Search box, you can select that appears in the box to specify the following search options: Highlight All, Match Case and Match Whole Word. To cancel the search operation, clear the text or select
  .
. - Editing the privileges of a group
In the group table, select the name of the role, then in the displayed dialog, add or remove privileges for the group and select OK. - Editing members of a group
You can edit members of a group, such as adding a new member, or removing a member from the group. To do this, in the group table browse to the specific group, select the member(s) link, then edit the members of the group as follows:- To remove a member from the group, check the member and then select the Remove button.
- To add a member to the group, select the Add Members link, check the new member, and then select the Add button.
Notes:
- A group can have more than one child member and parent member.
- A parent member cannot be added to the current group as its child member.
- Deleting a group
If you find a group is no longer required, you can delete it by selecting the corresponding Delete link in the Control column of the group table. However, groups that are not empty, having child members or parent members, cannot be deleted.
 Previous Topic