General Operations in Web Report
This topic describes how you can perform general operations in Web Report Studio, including undoing and redoing actions, switching between Partial Data and Full Data, quick schedule, configure the report page, exit Web Report Studio, and more.
This topic contains the following sections:
- Opening Another Web Report
- Undoing/Redoing Actions
- Turning Component Pages
- Showing/Hiding Editing Marks
- Switching the Report Data Mode
- Setting up the Report Page
- Automatically Scaling Report Components According to Browser Window
- Scheduling Report Tasks
- Sharing a Web Report
- Viewing In-memory Cube Status
- Asking for Help
- Exiting Web Report Studio
Opening Another Web Report
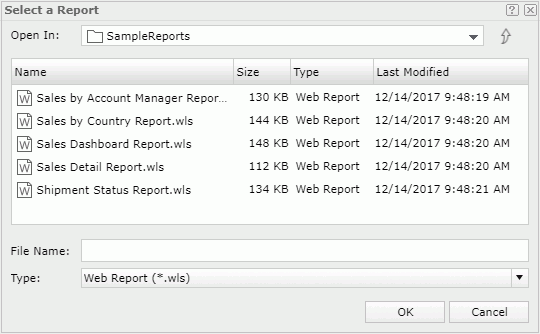
Select Menu > File > Open or the Open button  on the toolbar. Server displays the Select a Report dialog box and lists the web reports in the same folder as the current open report. Select the web report you want to open from the default folder or from another folder, and then select OK.
Undoing/Redoing Actions
You can undo or redo some actions. To do this, select Menu > Edit > Undo or Redo (or the Undo button  or Redo button
  on the toolbar).
Turning Component Pages
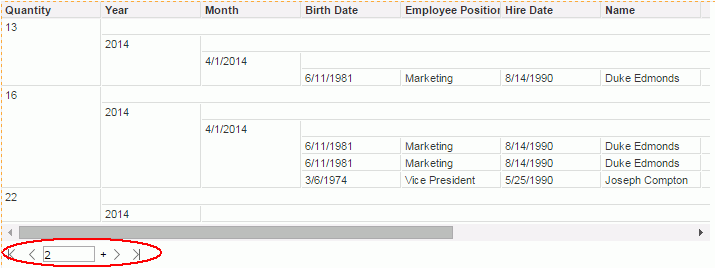
When a table or a crosstab contains more than one page, Server displays a navigation bar specific for the component right below the component. You can use the navigation bar to view the desired pages: select the corresponding button to go to the first page, the previous page, the next page, or the last page, or type a number in the text box to go to that page.
Showing/Hiding Editing Marks
You can use editing marks (dashed outlines of objects) for purposes such as aligning, moving, and resizing. Server displays the editing marks by default. To switch the status of the editing marks, select Menu > View > Editing Marks.
Switching the Report Data Mode
If you are making a lot of changes to the report, it may be faster to limit the number of records to one page while you make the changes and then change it back to full data mode to view the final result.
By default, Server enables the Partial Report Result feature in the server profile. You can switch the report data mode to view full data or only a specified number of data in a report. To show a certain number of data, select Partial Data from the data mode drop-down list on the toolbar, type a positive integer in the text box that follows, and then press Enter or select outside the text box. By default, the number is 5000, which means Server retrieves the first 5000 records. To show all data records, select Full Data.
Setting up the Report Page
- Select Menu > File > Page Setup. Server displays the Page Setup dialog box.
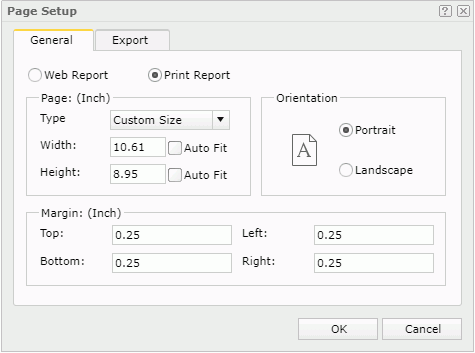
- In the General tab, select the page type: Web Report or Print Report, which determines the unit of the page size, pixel or inch.
- Specify the size, orientation, and margins of the report page. You can select the Auto Fit option to calculate the page width/height according to the width/height of the content within the page dynamically, which is useful when the content width/height is unpredictable and when the report is not huge.
- In the Export tab, specify the page properties for the exported result of the report, which will be applied when you advanced run and schedule to run the report on Logi Report Server as well as export the report in Web Report Studio.
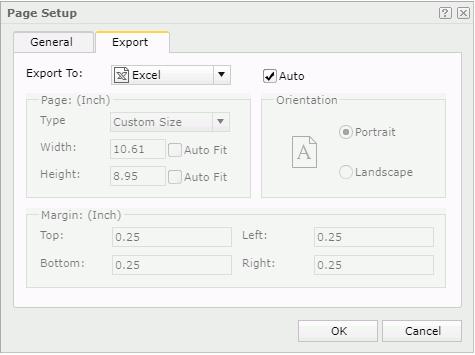
By default, the page properties defined for the report in the General tab of the dialog box applies to the exported result of all export formats. You can define the page properties for each exported result by selecting a format from the Export To drop-down list, clearing the Auto option, and then defining the properties as you want.
- Select OK to accept the changes and close the dialog box.
Automatically Scaling Report Components According to Browser Window
When Web Report Studio is in the View Mode, it can be responsive to any size of browsers on any mobile devices or computers. Report components excluding the report header and footer can automatically scale and fold according to the current browser window size. Information presented is always legible and the layout perfectly adapts to best utilize the available display screen. This is called Responsive View. It always works on mobile devices. When Web Report Studio runs on computers,  Server enables Responsive View by default by selecting the profile option View Web Reports in Responsive Mode, and you can then open or close it in the View Mode of Web Report Studio as follows:
- Select the Customize Buttons button
 on the toolbar and then select Open Responsive Mode or Close Responsive Mode from the menu list.
Server displays the Open Responsive Mode button
 or Close Responsive Mode button
  on the toolbar.
 - Select the button on the toolbar to open or close Responsive View.
Scheduling Report Tasks
By default, Server enables the Quick Schedule from Web/Page Studio option in the server profile. Therefore, in Web Report Studio, you can schedule tasks to publish web reports to e-mails, FTP sites, or the Logi Report Server versioning system. However, the Quick Schedule feature inside Web Report Studio does not provide the full functionalities. If you want to use the full schedule system of Logi Report Server, go to the Server Console to submit the schedule tasks.
- Make sure you are in the View Mode of Web Report Studio.
- Select the Quick Schedule button
 on the toolbar. Server displays the Quick Schedule dialog box.
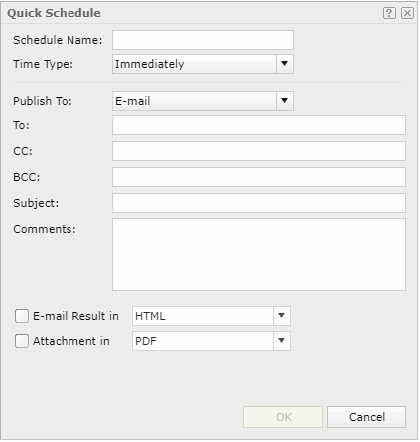
If the current open report has not been saved, Server prompts you to save the report.
- Type the name for the task in the Schedule Name text box.
- From the Time Type drop-down list select the time for when to perform the task.
- To perform the task as soon as you submit it, select Immediately.
- If you want to run the task repeatedly, select Periodically, then specify to run it daily, weekly, or monthly at a specific time of a day.
- From the Publish To drop-down list, select where to publish the report result and then specify the settings of the publish type.
- To publish the report result to email, select E-mail. Then specify the email information such as addresses, subject, and comments, respectively. If you want to send the report result in the mail body, select E-mail Result in and then select a format for the result: HTML or Text. If you selected HTML, the report result overwrites the comments you input for the email. If you selected Text, the comments will be positioned in front of the report result. Select Attachment in to send the report result as an attachment and then specify the format of the attachment file.
- To publish the report result to the Logi Report Server versioning system, select Version System. Then choose a format in which to send the report result.
- To publish the report result to an FTP site, select FTP. Then specify the information for the FTP site and select a format in which to send the report result.
- Select OK to submit the task.
You can then go to the My Tasks page in the Server Console to view the scheduled report result.
Sharing a Web Report
If the current web report is not a shared report and you are the owner of the report, you can use the Share Report feature to share it to others. To share a web report, make sure you have already saved it, then select Menu > File > Share or select the Share button  on the toolbar. Server displays the Share Report dialog box. Set the options for sharing the report. For more information, see Sharing Web Reports.
![]() After you remove all the components that reference a business view from a shared report and then save the shared report, the business view will no longer be available to the shared report.
After you remove all the components that reference a business view from a shared report and then save the shared report, the business view will no longer be available to the shared report.
Viewing In-memory Cube Status
If you selected the Show Status When Using Cube Data option in the server profile, you will find the Cube Status button  on the toolbar, by selecting which you can view the information about whether the data components in the current report apply in-memory cubes and the reasons if not in the Cube Status dialog box.
Asking for Help
At any time, you can select Menu > Help > User's Guide to open the Web Report Studio user documentation. Furthermore, you can select the Help button in any dialog box to show the help document about the dialog box. You can also use the Help menu to access Logi Report website for more information.
Exiting Web Report Studio
To close the current web report and release the resources, select Menu > File > Exit (or the button X on the far right of the toolbar). Do not use the close button of the browser window as that may not release the resources that the report used.
 Previous Topic