Example of Delivering a Message
This example demonstrates how to deliver a filter user defined message between two library components in order to synchronize the data components in them. It contains the following tasks:
Task 1: Create Two Library Components
- Open the catalog file SampleReports.cat in
<install_root>\Demo\Reports\SampleReports. - Use the business view SaleStat in Data Source 1 to create two library components and save them as Component 1.lc and Component 2.lc.
For Component 1, create a chart which displays in the clustered bar 2-D chart type, shows Assigned Region on X-Axis and Total Actual as Bar Length. For Component 2, create a crosstab using Order ID and Assigned Region respectively as the row and column fields, and Total Actual as the summary field. Apply the style Commercial to both of them.
Task 2: Send out a Filter User Defined Message from the Chart
In this task, we will send a filter user defined message from the chart in Component 1 when the Select event occurs on any legend entry value.
- Open Component 1.lc.
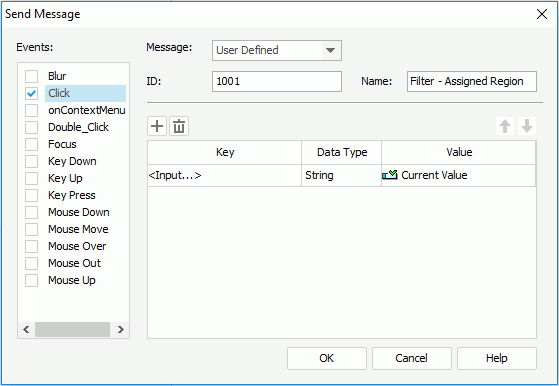
- Right-click the chart legend and select Send Message > Customize on the shortcut menu to bring out the Send Message dialog.
- In the Events box, check Select as the trigger event, then select on the event to activate the message options on the right.
- From the Message drop-down list, select User Defined, then input 1001 and Filter - Assigned Region as the message ID and name.
- Select
 to add a message line.
 - Select the <Input> item from the drop-down list in the Key column and input Assigned Region in the text box.
- Select Current Value from the drop-down list in the Value column. String is displayed automatically in the Data Type column.
The message is defined as follows:
- Select OK to finish defining the message to be sent out.
- Save the library component.
Task 3: Make the Two Data Components Receive the Same Message
In this task we will make the chart and crosstab in the two library components receive the same filter message to filter on the Assigned Region values when they receive the message sent out from a chart legend entry.
- Right-click the chart platform and select Receive Message from the shortcut menu to display the Receive Message dialog.
- Select
 to add a message line.
 - Select the <Input> item from the drop-down list in the Message ID column, then input 1001 in the text box.
- Input Filter - Assigned Region in the text box of the Message Name column.
- Select the blank text box in the Actions column, then select
 that appears.
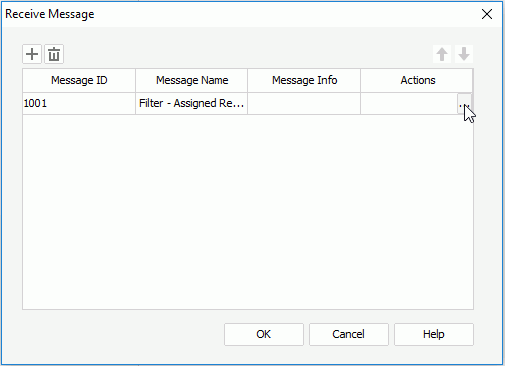
- In the Web Action List dialog, select *Filter and select OK to display the Filter dialog.
- Select Assigned Region from the Filter On drop-down list, keep the default operator, then select <Input> under the Message Key node in the Value drop-down list and input Assigned Region in the text box.
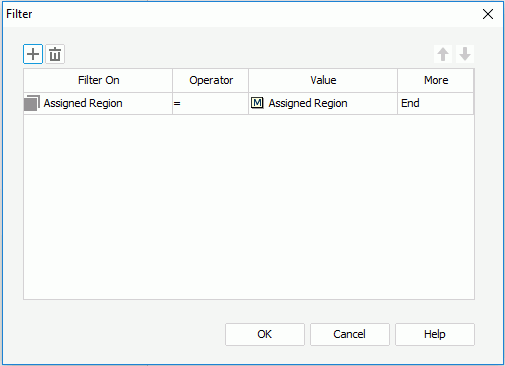
- Select OK to go back to the Receive Message dialog. The message Component 1 receives is defined as follows:
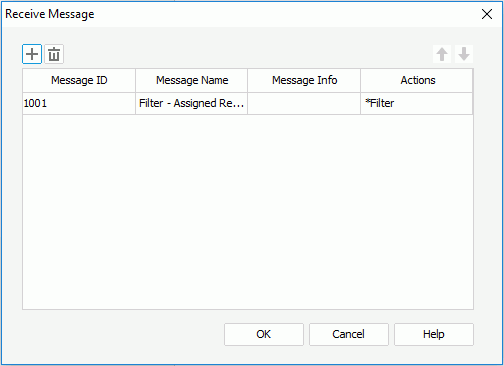
- Select OK, then save the library component.
- Open Component 2.lc.
- Right-click the crosstab and select Receive Message from the shortcut menu.
- In the Receive Message dialog, specify the message the crosstab is going to receive as shown above.
- Upon finishing defining the received message, save the library component.
Task 4: Publish the Library Components
Start Logi JReport Server and publish the library components along with the catalog SampleReports.cat to the component library in Logi JReport Server. For details about publishing resources from Logi JReport Designer to Logi JReport Server, see Publishing Resources Remotely.
Task 5: Deliver the Message in a Dashboard for Data Synchronization
- Open the Logi JReport Console > Resources page, select New > Dashboard on the task bar. A blank dashboard is displayed in JDashboard.
- Open the Resources panel and browse to the folder where the two library components are published.
- Drag and drop the two library components to the dashboard.
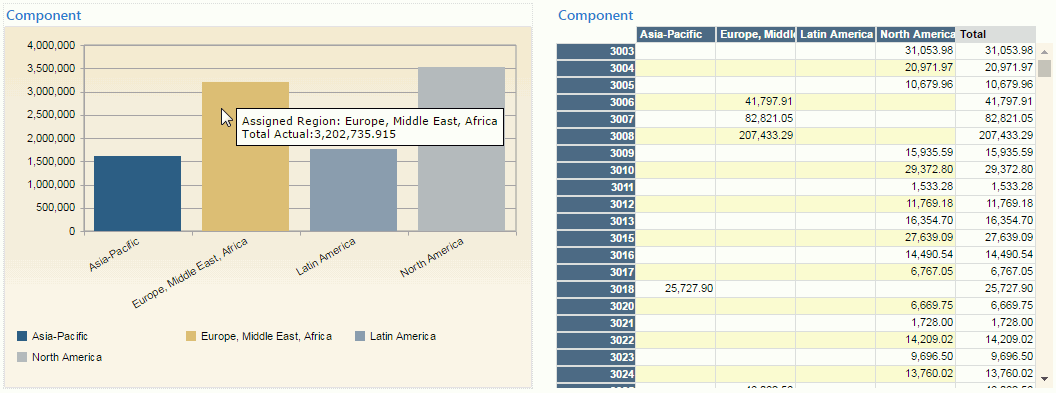
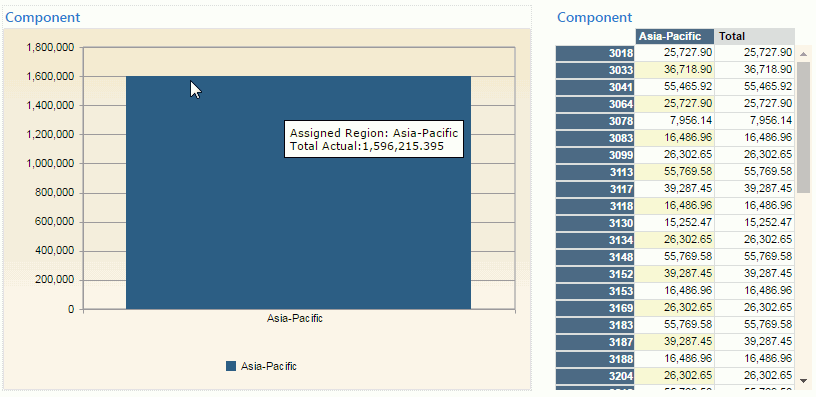
- Select Asia-Pacific in the chart legend to send out the message. The chart and the crosstab are both filtered to show data in the Asia-Pacific region only.
- Select the Clear Filters button
 on the toolbar to clear the filter in both components.
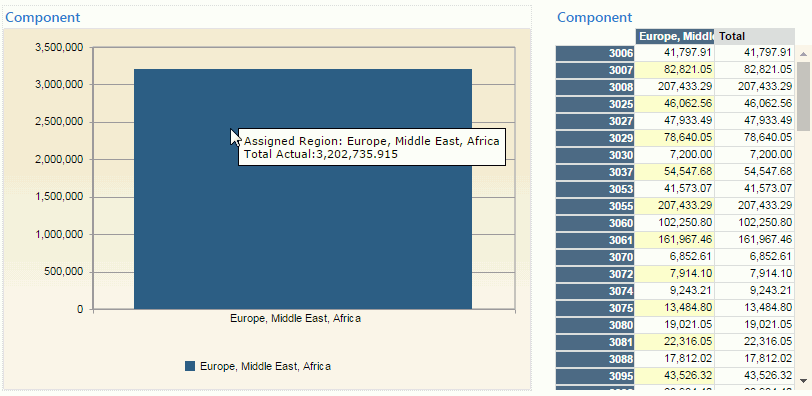
 - Select Europe, Middle East, Africa in the chart legend and the chart and crosstab are filtered based on this region now.
 Previous Topic