The Wait Panel
Logi applications interact with the web server, generally, in a serial or synchronous manner: one operation has to complete before the next one begins. In cases where operations may be time consuming, developers can include the Wait Panel element, which displays a transparent, modal, "please wait" overlay on the current page. This topic discusses use of this element.
- About the Wait Panel Element
- Use the Standard Wait Panel
- Use a Custom Wait Page or Wait Panel
About the Wait Panel Element
The Wait Panel element is associated with the start of an action and displays a modal panel, with animated image, until action processing is complete. Prior to v11, this element was named Wait Page and operated by displaying a blank page, with an animated icon, until processing completed.
The Wait Panel element can be added as a child of a number of elements, including:
|
|
|
You can see, from the list, that it covers a variety of potentially time-consuming operations. What happens is that, when the parent Action occurs, the current web page is overlaid with a transparent, modal page, with an animated "please wait" icon, which remains in place until it's replaced by whatever page follows it.
Note that the Wait Panel is not available for use in SubReports with a SubReport Mode attribute setting of Embedded.
Logi Report and Logi Info are provided with a standard HTML "wait" page which is called by the Wait Panel element. This file and its supporting files are located in your application's rdTemplate folder.
Use the Standard Wait Panel
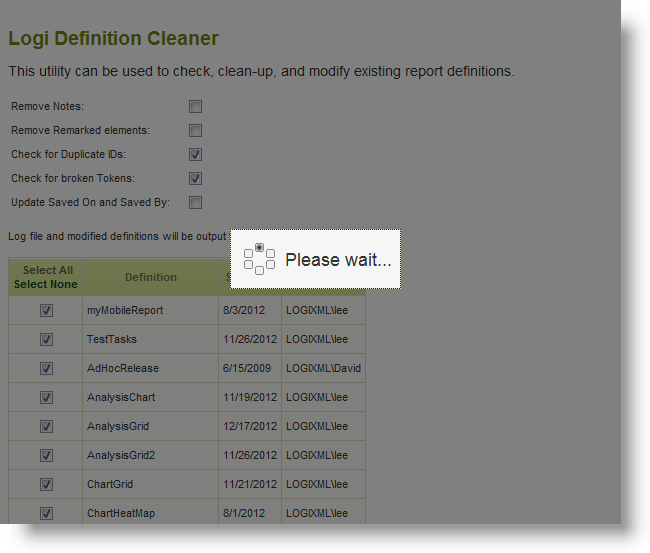
In v11, the Wait Page element was changed to the Wait Panel element. It displays a transparent, modal page over the current page and includes an animated icon, as shown below:
Prior to v11, the standard "wait page" distributed with the products looked like this:
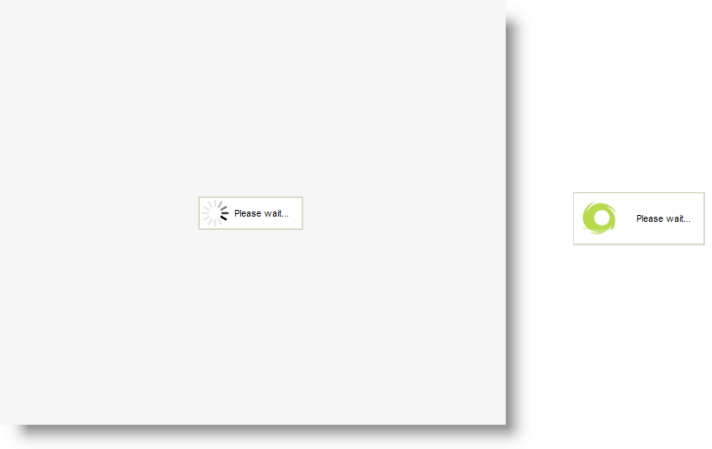
As you can see, it was a plain page, with a generic animated image that rotates. For even earlier versions, the image at the center was the original LogiXML logo "swirl", as shown above, right.

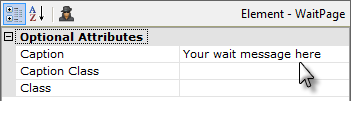
As shown above, to implement it, the Wait Panel element is added beneath one of its parent elements. All of its attributes are optional, and you do not need to configure them to display the page shown earlier.
However, you can enter a customized message in the Caption attribute or apply style classes to the caption or the display in general using the Caption Class and Class attributes. Note that the Caption attribute does not support formatting, formulae, or multiple lines, but will evaluate tokens.
Once displayed, the page remains visible until the browser receives another page from the server to replace it, or the user otherwise navigates to another page.
Use a Custom Wait Page or Wait Panel
In v10.0.366, features were introduced that allow you to use your own customized Wait Page. Variations on this capability have been introduced in later versions, as discussed below:
For Versions Prior to v10.1.18
The files in the rdTemplate folder that support the standard Wait Page include rdWait.htm, six rdWait#.gif files for the animated logo, and the style sheet rdWait.css. While it is possible to directly edit these files to customize them, we do not recommend the practice of editing any file within the rdTemplate folder, as they may change with future product updates. Instead, you can create and use a customized Wait Page.
To create a customized Wait Page, start by making a copy of the standard Wait Panel, rdWait.htm, then modify it. Don't store your customized wait page and its supporting files in the rdTemplate folder.
When making modifications, be sure to include the scripting that returns processing to the calling page! In the standard wait page, this is handled by the Javascript function rdGetReport(). Without this scripting, your wait page will never return once processing is done.
![]() If you're using HTTPS, do not use an animated image on your custom Wait Page. Under certain circumstances, because the image is not cached, this can result in gross memory consumption and Out of Memory errors can result.
If you're using HTTPS, do not use an animated image on your custom Wait Page. Under certain circumstances, because the image is not cached, this can result in gross memory consumption and Out of Memory errors can result.
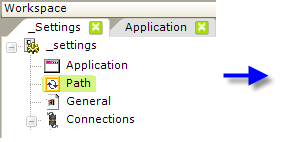
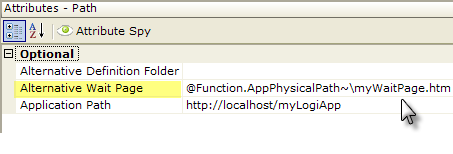
As shown above, in the _Settings definition, the Path element has an Alternative Wait Page attribute. Once you've created your customized Wait Page, set this attribute value to its fully-qualified filename. Tokens can be used here, as shown.
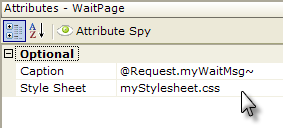
In the standard wait page, you'll see two special words: rdWaitCaption and rdWaitStyle. The Logi engine will replace these two words with the values, if there are any, of the two attributes of the Wait Panel element, shown above, before displaying your customized wait page. These values can be tokens, allowing you to provide dynamic customization at runtime. If left blank, the Caption value will default to "Please wait..." and the Style Sheet value to "rdWait.css".
For v10.1.18 and Later Versions
Given that the image displayed with v10.1.18 and later versions is very generic, you may want to reconsider whether you need to customize the page when upgrading applications or developing new ones.
The files in the rdTemplate folder that support the standard Wait Page include rdWait.htm, rdWaitAll.gif for the animated image, and the style sheet rdWait.css. While it is possible to directly edit these files to customize them, we do not recommend the practice of editing any file within the rdTemplate folder, as they may change with future product updates.
For v10.2.424 and Later Versions
Because the Wait Panel is simply a large modal panel with an animated icon, the opportunity to create a separate customized Wait Panel file was eliminated in v10.2.424, with the removal of the Path element's Alternative Wait Page attribute, in the _Settings definition.
In the Wait Panel, the icon "animation" is achieved using the "sliding window" technique, and it's possible for developers to substitute their own images, and limited styling, based on the rdWait files in the rdTemplate folder. However, these files must remain in the rdTemplate folder and so will be overwritten during an upgrade. If you modify these files for customization purposes, a manual scheme for replacing them after an upgrade will be required.