Insert HTML Into Reports
The Logi Server Engine generates HTML and Javascript when it processes a Logi definition, but developers may find that they need to insert their own HTML code directly into a Logi report. Two elements, Include HTML and Include HTML File, are available to accomplish this and they're discussed in this topic.
- About Inserting HTML
- Use the Include HTML Element
- Use the Include HTML File Element
- Use the Meta Names Element
- Insert <Meta> and Other Tags Using JavaScript
- Use the Label Element with HTML Format
- Use the Label Element's HTML Tag Attribute
- Invalid XHTML Characters
About Inserting HTML
The "source code" of a Logi definition is an XML document, which is processed by the Logi Server Engine, and output as HMTL. However, under certain circumstances, Logi developers may want to insert their own HTML code directly into a Logi report. Three common circumstances include adding <META> information, adding <SCRIPT> content, and embedding external HTML documents in your report page.
For example, the document you're reading right now is actually a separate, external HTML file that has been embedded into the DevNet site page.
Requirements
HTML that's included into a Logi definition must be have properly-formed tag structures, and include all closing tags. For example,
<p><strong>My Title</strong></p>
If a complete HTML page is embedded, it can include <HTML> and <BODY> tags, but they are not required.
Use the Include HTML Element
The Include HTML element, introduced in v9.5.169, allows you to insert HTML at selected points within your report definition.
This element can be placed in your definition as the child of a number of elements, such as Report Header, Body, Division, Data Table Column, Report Footer, and others. See the Element Reference entry for this element for a complete list.
In the past, developers have used a Label element, set to HTML format, for this purpose. However, feedback from developers indicated that this was a somewhat obscure usage, so the Include HTML element is now recommended for this purpose instead.

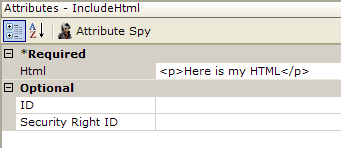
A simple example is shown above and the resulting HTML looks like this:
|
Scripts can be entered here in the same way, using <SCRIPT> tags. If you double-click the HTML attribute name and open the Attribute Zoom window, it's easy to enter multi-line scripts, like the following example:
NagMsgTimer = function() { function ShowNagMsg() { /* cause function NagMsgTimer to run when page is loaded */ |
This script will be included in the HTML and, because it attaches itself to the page load event, will begin to execute automatically when the page is loaded. To get the script inserted in the <HEAD> section, see the next part of this topic and use the Include HTML File element instead.
Use the Include HTML File Element
The Include HTML File element allows an HTML document to be included within your Logi report definition. HTML files that will be included in this manner can be managed as support files and will be available from a drop-down list if they're stored in your application's _SupportFiles folder.
The Include HTML File element can be placed in your definition beneath a number of elements, such as Report Header, Body, Division, Data Table Column, Report Footer, and others. When it's placed beneath any of these lower level elements, the HTML it references will be inserted between the <BODY> tags of the report page.
It can also be a child of the Report (root) element in your definition, which places the HTML between the report page's <HEAD> tags. This can be very useful for including scripts, instructing the browser where to find external style sheets, providing meta information, and more.
See the Element Reference entry for this element for a complete list of parent elements.
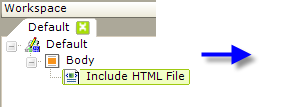
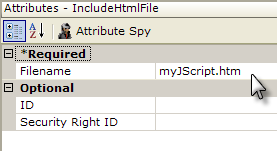
If your HTML file has been added to the application in the _SupportFiles folder, then, in the Include HTML File element's Filename attribute, you need only specify the actual file name or select it from the drop-down list, as shown above. Otherwise, you'll need to specify a fully-qualified file path (on the web server), starting with a drive letter.
You can place script functions in an HTML file (with the proper <SCRIPT> tags) and use Include HTML File to include them in definitions; this can be useful if you want to include the same script functions in a number of Logi definitions but maintain them all in a single file. Or, you may want to use scripting in this manner to include an external Javascript library.
<script type="text/javascript" src="_Scripts/tiny_mce/tiny_mce.js"></script>
For example, the TinyMCE editor used in DevNet's forums is added into DevNet using an Include HTML File element and an HTML file containing the script shown above.
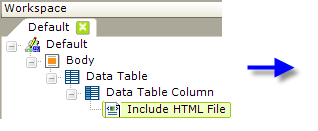
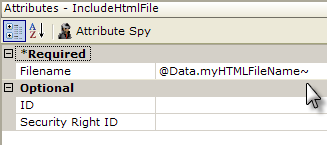
In the example shown above, the Include HTML File element is inside a data table column and its filename attribute is being supplied using an @Data token. This would allow a specific HTML file to be displayed in the table, based on a query.
Here are some key points to remember when working with HTML files with visible content and the Include HTML File element:
Caching Confusion
Files embedded with the Include HTML File element are cached at the web server. If you forget about this, it can cause great frustration when you edit the HTML content in your file and then it doesn't appear to change in the report page! To abandon the cached content, you will need to delete the value in the Filename attribute, save and browse the page again, then re-enter the filename and continue testing. Or, if it doesn't affect anyone else, you can reset the web server.
Width Coordination
When embedding your HTML file in a report definition that you must pay close attention to widths. Possible parent elements, such as Column and Data Table Column, need to be wide enough to accommodate your HTML file; conversely, your HTML file may need to constrain its own width to fit inside the Logi report page. Coordination of widths is essential for a good result.
No Scrolling
A file displayed using the Include HTML File element will be shown in its entirety; its full length will be displayed, "pushing" anything below it down the page. There is no option to show a portion of it within a scrolling window. (To create a scrolling area for HTML content within a report, you need to use the Sub-Report element).
Stylesheet Interaction
The effects of style classes referenced in your embedded HTML document will be combined with those of the Logi report page containing the document. They will interact and this can have unexpected consequences as different classes vie for precedence. There is no hard-and-fast rule to follow concerning the use of style in this situation, but be prepared for the possibility that a little experimentation may be necessary to get things looking right.
Use the Meta Names Element
The HTML <META> tag provides metadata about a Logi report. Metadata is not displayed on the page, but is machine parsable and is typically used to specify page description, keywords, author of the document, last modified, and other metadata. The <META> tag always goes between the <HEAD> elements and can be used by browsers (to tell them how to display content or to reload page), search engines (keywords), or other web services.
Logi products provide the Meta Names element, which allows developers to set some of the more common <META> tag variations directly, without the use of an external HTML file and the Include HTML File element. The Meta Names element is child of the report's root element.
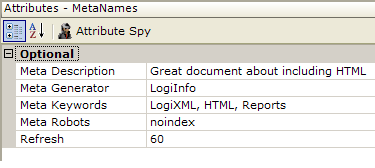
The example above shows a Meta Names element with every one of its attributes configured (they're all optional),
|
and here we have the <META> tag text that each attribute generates in the report page. See the Information Panel in Studio for a description of each individual attribute.
Insert <Meta> and Other Tags Using JavaScript
The Meta Names element provides a method of inserting common <META> tags, but if you want to insert other tags, you can do so using JavaScript. Suppose, for example, that you want to insert a tag that specifies a character set, like this one:
<META charset="UTF-8">
To do this, you can use either an Include Script element, beneath the Report Header element, or an Include Script File element, beneath the definition's Report root element, to include the following JavaScript:
|
This will add the desired <META> tag to the code between the <HEAD></HEAD> tags in the generated HTML page.
Here's another example: suppose that you want to insert a tag that controls Internet Explorer compatibility settings, like this one:
<META http-equiv="X-UA-Compatible" content="IE=EmulateIE7">
But, to be effective, this needs to be the first tag in the <HEAD> section. The following code allows you to create this arrangement:
|
And, for completeness sake, here's code that demonstrates use of a custom "insertAfter" function, should you need to do that. This code inserts the <META> tag from the previous example into the <HEAD> section, after the <TITLE> tag:
// create a custom function, which takes two parameters: var titleTag = document.getElementsByTagName('TITLE')[0]; |
JavaScript can be used, with the Document Object Model, to manipulate the final HTML page in many ways that are otherwise unavailable through elements.
Use The Label Element with HTML Format
The Label element can be used to insert HTML into your report. This is done by setting its Format attribute to HTML and entering the desired HTML code in its Caption attribute.
Because the code is embedded within an existing HTML page when the report is generated, you do not need to include HTML or BODY tags in the Caption.
Any valid HTML can be entered in the Caption and this is often a simple way to add Bold or Italic effects to text without the need for a style class. The HTML must be "well-formed"; that is, you need to ensure that you have entered all matching opening and closing HTML tags required.
For example, have you ever needed to call a Logi report and then automatically scroll to some specific location within it? In HTML, this is done using an Anchor tag (<a>) with a named bookmark in the destination page. Here's how to do it using a Label element:
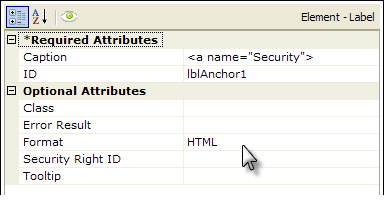
- In the destination report, use a Label element to create an HTML bookmark. The Label element won't be visible, so include it in the appropriate location in your report (the location that the browser will scroll to when the report is displayed). Set its Format attribute to HTML and, in its Caption attribute, enter the HTML code for an anchor, with a name selector, as shown above. Note that the HTML bookmark is identified in the example as "Security", using the name selector.
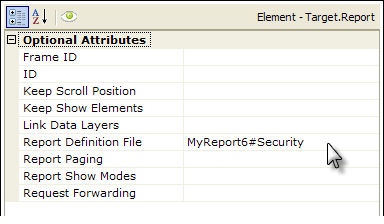
- In the calling report, in the Target.Report element used to identify the destination Logi report, add a hash mark (#) and the bookmark name after the report definition name, as shown above.
Now, when the link, image, etc. that calls the report definition is clicked, the browser will scroll to bring the Label element from Step 1 into view. The URL generated looks like this:
http://myServer/myLogiApp/rdPage.aspx?rdReport=SampleApps4#Security
Note that, for the anchor to work correctly, it has to be the very last thing in the query string. This means, for example, that you cannot use this technique with Link Parameters or the Wait Page element, as they will add items to the query string after the bookmark name.
Use the Label Element's HTML Tag Attribute
![]() The Label element was given a new attribute, HTML Tag, in v11.4.046. This attribute allows you to control which HTML tag set will surround the label text.
The Label element was given a new attribute, HTML Tag, in v11.4.046. This attribute allows you to control which HTML tag set will surround the label text.
The default is a <SPAN> tag set and the resulting HTML output looks like this: <SPAN>Here comes the sun</SPAN>
However, the new attribute allows you to specify a range of other options:
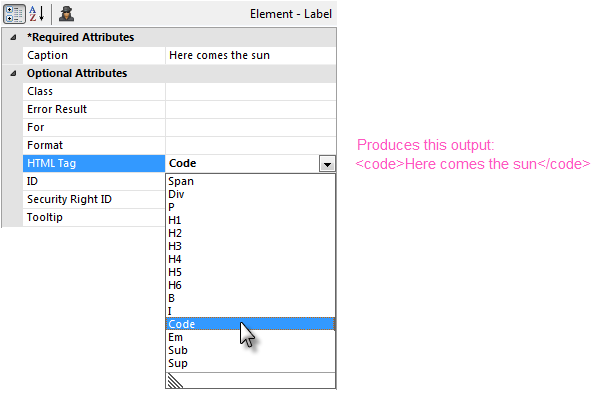
A selection of commonly-used tags is available from a pull-down list, as shown in the example above.
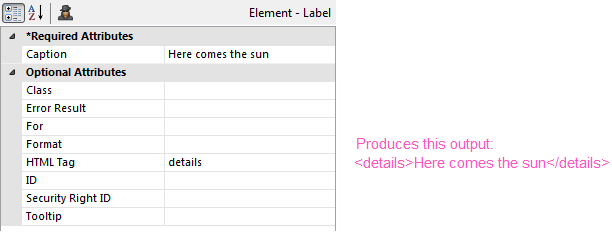
You can also type in other values. HTML5, for example, supports a number of semantic tags including <article>, <figure>, and <details>, and you can type any of these directly into the attribute value (without brackets) to use a tag set not in the pull-down list.
Invalid XHTML Characters
The Logi Server Engine may generate errors if it needs to read a string of characters as XML and that XML includes un-escaped, invalid XHTML characters.
A primary examples of this is when AJAX-style requests are used, such as data table sorting or paging (when Ajax Paging = True has been set), or use of an Action.Refresh Element that includes a data table or other data object. In these cases, the XML data may be indistinguishable from XML tags and reserved characters.
This can also happen when HTML is included in a report definition using the techniques discussed earlier.
The most common culprit in this scenario is the inclusion of unencoded "&" characters. In situations like those described above, the application will fail and produce an error message that looks like a parsing error.
Replacing the "&" character with "&" is often an easy solution.