Example: Developing Reports from a Web Service Data Source
In this example, we use a WSDL file from http://www.webservicex.net/ to demonstrate how to use web service as the data source to create a report.
- Open the catalog file SampleReports.cat in
<install_root>\Demo\Reports\SampleReports. - In the Catalog Manager, select any data source node, select New Data Source on the toolbar.
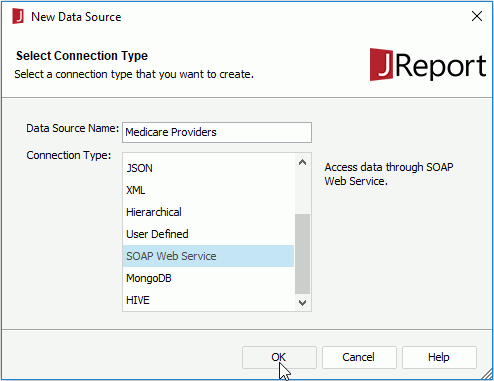
- In the New Data source dialog, specify the name of the data source as Medicare Providers, select the SOAP Web Service connection type and select OK.
- In the SOAP Web Service Data Source dialog, check the URI radio button, and then type the URI string: http://www.webservicex.net/medicareSupplier.asmx?WSDL in the text field to get the WSDL file.
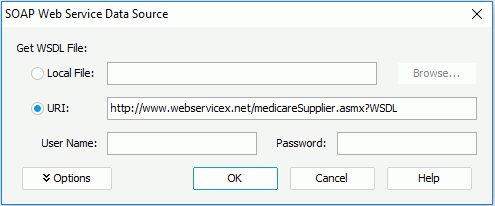
- Keep the default settings for other options in the dialog, and then select OK.
Next we are going to add tables via the connection into the Logi JReport catalog.
- Locate the Tables node in the web service connection, right-click it and select Add Tables from the shortcut menu to display the Add Tables dialog.
- Select GetSupplierByZipCode from the Operation Name drop-down list.
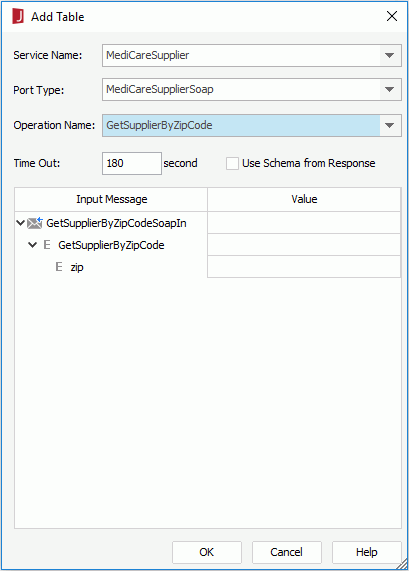
- In the Input Message column, select zip, then in its value column, select
 and select <New Parameter...> from the drop-down list.
 - In the New Parameter dialog, input pZipCode as the parameter name in the Name text field.
- Select Type-in Parameter from the Value Setting drop-down list.
- Set the data type of the parameter value to String from the Value Type drop-down list.
- In the Value List box, select
 to add a value line, select in it and then type in 85226.
 - Repeat the above step to add three more values one by one: 80027, 20878, 20874.
- In the Options box, enter Type a zip code as the prompt text.
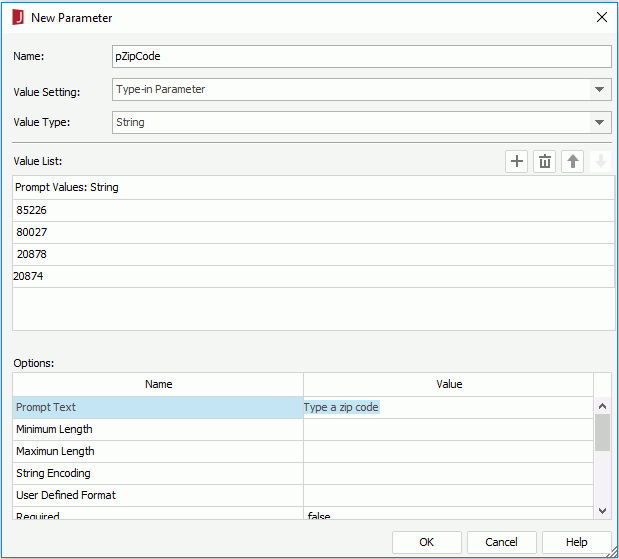
- Select OK to return to the Add Table dialog.
- Select OK to add the table to the web service connection.
Now will use the tables got from the web service data source to create a business view and then create a web report using the business view.
- Locate the Business Views node in the data source on which the web service connection is set, right-click it and select New Business View from the shortcut menu.
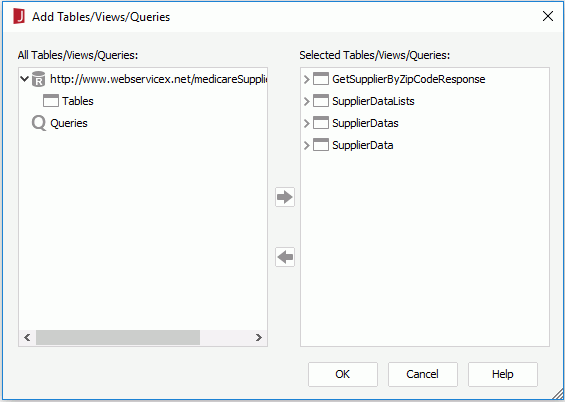
- Specify the name of the business view as MedicareProvider in the Input Business View Name dialog, then select OK. The Add Tables/Views/Queries dialog appears.
- In the All Tables/Views/Queries box, expand the connection > Tables node, select all the tables and select
 to add them to the Selected Tables/Views/Queries box. Select OK.
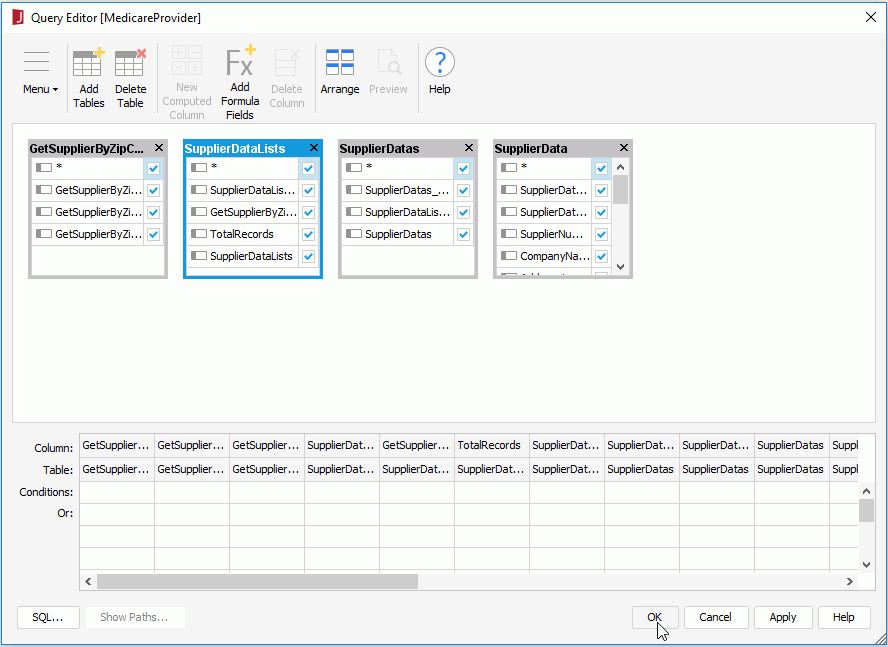
- In the Query Editor, select all the columns in the tables by selecting the * checkboxes and select OK. Then select Yes in the prompt message.
- In the Business View Editor, drag and drop the tables from the Resource Objects panel to the MedicareProvider node in the Business View panel.
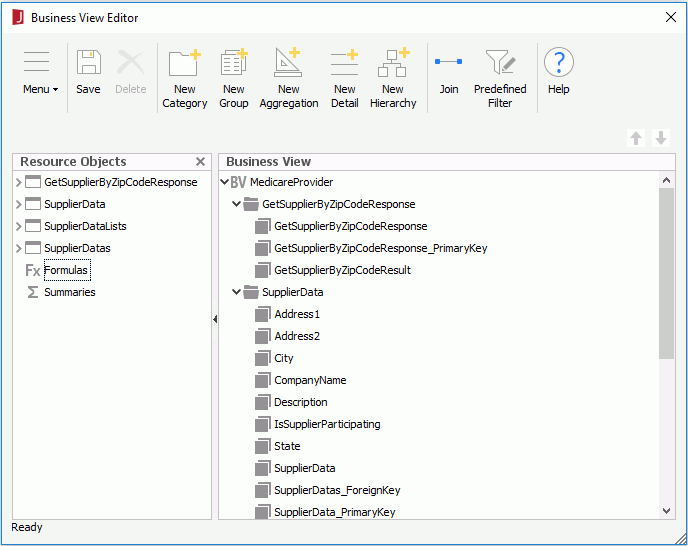
- Select Save on the editor toolbar to save the business view, then close the editor.
- Upon closing the Business View Editor, Logi JReport will prompt you to create a report using the business view. Select New Web Report in the prompted dialog. A blank report is created.
- Insert a table in the web report with the type Table (Group Above) which is based on MedicareProvider in the data source Medicare Providers, shows the fields SupplierNumber, CompanyName, City and Description, and grouped by the field Zip.
- Right-click the TableGroupFooter panel and select Hide from the shortcut menu to hide it from view. Repeat to hide the TableFooter panel in the same way.
- Select Home/File > Save to save the report as MedicareProviderInfobyZip.wls.
- Select the View tab to preview the report. The Enter Parameter Values dialog appears.
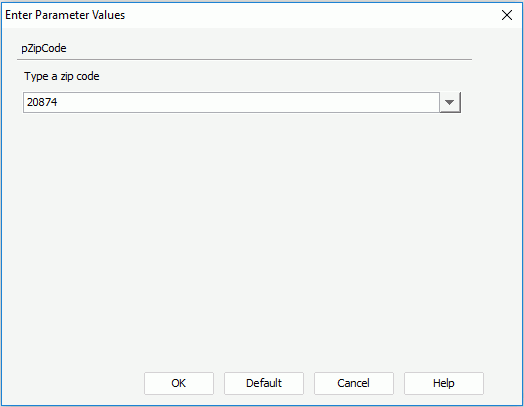
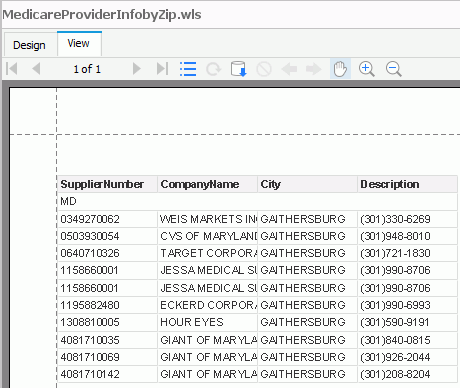
- Type a zip code or select the one you want from the drop-down list, and then select OK. The report will be displayed according to your selected parameter value. For example, specify the zip code as 20878, then the report will be displayed as follows, showing information for zip code 20878 only:
 Previous Topic