DataLayer.Static
The DataLayer.Static element gives developers the ability to "hard-code" data rows directly into the report definition. The data provided in the manner is fixed and cannot be changed programmatically.
Attributes
The DataLayer.Static element has no attributes other than an ID. If this datalayer will be linked with another, be sure to provide a unique ID for it.
Working with DataLayer.Static
In order to actually create the data, developers must add one or more Static Data Row elements beneath a DataLayer.Static element. Each Static Data Row element represents a single row of data in the datalayer.
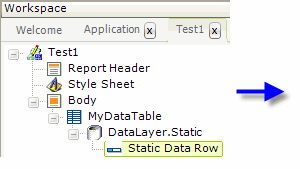
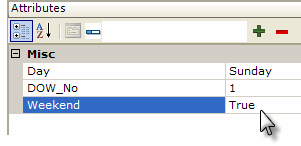
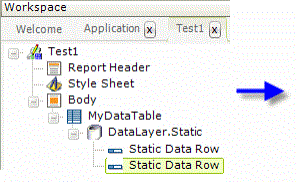
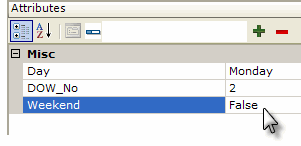
As shown above, Static Data Row elements have dynamic attributes, which the developer creates. Each attribute represents a column in the data row; the attribute name assigned by the developer becomes the column name and the value entered becomes the column data. Naturally, if multiple Static Data Row elements are being added, they all need to have the same number of attributes, with identical names.

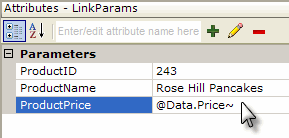
Dynamic attributes are added by entering the attribute name in the input box at the top of the Attributes Panel, as shown above, and clicking the "+" icon. Values are then added by entering them in the usual fashion. An attribute and its value, if any, are deleted by selecting it and clicking the red "-" icon.
As of v10.0.189, dynamic attribute names can be edited by selecting them and
clicking the "Pencil" icon. This will place the name into the top text box,
where it can be edited. The icon will change to a "Diskette" icon and clicking
it again will save the edited attribute name. Attribute values can be edited
directly, as usual, by placing the cursor on them

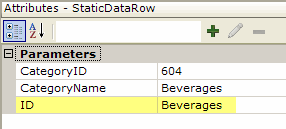
If an attribute named ID is created, its value will replace the words "Static Data Row" next to the element icon in the element tree. This may be more desirable than a big stack of anonymous Static Data Row elements, as it allows developers to visually identify each static data row element separately in the tree.
Developers can retrieve the values from each column in the datalayer by using the @Data token.
Using Studio's DataLayer Wizard
Beginning in v10.0.299, Studio includes a wizard that assists you in configuring DataLayer.Static and creating static data.
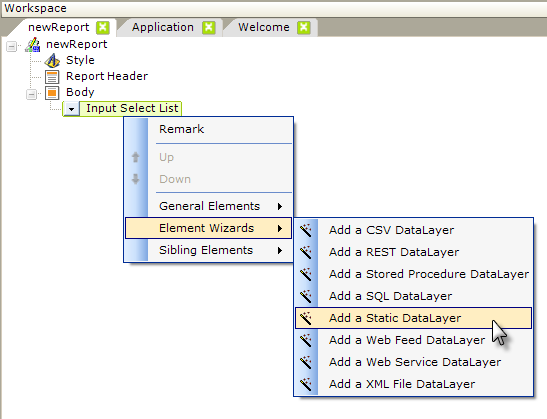
As shown above, the wizard can be started by selecting and then right-clicking the parent element under which you want to add the datalayer, and using the context menus to select "Add a Static DataLayer."
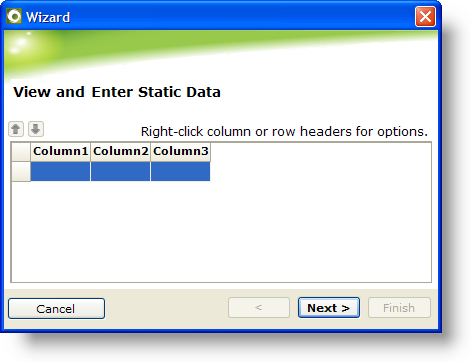
The wizard opens, as shown above. Use the wizard as follows:
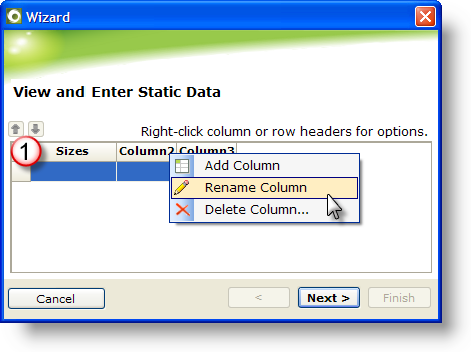
- Right-click the column headers, one-by-one, select Rename Column from the pop-up menu, and change the column names to names appropriate for your purpose. You can drag the column header borders to widen the columns, if desired. Add or delete columns as necessary, until you have just those you need.
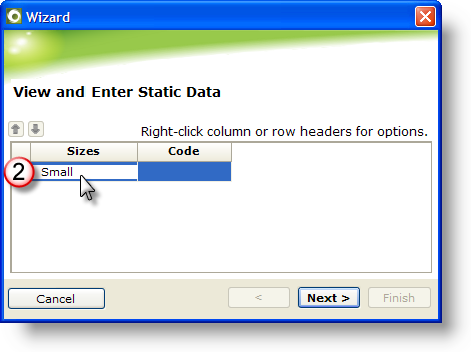
- Click the first column and enter the desired data. Press Tab to move to the next column and enter its data, then repeat for all columns. Do not press Enter!
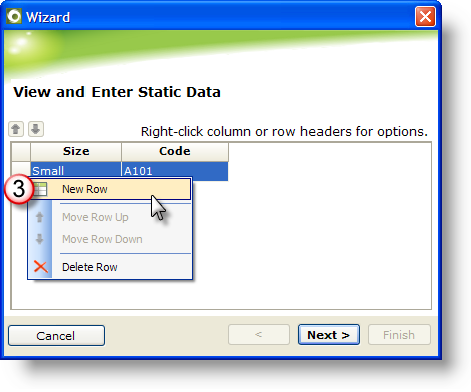
- Right-click the blank square to the left of the first column and select New Row from the pop-up menu that appears. Repeat Steps 2 and 3 as many times as necessary to enter data for all static rows.
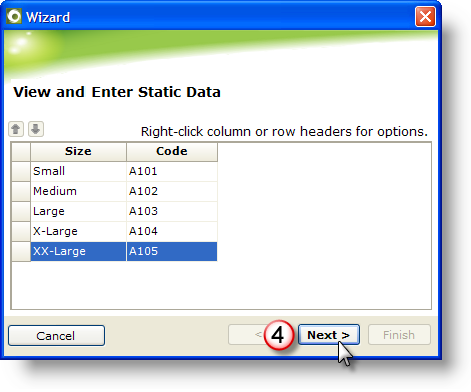
- When the data for all rows and columns has been entered, click Next to insert the elements.
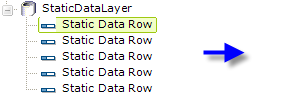
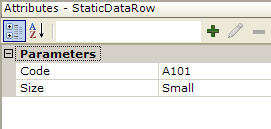
- The wizard will insert the elements, as shown above, and set their attributes appropriately. Click Finish to close the wizard.