Use the Metadata Builder Wizard
The Metadata Builder wizard is used to build a metadata file. The file is used with an Analysis Grid that has been extended to use the Active Query Builder. This topic provides instructions for using the wizard.
- About the Metadata Builder Wizard
- Use the Metadata Builder Wizard
- Create Multiple Metadata Files
- Configure for Multi-Tenant Data
About the Metadata Builder Wizard
The Metadata Builder wizard is part of an add-on module, the Self-Service Reporting Module (SSRM), which is installed separately from Logi Info. Once installed, the Active Query Builder and the Metadata elements will be enabled in Logi Studio. For information about the SSRM, see Install the Self-Service Reporting Module.
The Analysis Grid is often configured with a SQL datalayer, which retrieves data based on a SQL query hard-coded by the developer. The query determines the dataset that will be available to users for analysis.
The Active Query Builder provides a different approach: it allows users to determine what dataset to work with, by giving them a way to interactively select tables and joins, at runtime.
When added as a child of an Analysis Grid, the Active Query Builder element causes a special "Data" tab to appear at the top of the
Analysis Grid. In it, users can select the tables and joins they want to work with. Intelligent assistance is provided to help users make reasonable joins.
Controlling the Metadata
The developer, however, still exercises control over what tables, views, columns, and relationships are available for use with the Active Query Builder. This is done by building a "metadata file", associated with a Connection element, which enumerates all of the database objects that will be available to users for selection in the Analysis Grid. The Metadata element provides a tool, the Metadata Builder wizard, which is used during development to create the file. The Active Query Builder is then pointed to the file. Multiple metadata files can be associated with a Connection element.
The Active Query Builder and Metadata elements work with these database servers:
- HP Vertica (v11.3.049 SP 5+)
- Microsoft SQL Server 2005+
- MySQL
- Oracle
- PostgreSQL
Use the Metadata Builder Wizard
The purpose of the Metadata Builder wizard is to identify the metadata that will be written, at the end of the process, into a metadata file. The wizard can help you create a brand new file or edit an existing file. Here are the steps for using the wizard to build or edit the file:
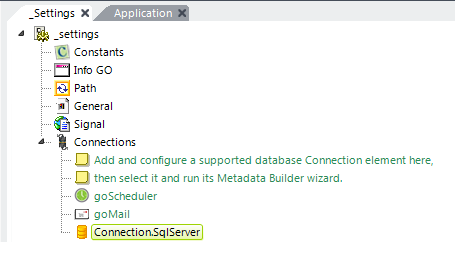
- In your Settings definition, add a Connection element for one of the supported databases, as shown above. Configure the element to connect to the desired database.
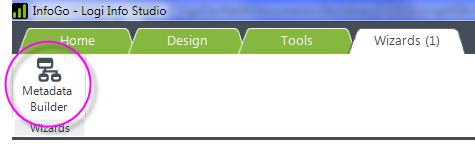
- Select your configured Connection element and, in the Wizards main menu tab, click the Metadata Builder wizard menu item, shown above. The wizard will insert a Metadata element as a child of the Connection element and prompt you for more details.
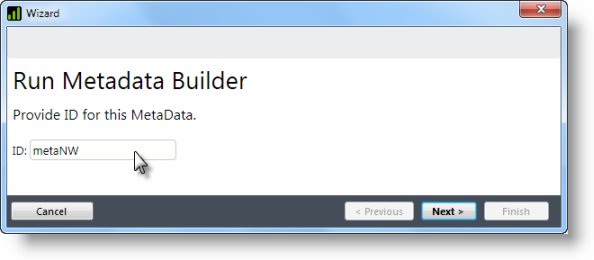
- Provide a unique element ID for the Metadata element. Do not include any spaces in this ID. This value will also be used as the metadata file name, which will be created in the _Metadata folder with an .lgx file extension. Do not include a file extension here.
If a metadata file with this ID already exists, it will be opened for editing and its values will be populated in the wizard.
Click Next to proceed to the next step.
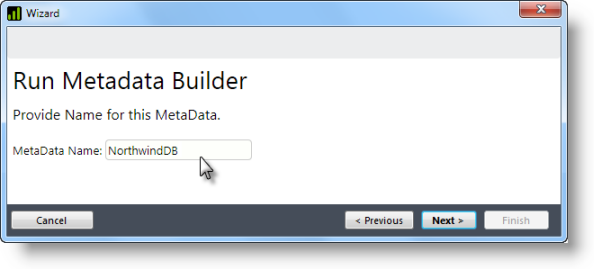
- Provide a descriptive name. If you create multiple metadata files, this name will appear as a selection in the Analysis Grid user interface as a "data source". Click Next to proceed to the next step.
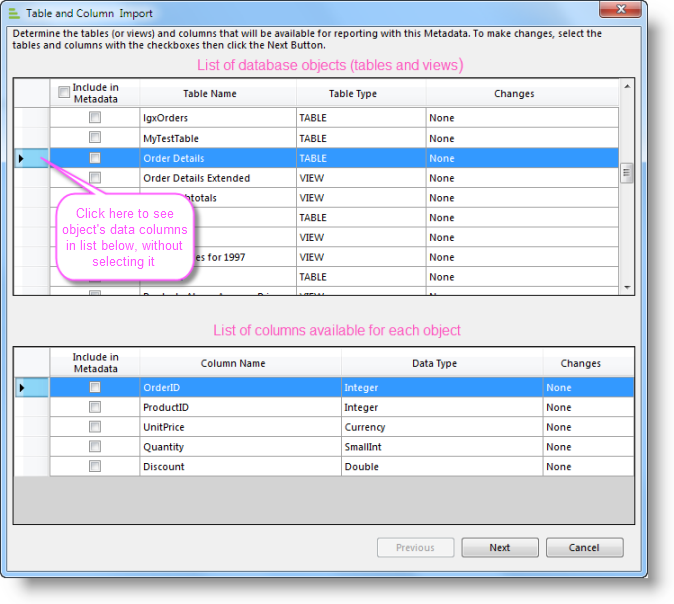
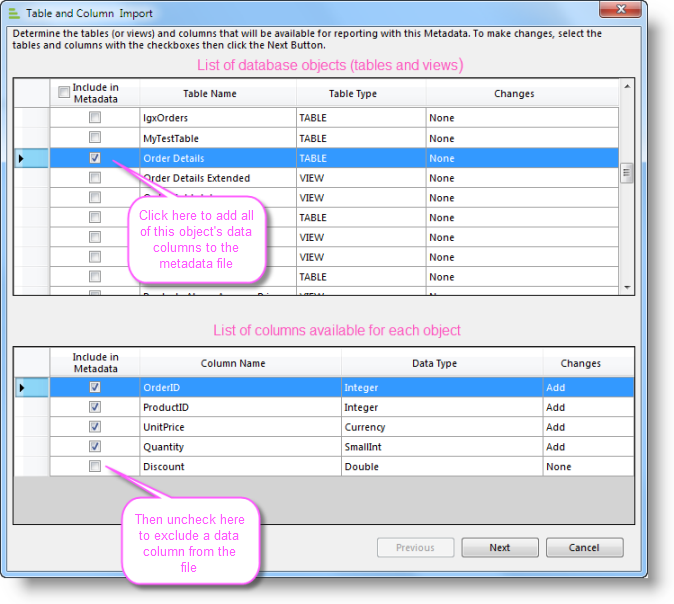
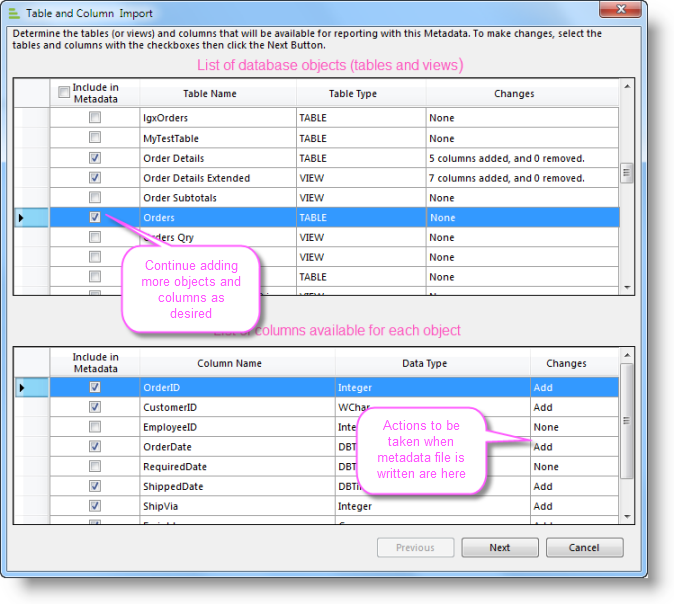
- Select Tables: The dialog box shown above will appear. It contains an list of database objects (tables and views) from the connected database. The objects are limited to those available to the account used in the Connection element to access the database.
- (1) You can filter the list by typing an object name or click Clear to remove any filtering.
- (2) Check the box for each object to include in the metadata. Check the box in the column header to include or exclude all objects.
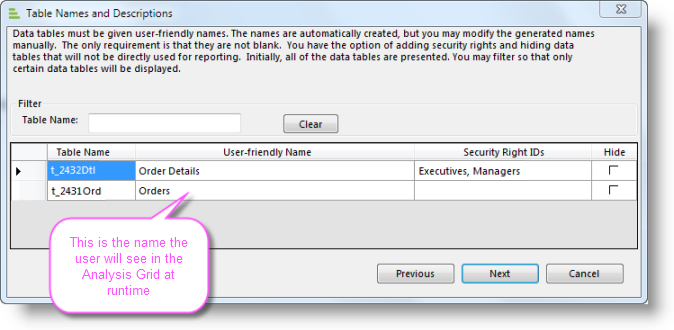
- (3) Change the suggested "user-friendly name" for each object, if desired.
- (4) Select or enter Security Right IDs (in a comma-separated list) for each object.
- (5) Click to create a custom table, if desired. Otherwise, click Next to continue.
- (1) Enter a name for your custom table object. It will be created in the metadata at runtime.
- (2) Enter the SQL query to retrieve data for your custom table. You may not use wildcards with JOINs or include an ORDER BY clause. Session tokens can be used in a WHERE clause and will be resolved at runtime.
- (3) If you used a Session token, you can test it by entering a value for it and clicking Test.
- (4) Test results will let you validate your query.
- (5) You can delete existing custom tables by clicking Delete.
- (6) Click Save to save your new custom table and return to the previous dialog box.
If you click Add Custom Table, the dialog box shown above will appear.
New custom tables may appear at the bottom of the table list, with an editing link in the Custom Tables column, until the list is refreshed. Click Next to continue.
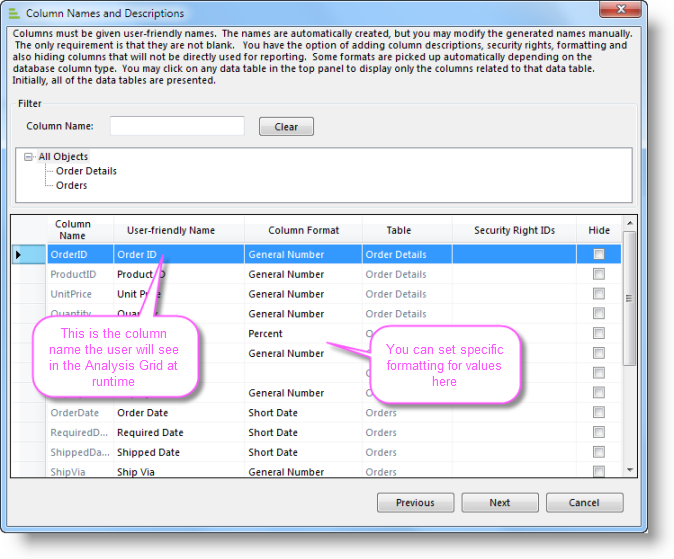
- Select Columns: The dialog box shown above will appear. It contains a list of all columns in the selected database objects.
- (1) You can filter the list by typing a column name or click Clear to remove any filtering.
- (2) You can filter by table name by selecting a table name; select "Tables" to see all columns.
- (3) Check the box for each column to include in the metadata. Check the box in the column header to include or exclude all columns.
- (4) Change the suggested "user-friendly name" for each column, if desired. This cannot be left blank.
- (5) Change the suggested data format for each column, if desired. Defaults formats are based on data type.
- (6) Select an alignment (Left, Center, Right) for data displayed in each column, if desired.
- (7) Select restrictions on column usage for sorting, for grouping, and for aggregations.
- (8) Enter comma-separated list of values that will appear in the UI when each column is used for filtering, if desired.
- (9) You may desire to make data in columns into clickable links. When the Link URL icon is clicked, the dialog box shown above is displayed. You can enter a URL, with or without a token, to be associated with the column's data. Click Save to save the link.
 The Data token used here is unusual - it must include the table name: @Data.OrdersTable.OrderID~.
 - (10) Select or enter Security Right IDs (in a comma-separated list) to control access to each column.
Click Next to continue.
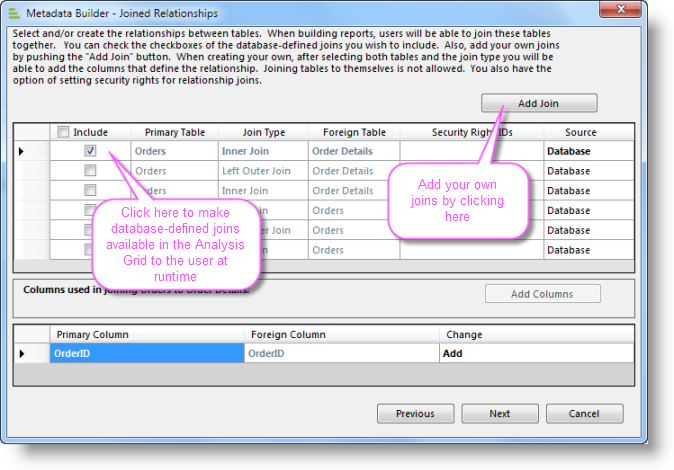
- The dialog box shown above let's you specify the joined relationships that will be available. These can be from the database and/or custom joins you create.
- (1) Click Add Join to create your own relationship. A blank row will be added at the bottom of the list, with drop-down lists of primary table, join type, and foreign table options. When this is configured, you may add join columns in the lower list. Additional buttons will also appear to allow you to remove relationships and columns.
- (2) Check the box for each relationship to include in the metadata. Check the box in the column header to include or exclude all relationships.
- (3) Select or enter Security Right IDs (in a comma-separated list) to control access to each relationship.
- (4) The lower list displays the columns that define the relationship. When adding a new join, select columns from drop-down lists.
Click Next to continue.
- As shown above, you can also configure "user-friendly names" for relationships and provide a description for future reference. Click Finish to complete the process and write out the metadata file.
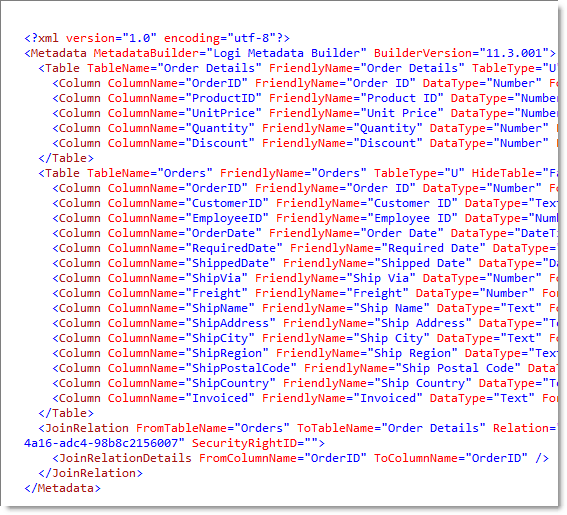
An example of the contents of a metadata file is shown above. It's an XML file that describes all of the data, relationships, and other details you specified in the wizard.
Create Multiple Metadata Files
As mentioned earlier, you can create multiple metadata files in order to provide multiple datasets to users.
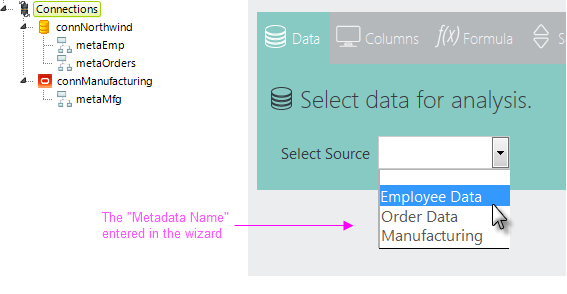
As shown in the example above, you can use multiple child Metadata elements beneath a single Connection element, and also use multiple Connection elements, each with their own child Metadata elements.
The result in the application, as shown, is a combined list of datasets. Multiple metadata files are created by repeatedly selecting a Connection element and running the wizard.
Configure for Multi-Tenant Data
Databases may include the data from many separate entities or users, an arrangement known as "multi-tenant data". This avoids having to have and maintain separate databases, platforms, etc. but demands that applications be able to securely distinguish between each tenant's data.
In Logi Info v11.3.049 SP 5, features were added to handle multi-tenancy in data described by Logi metadata files. In this release, adding the necessary segregation requires manual editing of metadata files. It's anticipated that in later releases, this will be incorporated directly into the Metadata Builder interface. For now, here's how to manually edit a metadata file to provide this functionality:
- Compose a SQL query that will retrieve the data specific to one entity or user in a multi-tenant database, using a dynamic variable like a session token in a WHERE clause. For example:
SELECT * FROM Orders WHERE CustomerID = @Session.custID~
- Do not use an ORDER BY clause.
- You may use JOINs but, if you do, you may not use the column wildcard "*"; instead all columns must be listed.
- This query's results should include the columns you identified when you ran the Metadata Builder; "SELECT *", for example, will always do this.
- Use the Metadata Builder to select columns and create your metadata file as if the data was not multi-tenant, or identify an existing metadata file to edit.
<Table TableName="Orders" Schema="" FriendlyName="Orders" TableType="U"... <Column ColumnName="OrderID" FriendlyName="Order ID" DataType="Number"... </Table> |
- Find the metadata file you want to edit, in the yourLogiApp\_Metadata folder, and open it with Notepad. An example, with extra spacing and line truncations for clarity, is shown above.
<Table TableName="Orders" SqlSource="SELECT * FROM Orders WHERE CustomerID = <Column ColumnName="OrderID" FriendlyName="Order ID" DataType="Number"... </Table> |
- Find the entry for the table your new SQL query refers to and add a new XML attribute to it: SqlSource. Add your SQL query as the value for that attribute, as shown above. Remember: your query results should include the columns you see listed for this table in its XML <Column> tags. Save the metadata file.
- Repeat this process for each table that includes multi-tenant data. Save and close the metadata file.
Now when they run the application, users of Analysis Grids with the Active Query Builder will only have access to the data that matches the SQL query's WHERE clause.
The successful creation of the metadata file concludes this topic.
For information about using metadata with the Active Query Builder, see Develop with Analysis Grids - v11.3 +.