Add a Data Table
The Data Table element is used to display data in a tabular format of rows and columns. The following examples use a table, Employees, in the Northwind database. If you're using a different database and table, adjust the names and selections as appropriate.

Here's how to add a Data Table element:
- If it's not already selected, select the MyDataTable2 definition tab in the Workspace editor.
- In the definition, select the Body element.
- In the Element Toolbox, expand the Data Tables section (if necessary) and double-click the Data Table element to add it to the report as a child of the Body element, as shown above.
- With the newly added element selected, in the Attributes panel, set its required ID attribute.
To add the next element, let's use an alternate method, which you may find you prefer:
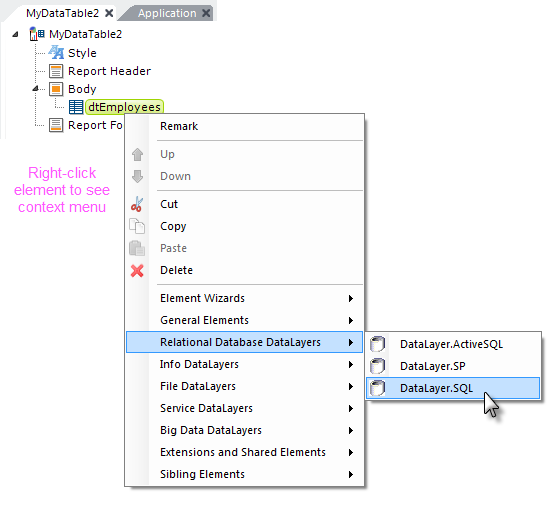
- Select the newly-added Data Table element ("dtEmployees"), and right-click it.
- In the context menu that appears, select Relational Database DataLayers.
- In the second context menu, click the DataLayer.SQL element to add it as a child of the Data Table element.

- Select the newly-added datalayer and set its attributes as shown above. The Connection ID can be selected from a pull-down list of choices. The Source attribute value is, obviously, the actual SQL query used to get data from the database and, if you're using a different database, you'll need to alter it.

- Select the Data Table element ("dtEmployees") again and below it add a Data Table Column element, as shown above. Set its ID attribute to colEmployeeID and its Column Header attribute to Employee ID.
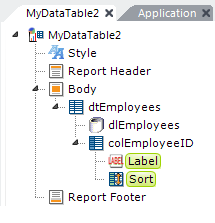
- Select the newly-added Data Table Column element and, below it, add Label and Sort child elements, as shown above.
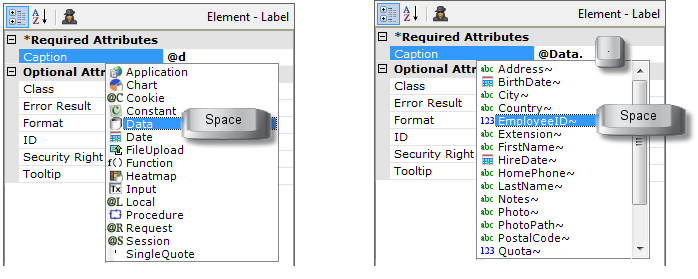
Now we'll use Studio's powerful "Token Completion" feature to fill-in the data value to be displayed for this column. - Select the Label element and in its Caption attribute, type @d . Studio will immediately display a drop-down list of "token" types. A token is a value that is evaluated at runtime and is used in Logi apps to represent data, session variables, cookies, and more. In our case, we want to use a Data token. Studio has anticipated our need and selected the Data token type in the drop-down list. Press the Space Bar on your keyboard to select it and Studio will enter the token type in the Caption attribute.
- Now press the Period key and Studio will attempt to retrieve a list of the data columns returned by our SQL query. Use your arrow keys or the mouse to select EmployeeID~, as shown above left, and, again, press the Space Bar.
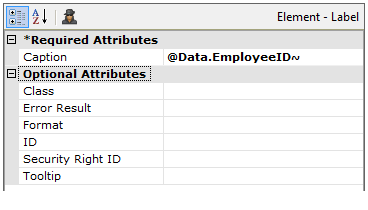
- Studio enters the column name in the Caption attribute, as shown above, and adds the trailing tilde ("~") character which is the required terminator for tokens. Here's another important fact about tokens: they're case-sensitive, so you must take care to spell them, and related identifiers such as column names, correctly.
Once you do this a few times, you'll find the Token Completion feature to be really valuable: it speeds things up and helps you avoid error-causing typos.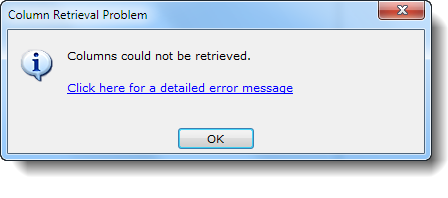
Did Studio return an error when it tried to retrieve the table column names? If so, you most likely have a problem with the configuration of your database connection or your SQL syntax. The link in the error message may provide a useful hint. Fix any problems and retry.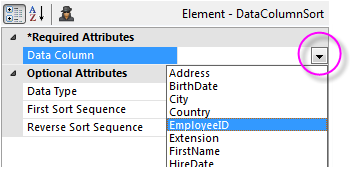
- The Sort element causes the column header text in the table to become a link that will sort the data based on the column clicked. Select it and set its Data Column attribute to the column name: EmployeeID.
 If an attribute name includes the world "Column" then the attribute value must be the actual column name, not a Data token. The column name is case-sensitive and must be spelled correctly. You can click the button at the end of the attribute value input box
to see a drop-down list of the column names.
This grouping of elements: Data Table Column, Label, and (optionally) Sort needs to be repeated for each column that you want to display. Now that you know what's involved, to save a little time, let's use a wizard to provide the other columns: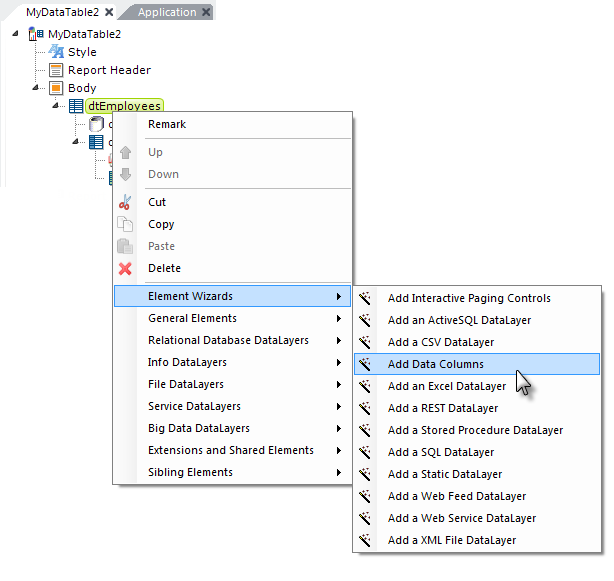
- Right-click the Data Table element ("dtEmployees"). Select Element Wizards from its context menu.
- In the second context menu, click Add Data Columns, as shown above.
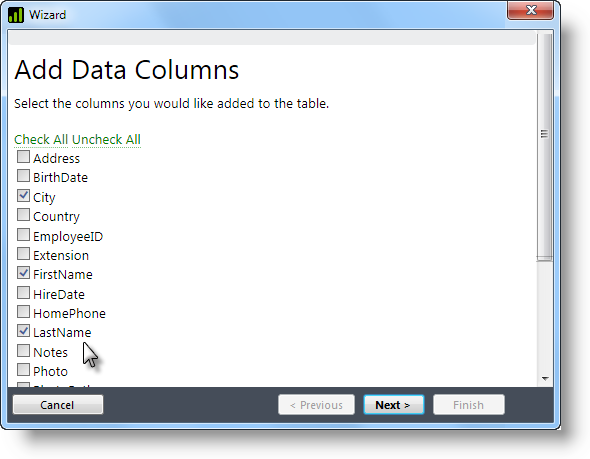
- When the wizard appears, as shown above, click the Uncheck All link, then check a few columns. Then click Next and watch in the Workspace editor as the wizard adds elements for you. Click Finish when it's done.
Click on some of the elements the wizard added and you can see that it has configured their attributes for you, too.
Now that all of the columns have been added, your Data Table is complete and you're ready to see the results.