PDF - Exporting a Report Manually
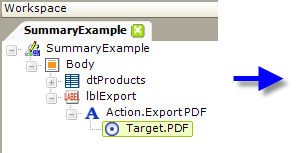
Here's an example of how to create a report with a link that allows the report to be exported manually:
- In your report definition, add an Action.Export PDF element as the child of a Label, Image, Button or Chart element, as shown above.
- Beneath it, add the required Target.PDF element.
- If the report to export is the current report, you need do nothing more. Just save your definition, preview or browse your report, and click the link to export it. It should open in the PDF viewer associated with your browser. It's that simple.
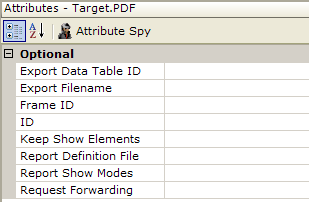
In order to export the current report while maintaining any sort order the user may have applied, set the Target.PDF's Report Definition File attribute to CurrentReport. - If the report to export is not the current report, specify that report by setting the Target.PDF's Report Definition File attribute appropriately.
- If you wish to export only a specific data table, provide its ID in the Export Data Table ID attribute. This prevents anything else in the report, such as headers or footers, images, etc., from being exported.
What happens: the report is exported to a temporary PDF file which is created in your project folder's rdDownload folder on the web server. The temp file is then opened automatically in your browser. Temporary files are cleaned up automatically over time.
If you wish to export to PDF in "landscape" page orientation, you should use the Printable Paging element, as described in Creating Printable Reports.

