Sharing Web Reports
Logi Report Server supports tenant level report sharing for web reports. This topic describes how you can share web reports to public folders and manage shared reports.
You can share your web reports that you created or added in the server resource tree, to public folders so that other users can work on the shared copies without touching the original reports. You can create multiple shared reports from one web report.
Server links a shared report to its original report. When you view a shared report, you can only access the business view that the shared report is referencing and edit the shared report based on the business views. Once you removed all the components that referenced a business view from a shared report and saved the shared report, the business view is no longer available.
This topic contains the following sections:
Sharing a Web Report
You can share a web report either on the Server Console or in Web Report Studio.
To share a web report from the Server Console.
- In the Resources page of the Server Console, locate the web report in the resource tree, then select the Share button
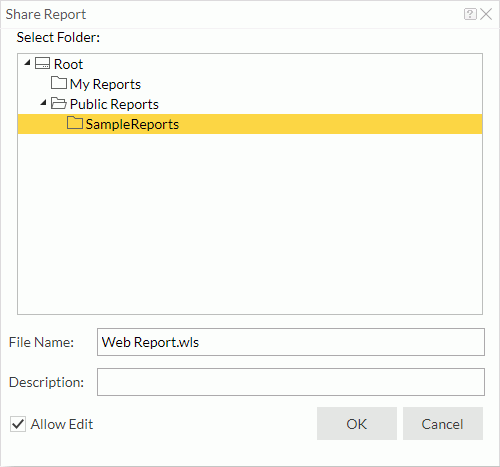
 on the floating toolbar. Or select the report row, right-click in the row, and select Share from the shortcut menu. Server displays the Share Report dialog box.

- Select a public folder in which you want to save the shared report.
- In the File Name text box, edit the file name of the shared report.
- In the Description text box, you can type text to describe the shared report.
- By default, Server selects Allow Edit. Clear it if you do not want anyone else to edit the shared report.
When a shared report is editable, users who have the Edit permission on the shared report will be able to run it using the Edit option, edit it in Web Report Studio, and save the modified report as a finished or unfinished version. Saves stores the versions saved from a shared report into the original report so they are available in the original report's version table. If a user saves an unfinished version for a shared report and then runs the report, Server displays the unfinished version for the user to continue working on it. In other cases, running a shared report always means accessing its latest finished version which could be created by any user.
- Select OK to accept the settings. Server adds the shared report in the specified folder.
Managing Shared Web Reports
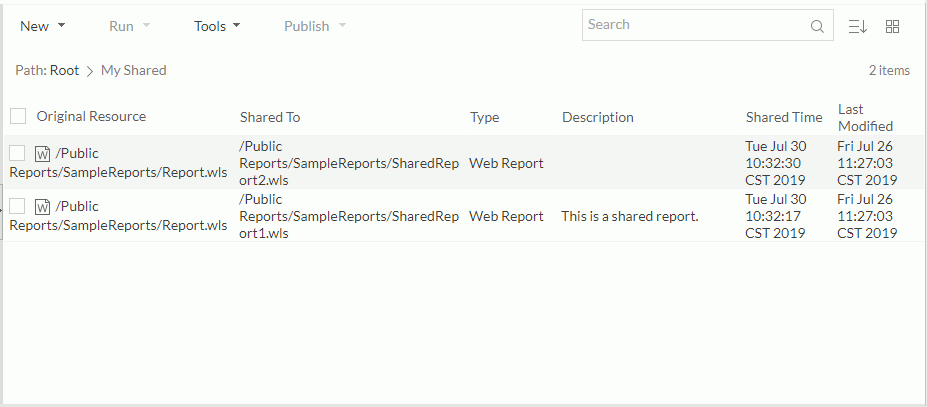
After you have shared your reports, you are able to view and manage them in the My Shared folder in the server resource tree root.

You can view information such as which web reports you have used to create shared reports, where the reports are shared and under what names, the descriptions to introduce the shared reports, when you shared the reports, and when you modified them last time.
You can also edit the sharing properties of the reports and delete them.
To delete a shared report from the My Shared folder, take the steps as described in Deleting Resources.
To edit the sharing properties of a shared report:
- In the My Shared folder, do any of the following:
- Put the mouse pointer over the report row and select the Properties button
 on its floating toolbar.
 - Select the report row, right-click in the report row and select Properties from the shortcut menu.
- Select the report row and select Tools > Properties on the task bar.
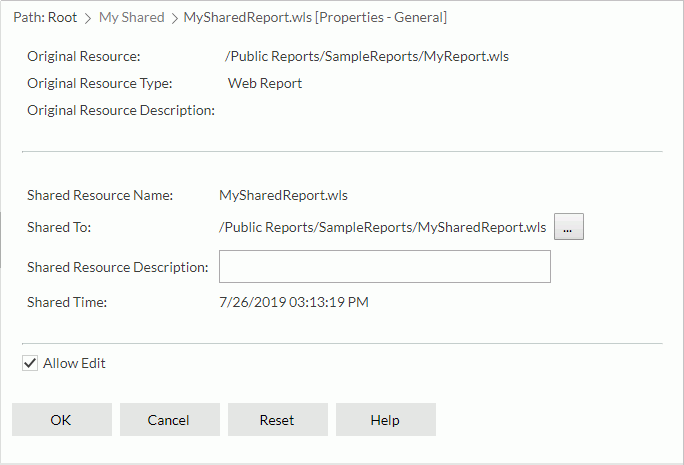
Server displays the Sharing Properties dialog box.

- Put the mouse pointer over the report row and select the Properties button
- Specify the values of the custom fields if there are any.
- To move the shared report to another directory in the server resource tree, select the ellipsis button
 next to the Shared To option.
 - Server displays the Select Folder dialog box. Select a different folder in the server resource tree.
- In the Shared Resource Description text box, you can edit the description.
- Specify whether the shared report is editable.
- Select OK to save the changes.
![]()
- You cannot use shared web reports as linked reports.
- No user including the report owner can edit NLS for shared reports. Shared reports take the NLS settings of their original reports by default.
 Previous Topic