Lesson 3: Creating a Mailing Label Report
In this lesson, we develop a Customer Contact Card report using the mailing label layout. The report users can use it to print rolodex cards and mailing labels. On each card, the following information needs to be shown:
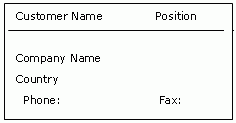
The data source for this report is our built-in XML data, predefined as Data Source 2 in the catalog.
Follow these tasks to create the report:
- Task 1: Define the Query the Report Uses
- Task 2: Add Objects to the Report
- Task 3: Edit Object Properties and Print the Report
Task 1: Define the Query the Report Uses
- In Designer, navigate to File > New > Page Report.
- In the Select Component for Page Report dialog box, select Mailing Label, then select OK.
Be sure that JinfonetGourmetJava.cat is the current catalog because it is the catalog we use in this track. For information about specifying this catalog, see Task 1, Step 2 and 3 of Lesson 1.
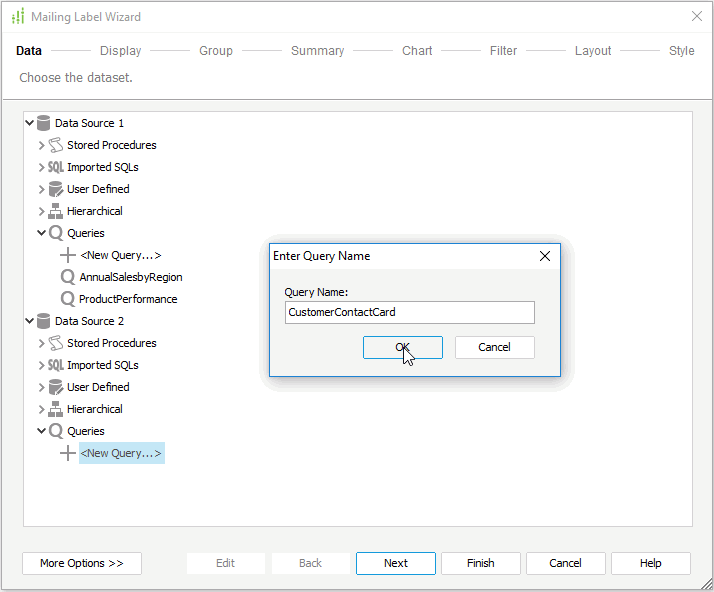
- In the Data screen of the Mailing Label Wizard dialog box, select <New Query...> in the Queries node of Data Source 2, type CustomerContactCard in the Enter Query Name dialog box and then select OK.
- In the Add Tables/Views/Queries dialog box, expand the XML connection node and then the Tables node, then select the table Customer and select Add
 to add it to the query. Select OK to close the dialog box.
 - In the Query Editor dialog box, select all columns in the Customer table by choosing *, then clear the NodePrimaryKey and NodeForeignKey columns.
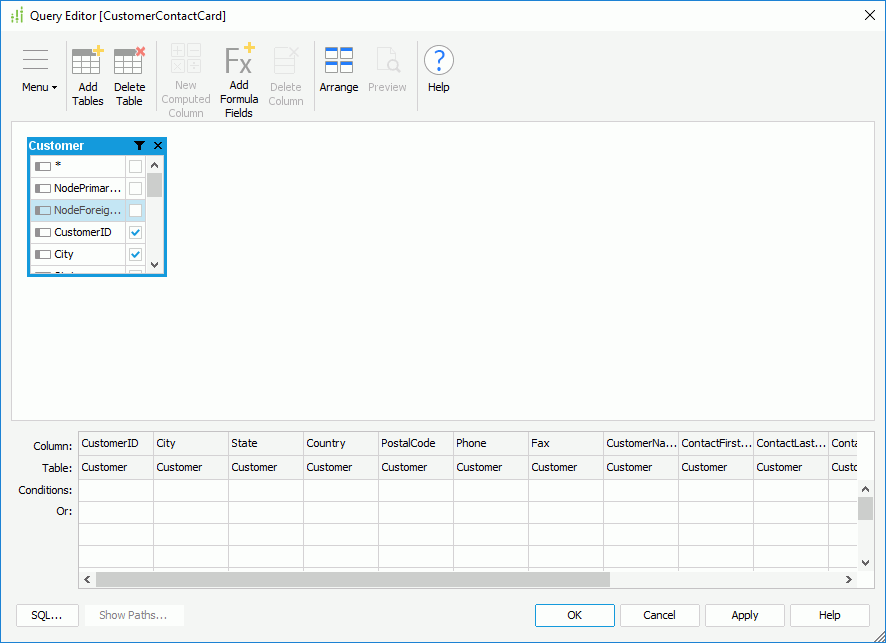
- Select OK to create the query.
- Select Style on the screen navigation bar to switch to the screen in the Mailing Label Wizard dialog box and select Simple as the report style.
- Select Finish to create the report.
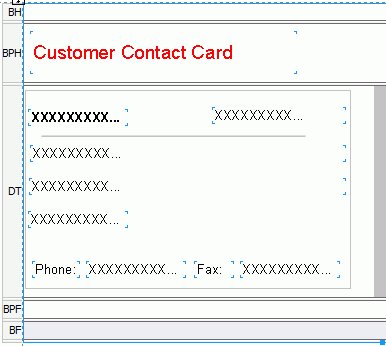
Designer creates the report with an empty banded object, and identifies the panels in the banded object on the left side by their abbreviations: a banded header panel (BH), a banded page header panel (BPH), a detail panel (DT), a banded page footer panel (BPF), and a banded footer panel (BF).
Task 2: Add Objects to the Report
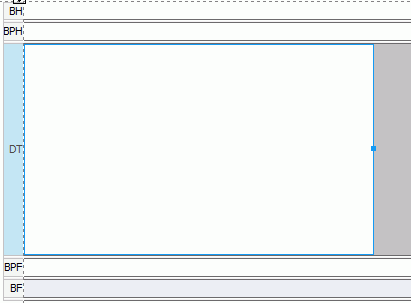
- Select and resize the DT panel of the banded object, to make it similar to this:
We want to use a simple formula to create a single value out of the customer's last and first names, and similarly to the address.
- In the Data panel, select <New Formula...> in the Formulas node.
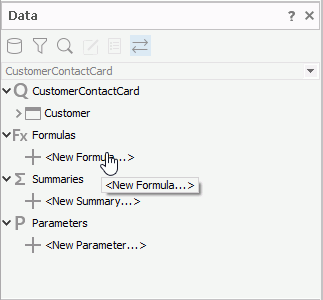
- Type the formula name CustomerContactName in the Enter Formula Name dialog box, select OK, define the formula in the Formula Editor dialog box as
@ContactFirstName + " " + @ContactLastName(you can copy the formula to the formula editing area directly), select Save on toolbar, then close the editor.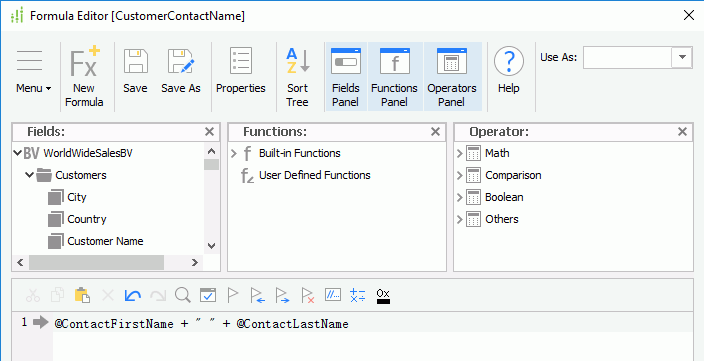
- Create another formula named CustomerContactAddress using the same way and define it as follows:
@Address1 + ", " + @City + ", " + @State + " " + @PostalCode
We do not want to show the name labels of the DBFields in this report, so we can use one of the Designer's customizations that can simplify the creation of this report.
- Navigate to File > Options.
- In the Options dialog box, select Component, clear Insert field name label with field and select OK.
Now we can add our formulas and DBFields to the report.
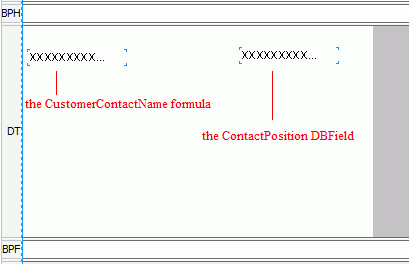
- From the Data panel, drag the CustomerContactName formula in the Formulas node to the DT panel of the banded object, and then the ContactPosition DBField in the Customer table to the right of it.
- Use the same way to add the following fields:
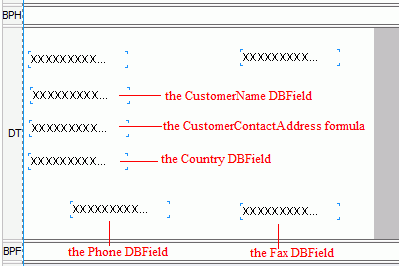
- Add two labels ahead of the Phone and Fax DBFields to identify them by dragging the Label icon
 from the Components panel. Resize the labels and edit their text to "Phone:" and "Fax:" respectively.
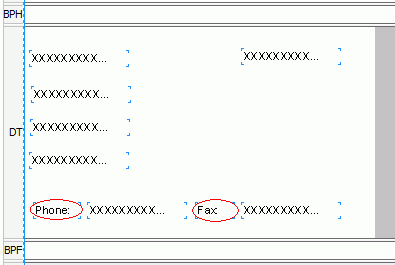
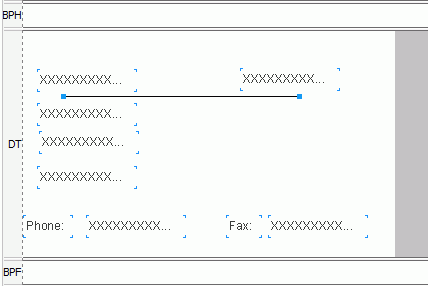
- Navigate to Insert > Drawing Objects > Line to insert a Line object above the CustomerName DBField.
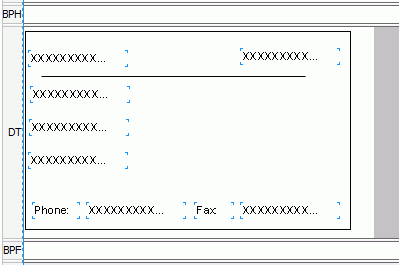
- Select the DT panel of the banded object, then navigate to Insert > Drawing Objects > Box to add a Box object to enclose all the objects in the panel.
- Resize the BPH panel, drag the Label icon
 from the Components panel to it to add a label in the panel, then resize the label and edit its text to Customer Contact Card as the title of the report.

Task 3: Edit Object Properties and Print the Report
- Select the label in the BPH panel and change its Font Size property to 14 and Foreground to Red in the Report Inspector.
- Select all the objects in the DT panel except the Line and the Box drawing objects, then select 10 from the Font Size drop-down list
 on the Format menu tab.
 - Select the CustomerContactName formula and navigate to Format > Bold
 .
. - In the Report Inspector, select the Box node from the report structure tree and change its Border Color property to Lightgray.
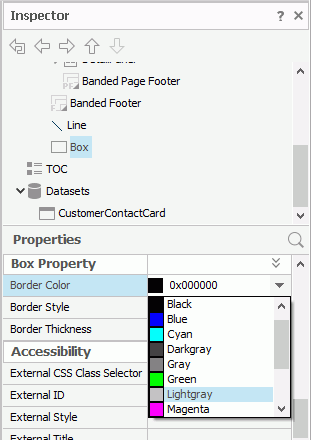
- Select the Line node and edit its Line Color property to Lightgray and Line Thickness to 0.02.
- Resize the fields horizontally to display the data completely.
- Hide the BH, BPF, and BF panels that do not hold any data by right-clicking the panel and selecting Hide from the shortcut menu.
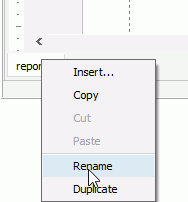
- On the report tab bar, right-click the report tab and select Rename to rename it to CustomerInformation.
- Navigate to File > Save to save the report as CustomerContactCard.cls.
- Select the View tab to preview the report. Designer displays the report similar as follows:
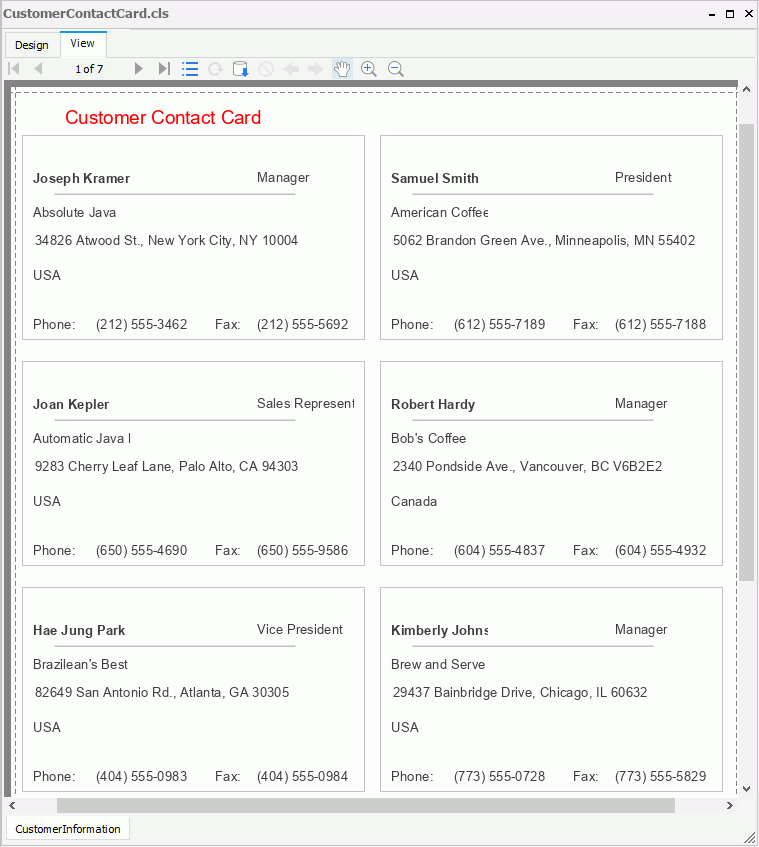
The report displays as expected. We can print it to make the customer contact card now.
- Navigate to File > Print and then specify the settings in the Print dialog box.
- Navigate to File > Options again and select Insert field name label with field in the Component category, so that later when you add fields to reports, Designer adds their name labels automatically.
![]() If the report does not look correct, you can compare it to the final version of the report included in Designer. To do this, save and close your current catalog, and then open the JinfonetGourmetJava.cat catalog file in
If the report does not look correct, you can compare it to the final version of the report included in Designer. To do this, save and close your current catalog, and then open the JinfonetGourmetJava.cat catalog file in <install_root>\Demo\Reports\TutorialReports.
 Previous Topic