Connecting via Elasticsearch Connections
An Elasticsearch connection contains relational data which is transformed from an Elasticsearch data source. This topic describes how you can set up Elasticsearch connections in a catalog, and add and manage tables transformed from the Elasticsearch data sources in the catalog via the connections.
This topic contains the following sections:
- How Designer Gets Data from Elasticsearch Data Sources
- Setting Up Elasticsearch Connections in a Catalog
- Adding More Tables to an Elasticsearch Connection
- Managing the Tables in an Elasticsearch Connection
How Designer Gets Data from Elasticsearch Data Sources
Designer gets data from Elasticsearch data sources in the same way as it gets data from JSON data sources.
Setting Up Elasticsearch Connections in a Catalog
To set up an Elasticsearch connection to connect a catalog to an Elasticsearch data source, follow the steps below:
- Create a catalog or open a catalog.
- In the Catalog Manager, right-click the node of a data source and choose New Elasticsearch Connection from the shortcut menu.
If you want to set up the connection in a new data source in the catalog, select any of the existing catalog data sources, select New Data Source on the Catalog Manager toolbar, then in the New Data source dialog box, specify the name of the data source, select the Elasticsearch connection type and select OK.
Designer displays the Elasticsearch Data Source Options dialog box.
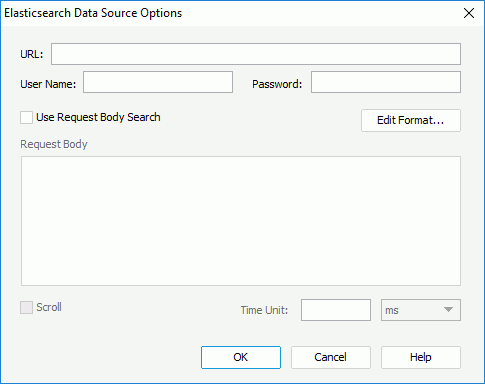
- Specify the URL, user name, and password with which to connect to the Elasticsearch data source.
- To get data from the Elasticsearch data source by the request body, select Use Request Body Search and specify the request body.
You can reference parameters and constant level formulas predefined in the catalog data source in which you create the Elasticsearch connection, as well as the special field "User Name" in the URL and the request body in the same way as in aggregation pipeline expressions.
- To get data from the Elasticsearch data source by the Scroll API, select Scroll and specify how long the Scroll API will keep the search context alive. For more information about the Scroll API, see https://www.elastic.co/guide/en/elasticsearch/reference/current/search-request-scroll.html.
- When you reference parameters and formulas in the URL or request body, you can select the Edit Format button to edit the format of their values.
- Select OK. Designer displays the Elasticsearch Connection Wizard dialog box.
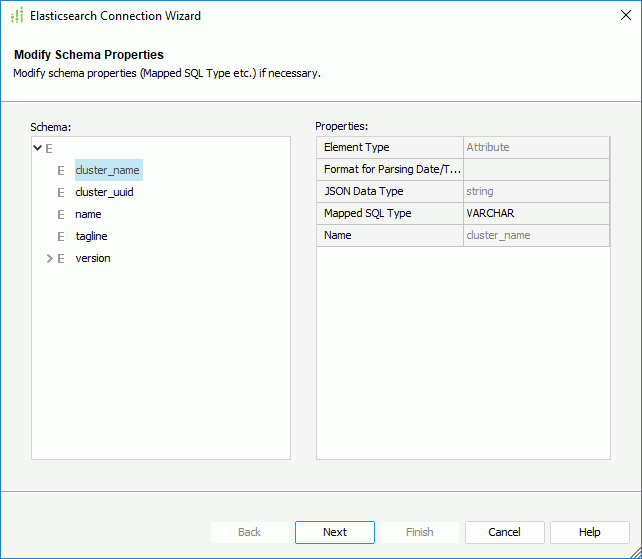
- In the Modify Schema Properties screen, Designer lists the elements in the Elasticsearch schema in the Schema box. You can select an element and modify its properties in the Properties box. Select Next.
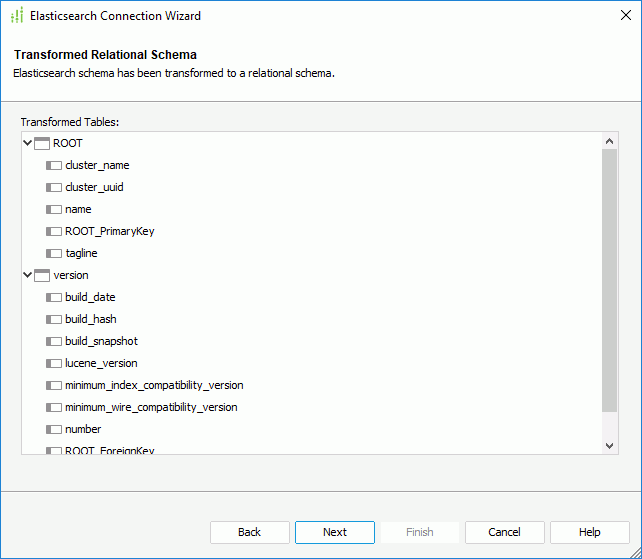
- In the Transformed Relational Schema screen, Designer lists the relational tables built based on the transformed relational schema structure. Check the transformed result in the Transformed Tables box, and then select Next.
- In the Add Table screen, add the required tables to the connection.
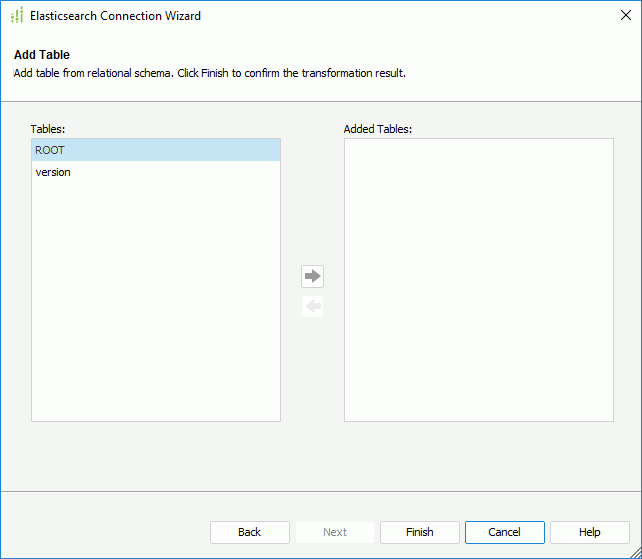
You can create queries and business views using these tables and a report is developed from a query (or something else which is functionally similar) or from a business view.
- Select Finish to confirm the transformed result and complete the transformation process.
Adding More Tables to an Elasticsearch Connection
After you have created an Elasticsearch connection in a catalog, you can add more tables transformed from the Elasticsearch data source into the catalog via the connection.
- Do one of the following:
- Right-click the Elasticsearch connection and select Add Tables from the shortcut menu.
- Right-click the Tables node of the Elasticsearch connection and select Add Tables from the shortcut menu.
- Right-click an existing table in the Elasticsearch connection if there is and select Add Tables from the shortcut menu.
- Right-click any folder in the Tables node of the Elasticsearch connection if you have already created some and select Add Tables from the shortcut menu.
- Select the Tables node of the Elasticsearch connection, or any existing table or folder in the connection and select Add Tables on the Catalog Manager toolbar.
Designer displays the Add Tables dialog box.
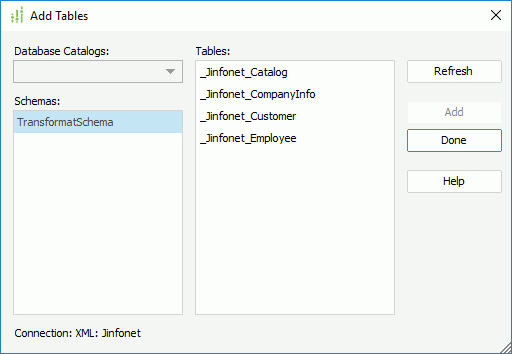
- Select the Refresh button.
- Designer displays the tables in the schema that it transforms from the Elasticsearch data source in the Tables box. Choose the required tables and select Add.
To choose consecutive tables, select the first table, press and hold down the SHIFT key, and then select the last table. To choose tables that are not consecutive, press and hold down CTRL, and then select each table.
- After adding the required tables, select Done to close the dialog box.
Managing the Tables in an Elasticsearch Connection
For the tables that have been transformed from an Elasticsearch data source and added into a catalog via an Elasticsearch connection, you can refresh them, organize them into folders, and remove and add the table columns the same as you do with tables from a JDBC database.
 Previous Topic