Introduction to Logi Studio
Logi Info and Logi Report include our primary development tool, Logi Studio. This integrated development environment is the recommended tool for use by developers in creating their Logi applications. This topic provides a brief introduction to the features of Logi Studio.
- About Logi Studio
- Logi Studio Geography
- Ribbon Menu
- General Features
This is just a brief introduction to Logi Studio; we recommend you follow up by reading the user guide Use Studio 11.
About Logi Studio
Logi Studio is a tool designed to let developers create Logi applications as easily and efficiently as possible. The definition files that form the "source code" of a Logi application are simple text files and can be edited with any text editor; however, Logi Studio makes the development and testing process typical of programming much easier.
Logi Studio is not a web application; a licensed copy must be installed on the desktop computer of each developer.
Studio is a .NET application, must be installed on a Windows platform, and is available in 32- and 64-bit versions. Studio allows you to create either .NET or Java-based web applications and reports.
All of the files that make up an application, including definitions, images, style sheets, scripts, XML data, and HTML pages, can be managed within Studio. All, with the exception of images, can be created and edited within Studio. Files can also be managed directly in the Windows file system.
Studio includes a number of wizards and other tools that automate many standard development tasks, incorporates a set of "rules" that prevents you from combining incompatible objects, and provides Intellisense-like features that provide code completion options to speed development. Its element-based technique of adding and arranging objects in a hierarchical tree eliminates tedious coding.
This topic refers to the latest version, Logi 11 Studio, released with Logi Info v11.3. A detailed user guide, Use Studio 11, is available.
Welcome to Logi Studio. We hope you'll enjoy working with it.
Logi Studio Geography
Logi Studio has a simple layout that makes it easy to develop applications and provides an array of features and tools. Learning "what's where" is the first thing you should do when beginning to work with Studio.
The Getting Started Dialog Box
The first time you launch Studio, you'll see the Getting Started dialog box:
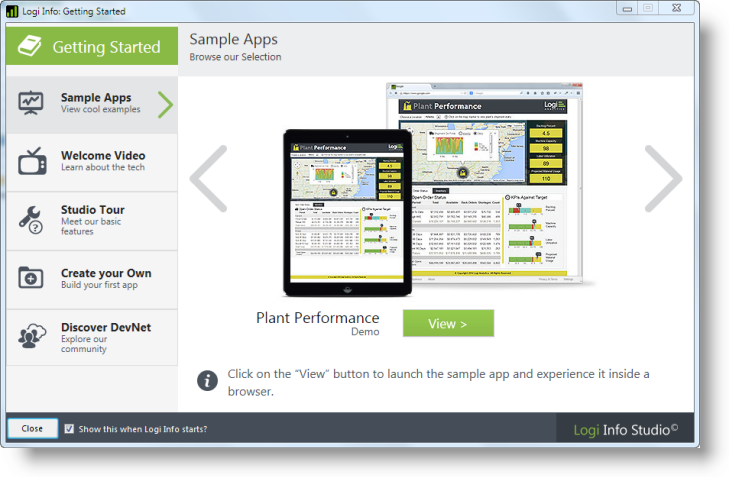
The dialog box, shown above, contains everything you need to quickly become familiar and productive with Studio. You should definitely explore all of its contents if you're a Logi Info newbie. You can hide it when you no longer need it.
The Welcome Panel
With the Getting Started dialog box hidden, you'll see the Welcome panel when you start Studio and whenever there's no application open.
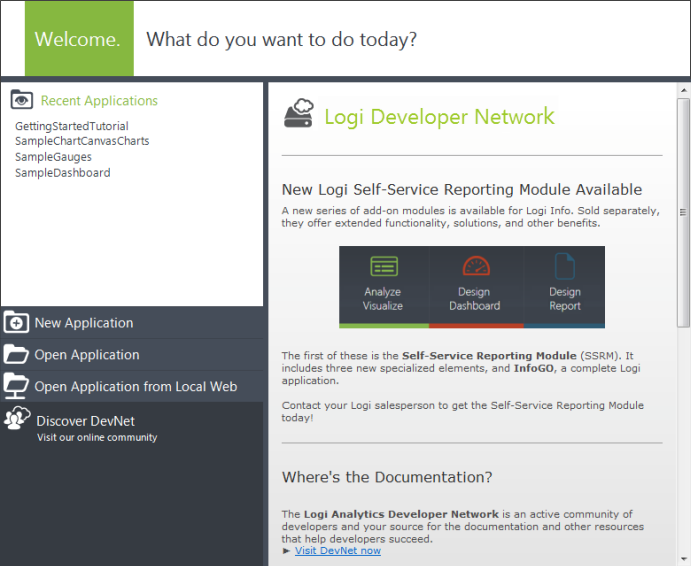
The Welcome panel provides quick links to recently-opened applications, links that open applications using a variety of methods, and a link to DevNet, our online community. In addition, you'll see some useful content, from DevNet, displayed in a scrolling area.
Working on an Application
When you open an application in Studio and begin editing a report definition, it looks like this:
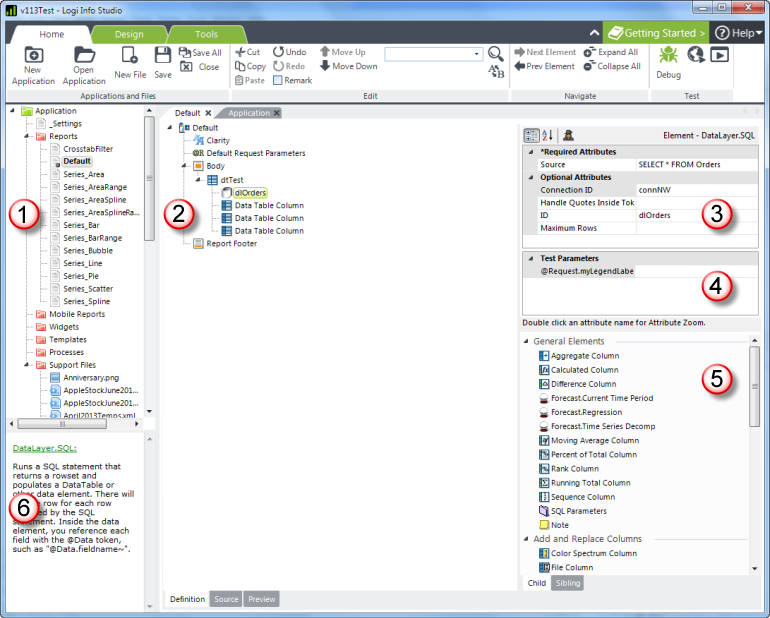
Logi Studio uses six standard panels, which can be resized to suit your needs:
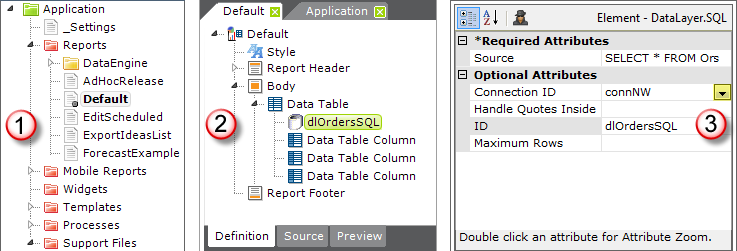
- The Application panel groups all of the files that make up a Logi application together into one file management tree.
- The Workspace panel is where files are edited. Tabs at the top are displayed for each file that's opened, as well as the Welcome and Application pages. Different editors are displayed within the tab pages depending on the file type being edited (report definition, style sheet, XML data, etc.). Report definitions (shown) display the elements that make up a report, in a hierarchical Element Tree.When editing report definitions, tabs at the bottom are displayed for switching between views of the Element Tree (the Definition), the underlying XML source code (Source), and a mini-browser preview of your work (Preview). When the Preview or Source tab is selected, the Element Toolbox, Attributes, and Test Parameters panels are automatically hidden, allowing the full width of the Workspace panel to be used.
- The Attributes panel is where developers enter element attribute values. Attributes can be sorted Alphabetically or by Category and the Attribute Spy feature can be invoked. Attribute names can be double-clicked to open a "zoom" window for easier data entry. For some attributes, valid choices, in a selection list, can be summoned by clicking a down-arrow or mini-browse button in their value field.
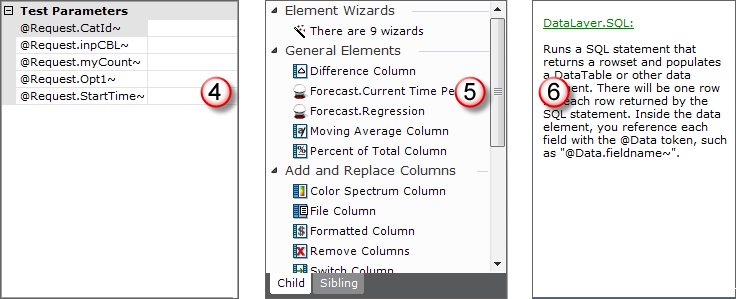
- The Test Parameters panel allows you to insert values as for parameters that are normally passed to the page. This panel is only visible if the report expects parameters and is not displayed until a report has been run or previewed once. Test values entered here are applied to a definition viewed inside Studio using Preview, but are not applied if the definition is viewed in a browser.
- When an element is selected in the Element Tree in the Workspace panel, the Element Toolbox panel provides a list of context-appropriate wizards and child elements that can be added to the Element Tree. Tabs at the bottom filter the element selection between child and sibling elements.
- The Information panel includes quick help text; the element or topic name is a link to more information on DevNet.
Panel Arrangement
The Attribute and Element Toolbox panels can be re-arranged to suit individual developer tastes, using the Tools![]() View menu options:
View menu options:
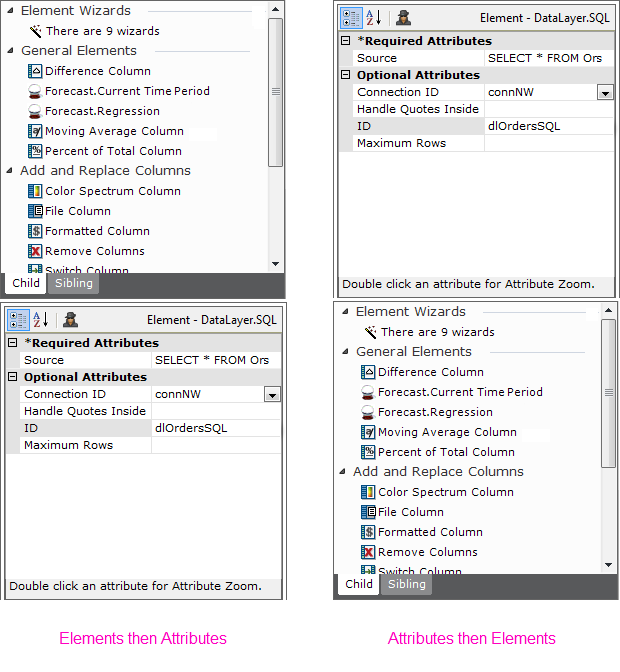
The vertical order of the Element Toolbox and Attributes/Test Parameters panels combination can also be specified, as shown above.
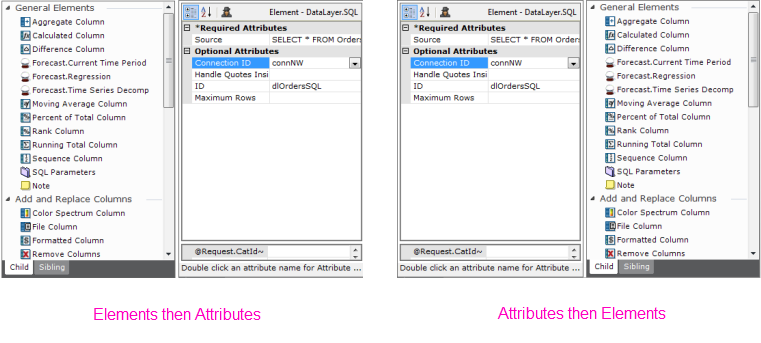
Panels can also be arranged side-by-side, as shown above.
Ribbon Menu
Studio operations can be controlled using the Ribbon Menu at the top of the screen. Here are its tabs and major items:

New Application | Create a new application with the assistance of the New Application wizard. |
Open Application | Open an existing application from the File Explorer, the recent apps list, or a list of apps registered with the local web server. |
New File | Create a new file by selecting a file category. |
Save, Save All, Close | Save the file in the current Workspace editor tab, save all edited files, and close the current application, with a prompt to save any unsaved files. |
Edit Actions, Remark, | Standard editing actions including Cut, Copy, Paste and more. Comment and uncomment elements and rearrange their order. |
| Search/Replace | Search current, or all, definitions and supporting text files, and replace text, if desired. |
Element Navigation, | Navigate to previous or next element in the Element Tree navigation history. Expand or collapse all child elements beneath the selected element. |
Test Actions | Control debugging, and preview a definition in a browser or in a separate "live" window. |

| Themes | Apply the selected Theme to the current report, or to the entire application. |

| Application Deployment | Deploy the application to other servers using the Application Deployment Tool. |
| Application Obfuscation | Render definitions unreadable by humans to prevent tampering and theft using the Application Obfuscation Tool. |
Server Manager | View registered applications and change their Logi Engine versions individually or in bulk. |
| Team Development | Manage built-in Logi source code control with file check-in/out and change history. |
| Database Browser | View schema and basic data samples from databases with connections in _Settings file. |
| Elements/Attributes Panel | Specify the arrangement and order of the Element Toolbox and Attributes panels in Studio. |
| Options | Specify Studio options including file encoding and definition editor colors. |

The Wizards tab appears when an element that has supporting wizards is selected. The number of wizards available varies depending on the selected element.
General Features
Logi Studio provides convenience and efficiency for developers. It includes many features added in direct response to requests from our developer community. General features include:
- Wizards - More than 50 wizards are provided to help you create applications and visualizations, and to accomplish other activities.
- Multiple-Document Editor - The Workspace panel allows multiple files of different file types to be opened simultaneously, including report and process definitions, style sheets, script files, and XML data files. Elements and attribute values can be easily copied between definitions.
- Support File Editing - Studio's internal support file editor provides improved editing and intelligent formatting of the source material based on file type. Features include line numbering, collapsible code regions, and syntax-specific highlighting.
- Global Search and Replace - The editor's Find and Replace feature supports current document and cross-document searching using a variety of criteria.
- Attribute Spy - This feature displays in the element tree, next to all relevant elements, their values for a selected attribute. For example, this feature allows you to quickly see which style class has been assigned to each element.
- Tree-based Element Selection - Child elements can be selected and added to the element tree either from the Element Toolbox panel or by right-clicking a parent element and selecting from the popup menu that appears.
- Intelligent Code and Token Completion - The task of entering tokens in attribute values is simplified by this feature, which dynamically presents selection lists for token types and appropriate identifiers in a drop-down list.
- Attribute Value Selection Lists - Values can be selected from drop-down lists for attributes with discrete sets of value options, such as True/False, Percent/Pixels, etc.
- Color Picker Tool - Attribute color values can be selected from a "color picker" tool, which can be opened from the attribute value.
- Test Parameters Panel - Parameters used in previews and tests remain accessible for easy use in the Test Parameters panel.
- Element Copy/Paste and Drag/Drop - Multiple elements can be selected at once in the element tree and copied, moved, or deleted.
- Query Tools - The Query Builder is a separate dialog box that allows queries to be created from graphic table representations, using drag-and-drop techniques. SQL statements can be extended across multiple lines, allowing more complex statements. In addition, statements can be tested by selecting them and pressing F5; the operation will be limited to just the selected portions of the query statement.
- Attribute Display Order - Element attributes can be viewed listed either in functional groups or sorted alphabetically.
- Database Browser - This handy utility launches from the toolbar and allows browsing of the structure and data in connected databases. It's also a non-modal window, so it can be kept open and referred to it while working with elements and attributes.
- Style Class Selector - This utility, shown as the first option in a the drop-down list of available classes for any Class attribute, appears as a dialog box and displays available classes and previews their effects as each is selected. Classes can also be edited right in place in the dialog box.
- Deployment Tool - Allows you to easily deploy Logi applications by copying their files to local or shared network drives, or using one of three flavors of FTP (regular, SSL, or SSH).
Detailed information about how to use Studio is available in our document Use Studio 11.