Building the Basic Table Structure
As discussed in Working with the Crosstab Filter, the Crosstab Filter element determines the basic structure of the table:

The definition starts with a Crosstab Table element (no attributes except an element ID need be set), a datalayer to retrieve the data, and a Crosstab Filter element to format the data. In the filter attributes shown above, the table will have a label column for the Product Names, be grouped horizontally (crosstab) by Order Year, and the initial values will be the sum of the order Quantity.
A Crosstab Table Label Column element ("colProductName") and a Crosstab Table Value Columns element ("colQuantity") are added to the definition to display the data.
![]() A special token is needed to access the Value column data: @Data.rdCrosstabValue~.
A special token is needed to access the Value column data: @Data.rdCrosstabValue~.
The token identifier uses the reserved word "rdCrosstabValue" and the token is used in the Caption attribute of a Label element beneath the Crosstab Table Value Columns element.
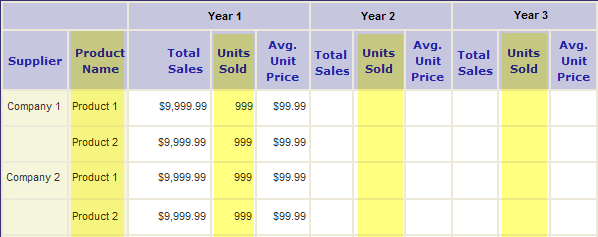
Referring to our crosstab layout model, the seven elements added so far provide the portions highlighted in yellow above.
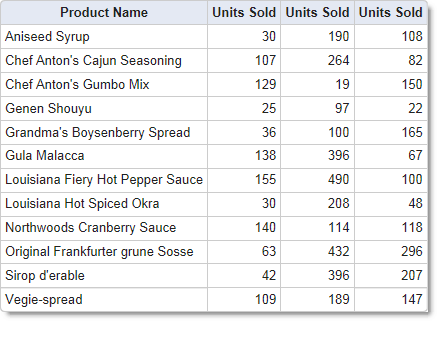
If we preview our definition at this point, the Crosstab Table looks like the example shown above. Now let's add another Label column to display the names of the suppliers.
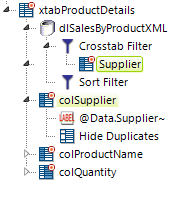
As discussed in Working with the Crosstab Filter, developers can add Extra Crosstab Label Column elements beneath a Crosstab Filter element to add additional columns from the datalayer as Label columns. As shown above, one of these elements is added beneath the Crosstab Filter and set to use the CompanyName datalayer column to create the "Supplier" column. ![]() Extra Crosstab Label Columns are for display only and do not support grouping.
Extra Crosstab Label Columns are for display only and do not support grouping.
A Sort Filter is added to the datalayer and set to sort on the new Supplier column to get things into order by Supplier.
To display the new column, another Crosstab Table Label Column element ("colSupplier") and a Label element to display the data are added. Finally, adding a Hide Duplicates element results in a hierarchical look by hiding the supplier name in consecutive rows.
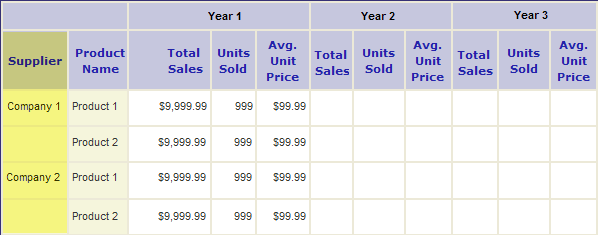
The result is the addition of the Supplier column, highlighted in yellow above in the crosstab layout model.
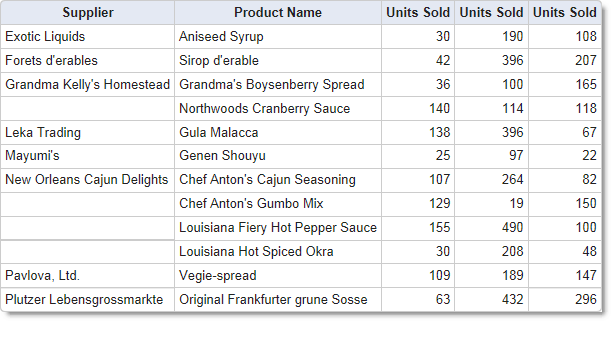
And, in a Preview, the table now looks like the image shown above.
You will need to apply formatting to various elements, such as Crosstab Table Value Columns and Column Cells, to align the data properly. This example uses the ThemeAlignRight style class to do this.
![]() The Secondary Crosstab Label Column element works like the Extra Crosstab Label Column element, except you can use this element to group Value Columns and Label Columns together. For more information, see Working with the Crosstab Filter.
The Secondary Crosstab Label Column element works like the Extra Crosstab Label Column element, except you can use this element to group Value Columns and Label Columns together. For more information, see Working with the Crosstab Filter.