Assigning Classes to Elements
You can assign style classes from the style sheet to elements in your application. The following example assumes this query:
SELECT CategoryID, CategoryName, Description FROM Categories
has been used to produce a report from the Northwind Foods database. Follow along in your application, making adjustments as necessary. These examples assume you've already assigned the CSSExample.css style sheet to your application.
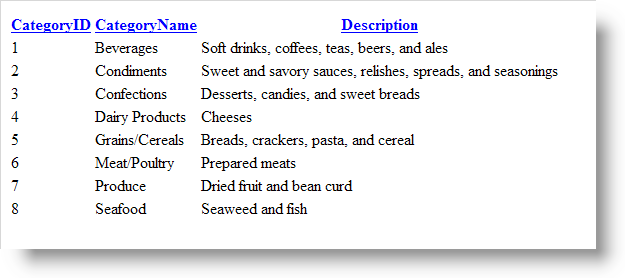
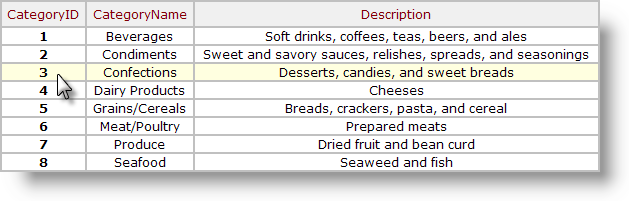
The report output above shows the data returned by the query. It's raw and not very attractive, so let's assign some style classes to improve its appearance.
Elements that can be directly affected by style have a Class attribute. Some may have several class-related attributes depending on the complexity of the element.
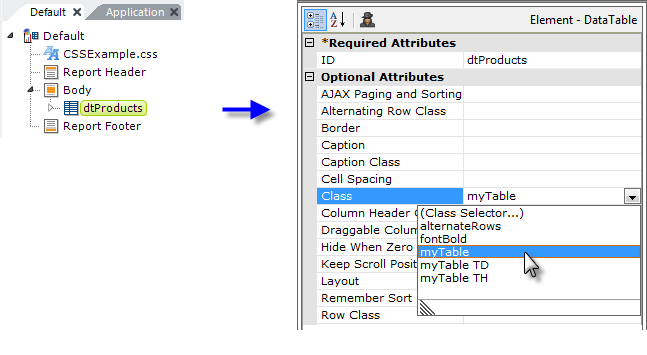
In your report definition, select the Data Table element and, in the Attributes panel, find its Class attribute and, using the drop-down list, select the myTable class, as shown above.
 The list includes all of the classes in your style sheet. It's also possible to manually assign multiple classes, separated by commas or spaces, as a Class attribute value.
Now let's preview the report:

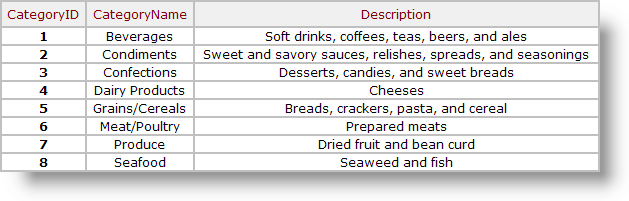
The table, with the style sheet classes applied, is shown above. It looks much better than the raw table! The style sheet has affected font sizes and colors, text alignment, background color, spacing and padding, and borders.
The classes affect everything about the table and its contents, flowing down through the Data Table element and all its child elements. This is the "cascading" effect of Cascading Style Sheets. However, the effects can be overridden by assigning other classes to child elements lower down in the hierarchy. Let's see how that works.
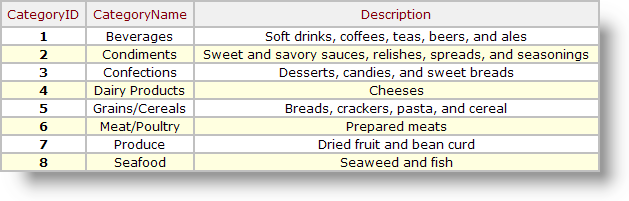
With the myTable class assigned to the table, all the data in all the columns appears in a normal, black font. Let's change the data in the first column, the CategoryID, to be bold-faced as well.

As shown above, select the Data Table Column element for the Category ID and, in its Class attribute, select the fontBold class from the drop-down list.
As you can see above, the class applied to the data column has produced an additive effect, in that column only. We could just as well have assigned the class to the Label element that actually displays the data. By assigning it to the Data Table Column, we applied the affect to all its child elements, which covers situations where you have multiple Labels or other elements in the column.
Create an Alternate Row Class
If you're using a Logi stock theme, it comes with a ThemeAlternatingRow class that you can assign to your Data Table element's Alternating Row Class attribute. If you're not using a theme, or want to create your own class for alternating Data Table rows, the following exercise shows you how to do that. Add a new class to the style sheet and then assign it to the Data Table. The goal is to have every other row in our table look slightly different, which makes it easier to read across many columns.- In Studio's Application panel, double-click and open the CSSExample.css style sheet file.
- In the Workspace editor, add the following CSS class:
.alternateRows {
background-color: LightYellow;
} - Click the Save icon in the toolbar, to save the style sheet changes.
- Click the tab at the top of the Workspace panel to return to your report definition.
- Select the Data Table element and assign your new alternateRows class to the Alternating Row Class attribute.
- Preview the results:
Create Dynamic Row Highlighting
If you're using a stock Logi theme, it automatically applies dynamic row highlighting. However, if you're not using a theme, or want to create your own class for dynamic row highlighting, the following exercise shows you how to do it.
This effect may not work with all browsers (especially older browsers):
- Once again, open your CSSExample.css style sheet file.
- In the Workspace editor, add the following CSS class:
.myTable TR:hover TD {
background-color: LightYellow;
} - Click the Save icon in the toolbar, to save the style sheet changes.
- Click the tab at the top of the Workspace panel to return to your report definition.
- Select the Data Table element and delete the Alternating Row Class attribute value, leaving it blank.
- Preview the results, and pass your mouse cursor over the rows:
As you have seen, style sheets are powerful tools that assist you in creating visually-interesting report presentations. More information about style sheets and Logi applications can be found in and Using Style Sheets.