Embedding the Widget Code in an HTML Page
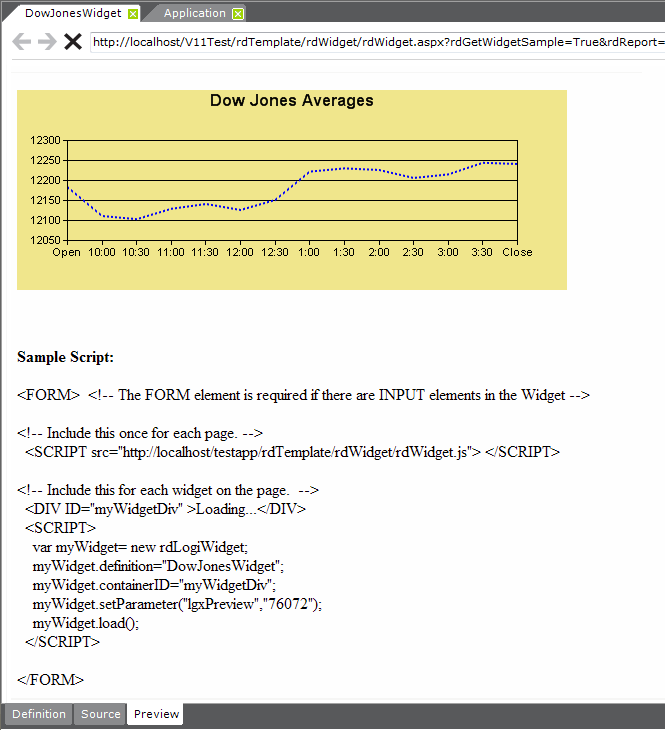
Once your have your widget definition created within Studio, the next step is to Preview it:

As shown above, the widget will be displayed in the Preview tab and, below it, the HTML and Javascript necessary to implement it will be displayed.
You can work with the widget as you would with a regular Logi report, refining and previewing it until satisfied. Debugging links can be turned on and will function as usual. When the widget is ready, preview it and then, right in the Preview tab, select and copy the sample script and paste it into the target external HTML page.
<html>
<head>
<title>Your Daily Stock Tip Sheet</title>
</head><body bgcolor="white" text="black" link="blue" vlink="purple" alink="red">
<p> </p>
<h2>Your Daily Stock Tip Sheet</h2>
<p><font face="Verdana"><span style="font-size:10pt;">The stock market has been somewhat volatile in the past few months and investors should be wary of any easy advice being sold by so-called experts. Wall Street-watchers and those who are keen on the musings of the
Fed Chairman</span></font><br><!-- Include this once for each page. -->
<SCRIPT src="http://localhost/testapp/rdTemplate/rdWidget/rdWidget.js"> </SCRIPT><!-- Include this for each widget on the page. -->
<DIV ID="myWidgetDiv">Loading...</DIV>
<SCRIPT>
var myWidget= new rdLogiWidget;
myWidget.definition="DowJonesWidget";
myWidget.containerID="myWidgetDiv";
myWidget.setParameter("lgxPreview","57952");
myWidget.load();
</SCRIPT><br><font face="Verdana"><span style="font-size:10pt;">know that this volatility is a
wake-up call for high risk investors and regulators alike. Recent developments in European
and Asian markets also reveal that the future will be one that requires vigilance from the savvy inverstor. </span></font><p> </p>
<p> </p>
</body>
</html>
As shown above, the code has been pasted into an HTML page. The example widget does not include any Input elements, so no <FORM> tags are required.

When displayed, as shown above, the widget is embedded in the HTML page and shows the data.
Multiple Widgets on a Page
To add multiple widgets to the page and make them all visible at the same time, you will need separate <DIV> statements in your HTML for each widget. Their scripts should then be combined within the <SCRIPT> tags.
<html>
...(HTML removed for brevity in this exsample)
<!-- Include this once for each page. -->
<SCRIPT src="http://localhost/testapp/rdTemplate/rdWidget/rdWidget.js"> </SCRIPT><!-- Include this for each widget on the page. -->
<DIV ID="myWidgetDiv1">Loading...</DIV>
<BR></BR>
<DIV ID="myWidgetDiv2">Loading...</DIV>
<SCRIPT>
var myWidget1= new rdLogiWidget;
myWidget1.definition="Table";
myWidget1.containerID="myWidgetDiv1";
myWidget1.load();
var myWidget2= new rdLogiWidget;
myWidget2.definition="Charts";
myWidget2.containerID="myWidgetDiv2";
myWidget2.load();
</SCRIPT>...(HTML removed for brevity in this exsample)
</html>
The example above shows the code to include two widgets, one below the other, at the same time on the HTML page (the resulting page is not shown here).
Switching Between Widgets
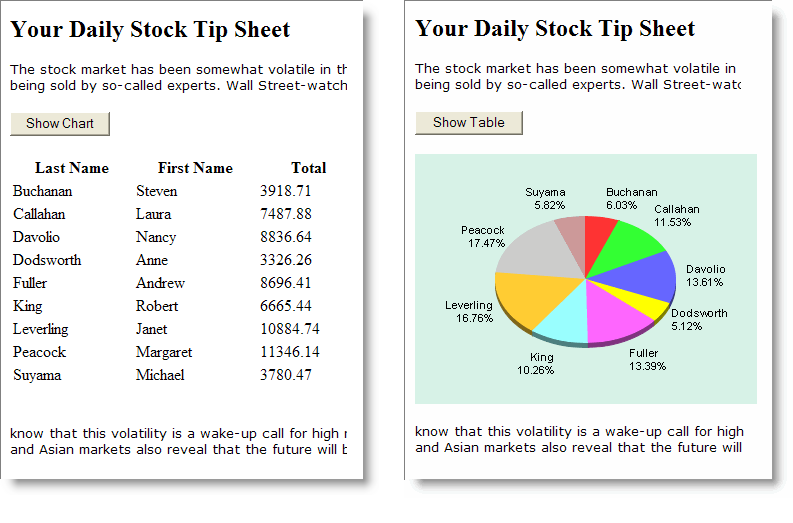
It's also possible to add multiple widgets to a page and display them one-at-a-time, using links or buttons on the widgets themselves. To do this, use Action.Widget and Target.Widget elements in your widget definition, to call the next widget to be shown. You only need to add the script for the first widget to your HTML page; the Action.Widget element will cause other widgets to be displayed in the same <DIV> as the first one.

Only one of the two widgets shown above appears at a time. They alternate being visible when the button is clicked.
<SCRIPT>
var myWidget1= new rdLogiWidget;
myWidget1.serverURL = "http://server1/widgetFarm";
myWidget1.definition="Table";
myWidget1.containerID="myWidgetDiv1";
myWidget1.load();
var myWidget2= new rdLogiWidget;
myWidget2.serverURL = "http://server2/widgetsRUS";
myWidget2.definition="Charts";
myWidget2.containerID="myWidgetDiv2";
myWidget2.load();
</SCRIPT>
If multiple widgets on the page are from different servers, be sure to include the server URLs, shown above in red, by setting the serverURL property.