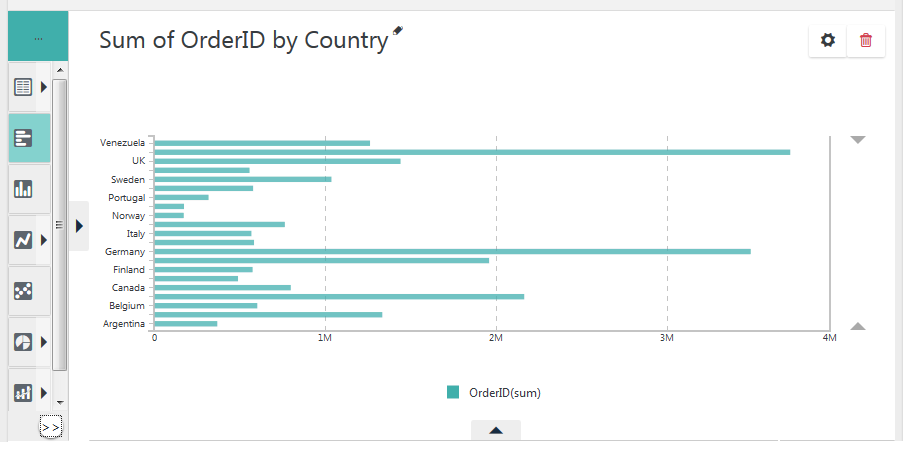
Using the Thinkspace Element
Logi Platform Services features, such as SuperWidgets, provide a seamless visualization and dashboard creation capability and is highly recommended. However, as a developer, you can also implement similar functionality using elements such as the Thinkspace.
The Thinkspace element has a user-interface, a built-in "recommendation engine", and automatic data grouping capabilities that help users discover insights in their data. The data is defined by a query in a child datalayer. It allows users to:
- Filter and aggregate their data in a table.
- Create charts with drag and drop simplicity. The recommendation engine automatically creates a best-fit chart while also allowing users to select their own visualizations.
- Benefit from binning capabilities that group data in easy-to-understand bins, enhancing comprehension of the data set.
- Add visualizations created in the Thinkspace to a dashboard or visual gallery for further use and sharing.

An example of the Thinkspace in use is shown above. The element offers a rich user-interface with a lot of functionality, and requires very little configuration from developers (in fact, it has very few configuration options). Earlier versions may look slightly different.
Technically, it's a not a "super-element" but it has a lot of the same qualities.
![]() The settings and changes a user makes while working with the Thinkspace are not automatically saved between sessions. It's possible to build the application so that users have opportunities to save their data and this is discussed in later sections.
The settings and changes a user makes while working with the Thinkspace are not automatically saved between sessions. It's possible to build the application so that users have opportunities to save their data and this is discussed in later sections.

In the example shown above, the Thinkspace element has been added to a report definition. It's configured by giving it a unique element ID and specifying the ID of the Connection.Logi Application Service element added to your _Settings definition earlier.
Attributes
The Thinkspace element has the following attributes:
| Attribute | Description |
|---|---|
| ID | (Required) Specifies an element identifier, unique within the definition. |
| Logi Application Service ID | (Required) The ID of a Connection.Logi Application Service element, in the _Settings definition. |
| Caption | Specifies a Caption to be displayed for the element. |
| Height | Specifies the height of the element, in pixels. If left blank, the element will be automatically sized to the height of its content. |
| Min Width Per Column | Specifies a minimum width, in pixels, for the data columns displayed. |
| Security Right ID | If entered, controls access to this element via Logi security. Supply the ID of a Right defined in the application's settings/security section. Only users that have a Role referenced in the Right will be able to see the element. (Be careful - when the Right is not defined in the settings, the element is visible.) Multiple Right IDs, separated by commas may be entered. In this case, the user will see the element if he has access to any one of the Rights. |
| Width | Specifies the width of the element, in pixels. If left blank, the element will be automatically sized to the width of its content. |
Retrieving Data for the Thinkspace
To retrieve data for the Thinkspace, you use a special datalayer and the Connection.JDBC element discussed earlier:

Add a DataLayer.Dataview element beneath the Thinkspace element, as shown above. Configure it to use the Connection.JDBC element from the _Settings definition and provide a valid SQL query for it.
Once the data is retrieved, all columns in the datalayer will be displayed in the Thinkspace. The column header text displayed and the initial column order will match that found in the datalayer.

If you want control over the column order, header text, and security restrictions, you can use Thinkspace Column elements, as shown above. Add one for every column you want displayed and set their attributes as desired. Other columns not represented by these elements will not be displayed.