Build a Data Table Definition
Now that we have a menu, let's build a few Mobile Report definitions for our menu to select. The first of these will display a data table.
-
Start by creating a new definition and duplicating the initial steps
used for the mDefault definition: create a new Mobile Report definition,
add a Style element, a centering Division, title text, and a second
Division to left-align the table contents.
 A quick way to do this would be to right-click and copy mDefault
in the Application panel, then select the Mobile Reports folder,
right-click and paste the copied definition, and rename it. Then
open it and delete the dtMenu element and its children.
Make sure the name of your new definition agrees with its entry in the
menu data (static or otherwise) in the mDefault definition, so tapping
the right menu item will redirect to this report.

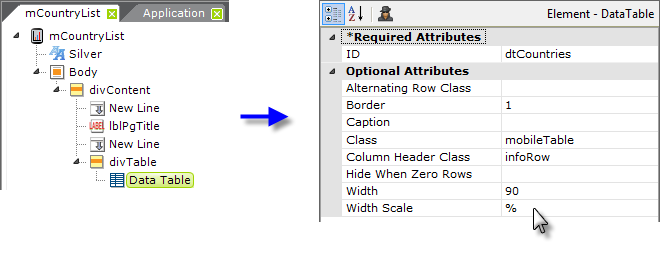
- Your definition should look something like the example shown above. Next add a Data Table element beneath the second Division, and set its attributes a shown (some blank attributes have been removed to save space). This data table is only going to have two columns and will fit horizontally on the mobile device screen. However, if a table has many columns, users will be able to use flick or drag gestures to scroll the table sideways to see all the columns.

-
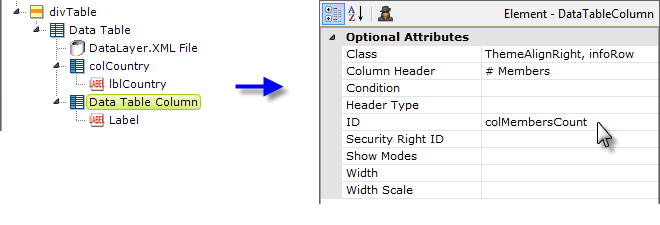
Add an appropriate datalayer element and two sets of
Data Table Column and Label elements, as usual, to display
the data.
 This data table does use Column Headers and
that the columns use both a theme class and a supplemental
stylesheet class. In the Label elements, use @Data tokens to reference
the datalayer data.

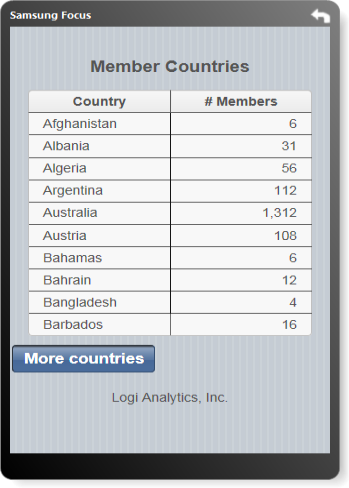
- Next, add one of the specialized Mobile Reporting elements, Append Paging, beneath the data table and set its attributes as shown above. The table will display ten rows and a button, with the caption "More countries" just below the table. When the user taps the button, the next ten rows will be appended to the table. Each tap will append ten more rows. The supplemental stylesheet includes a class assigned by IDto the "myAppendPaging" element ID, so if you choose to give this element a different ID, make sure you change it in the stylesheet, too.
-
Finally, finish up by adding a Label element as a footer, if
desired, as you did in the mDefault definition.

Preview your definition and it should look similar to the example above. You can clickthe "More countries" button to see how it works. Use your mobile device to browse to the mDefault definition, then tap the menu to navigate to your mobile data table definition.