Deploying Logi Applications
After you've developed your Logi application on your development machine, it's time to deploy it to your production server. There are several ways to this, and they're all discussed in Deploy a Logi Application.
![]() If your application uses Discovery 3.0+ and you wish to preserve the Dataviews, visualizations, and other objects created during development, or if you're moving your application to another server and want to preserve the same objects, you'll also need to migratethe Platform Database. For more information, see Deploy a Logi Application.
If your application uses Discovery 3.0+ and you wish to preserve the Dataviews, visualizations, and other objects created during development, or if you're moving your application to another server and want to preserve the same objects, you'll also need to migratethe Platform Database. For more information, see Deploy a Logi Application.
The easiest of these methods is to use Studio's Application Deployment tool. Before you use it, however, ensure that:
- Logi Server is installed on your production server. On a development machine you generally install both Logi Studio and Logi Server and you may wish to install them both on a production server, but it's not required and most developers only install Logi Server there.
- The .NET framework, or Oracle JDK orOpenJDK 8, 11, or 12, 13, or 14 has been installed on the production server.
 Oracle has changed its Java usage policies - see Java Usage Policy for important information.
 - You have an appropriate Logi license for the production server.
- You have the appropriate security credentials for writing to the production server.
- The production server has connectivity to the database server or other datasources needed by your application, and you know the security credentials they require.
- You know any storage conventions for folder locations on the production
server that you need to observe (such as, "all applications must be installed on
the D: drive, not the C: drive")?
Studio's Application Deployment tool is capable of copying all or part of your application to the production server, using either file system copy commands to local or shared network drives, or one of three flavors of FTP (standard, SSL, or SSH). In Studio, the details of each operation are called a "deployment target" and they can be saved for later reuse.
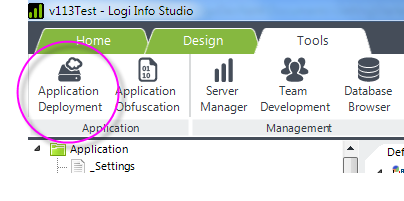
The Application Deployment tool is started in Studio by selecting it from the Main Menu Tools tab, as shown above.
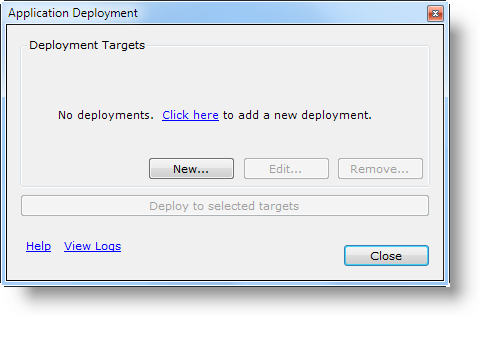
If no deployments have been defined, the dialog box shown above appears. Click the link or New... to define your first deployment target.
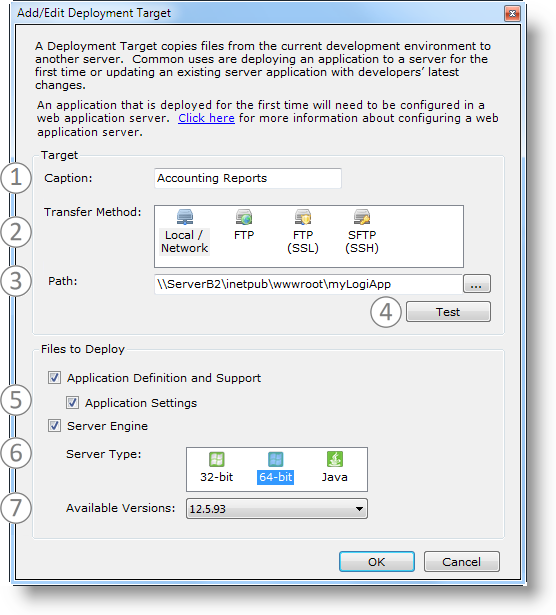
The Add/Edit Deployment Target dialog box contains the following:
- Caption: Enter an arbitrary name for the deployment, for easy future reference.
- Transfer Method: Select copy to Local or Network drive, FTP, FTP (SSL), or FTP (SSH).
- Path: If Local/Network was selected in #2, enter the UNC file path to the destination app folder on the production server. For example:
\\myWebServer\myLogiApp
If an FTP variant was selected in #2, enter the FTP protocol URL to the destination app folder and arguments. Examples:
For FTP & FTP SSL: ftp://myWebServer/myLogiApp, ftp://myWebServer.com:8082/projects/myLogiApp
For FTP SSH: sftp://test.myServer.local//opt/tomcat/webapps/myLogiApp
Note use of two forward slashes after server name. Also you'll have to create the target application folder and grant permissions, as described in Logi Java Application Folder Permissions, because the application is not being deployed to a user's home directory.
If necessary, you'll be prompted to supply a user ID and a password when the tool run; do not include them in the URL. - Test: This button can be used to ensure connectivity to the destination.
- File Types: Select the file types that are to be deployed. Files are overwritten at the destination without warning!
- Server Type: If "Server Engine" was selected in #5, these options are shown. Select the appropriate server type.
- AvailableVersions: If "Server Engine" was selected in #5, available server engine versions are shown. Select the appropriate version.
If the destination requires a user ID and password in order to access it, when you click the Test button, you'll be prompted for login credentials. If the credentials are successfully authenticated, the user ID will automatically be saved with the deployment target details and, optionally, the password as well.
Once a deployment target has been defined, it appears in a list...
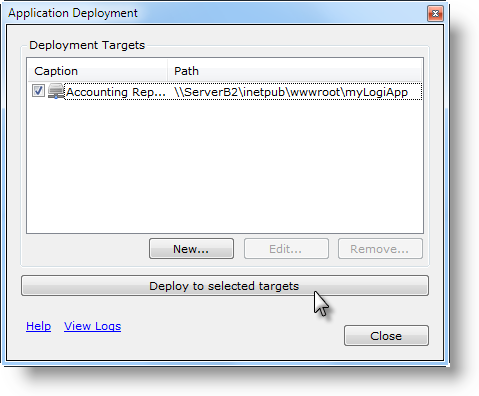
...as shown above, where it can be managed and edited. To run a deployment, check its check box and click the Deploy button. If multiple deployments are selected, they'll run consecutively.
The connection with the destination server will be established and then the files will be deployed to it.
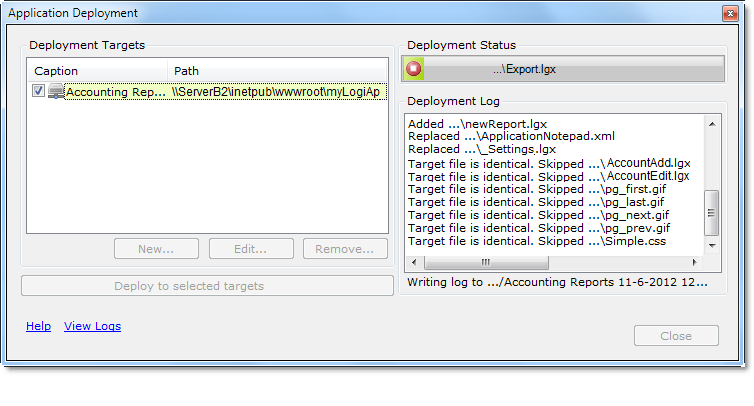
The Deployment dialog box will expand to display the results of the process, as shown above. The running log indicates which files are added, replaced, or skipped. Deployment process logs are created in the rdDeployment folder beneath each Logi application folder as text files and are accessible through the View Logs link.
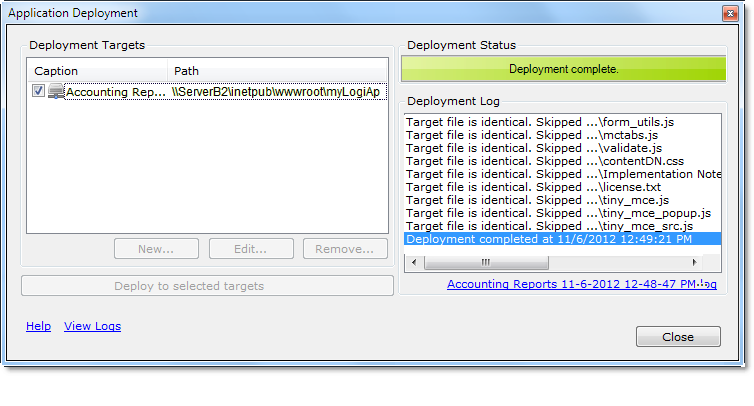
Finally, the deployment will complete and a direct link to its log file will be displayed.
![]() It's very important that you understand that copying the files, using the Deployment tool, does not register the application with a web server on the target machine. So, after a first-time deployment is run, you must complete this registration on the target machine using Logi Studio, Server Manager (for .NET applications only), or the web server's management tools.
It's very important that you understand that copying the files, using the Deployment tool, does not register the application with a web server on the target machine. So, after a first-time deployment is run, you must complete this registration on the target machine using Logi Studio, Server Manager (for .NET applications only), or the web server's management tools.