Studio Wizards
Studio includes "wizards", or automated procedures, which walk you, step-by-step, through complex tasks, from creating new applications to building charts. They save a lot of keystrokes and mouse clicks and provide repeatable, consistent productivity. Wizards can be invoked in several ways.
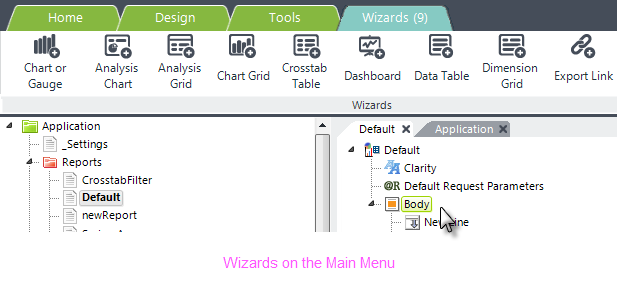
When you select an element that has wizard support in the Element Tree, a special tab will appear on the main menu, containing items for the appropriate wizards, a shown above.
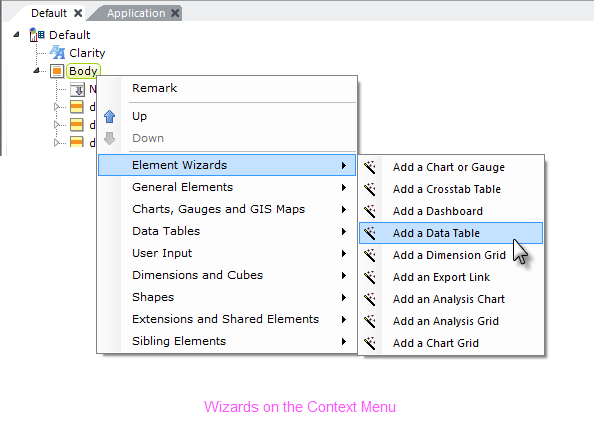
Element wizards are also available in the context menus that pop-up when you right-click an element, as shown above. As in the main menu, their availability depends on which element is selected in the definition. The wizards shown above are specific to the Body element.
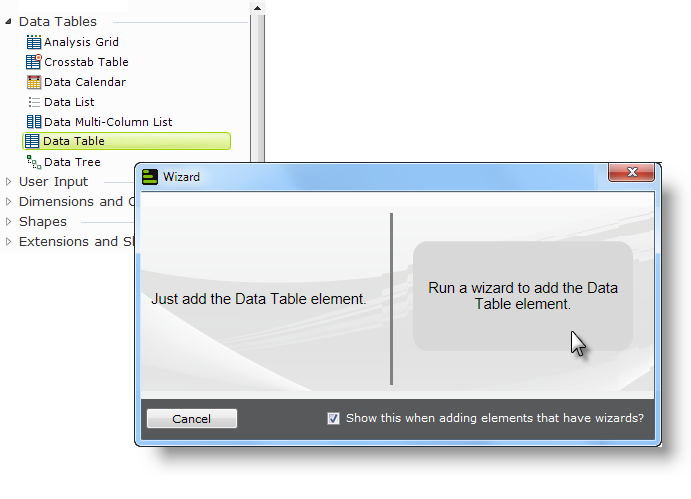
By default, if you double-click an element in the Element Toolbox that has a wizard associated with it, a dialog box like the one shown above will be displayed. It offers you the choice of inserting the element into the Element Tree directly (and configuring it manually) or running the wizard (which assists in configuring it). This behavior can be changed by unchecking the "Show this..." check box, in which case elements will just be inserted in the future. You can also control this behavior using
the Tools![]() Options menu option.
Options menu option.
Wizards are also capable of validating your definition and will let you know, for example, if you're missing an element that needs to be provided before the wizard can proceed.
Studio includes other kinds of wizards as well, such as the Master Report Layout wizard. This wizard, available on the main menu's Design tab, let's you select the components and layout for a master report that can be used to provide a framework for other reports, and then builds the definition for you. For more information, see Master Reports.
Wizards in Action
Studio's wizards are too numerous to document individually (there are more than 50!) but let's look at a representative example of a wizard in action:
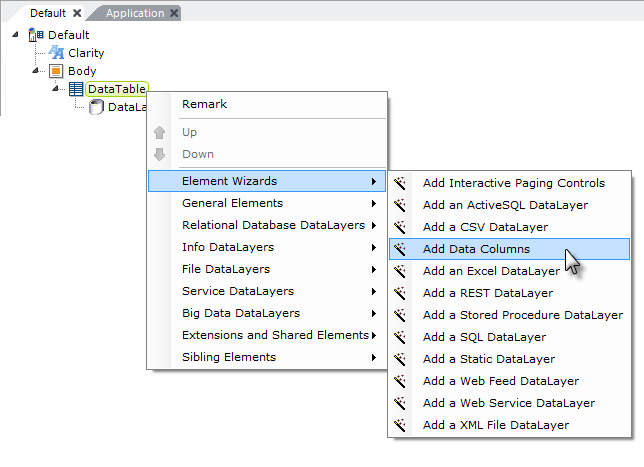
In the definition shown above, Data Table and DataLayer.SQL elements have been added beneath the Body element, and the datalayer has been configured with a valid SQL query. Right-clicking the data table displays its context menu; let's let the Element Wizard add data columns to the table by selecting the Add Data Columns wizard.
![]() If the query is invalid or contains a typo, or you try this with a datasource that can't return a schema, the wizard will fail. In such a case, the wizard will display an error message that should assist you in correcting the problem.
If the query is invalid or contains a typo, or you try this with a datasource that can't return a schema, the wizard will fail. In such a case, the wizard will display an error message that should assist you in correcting the problem.
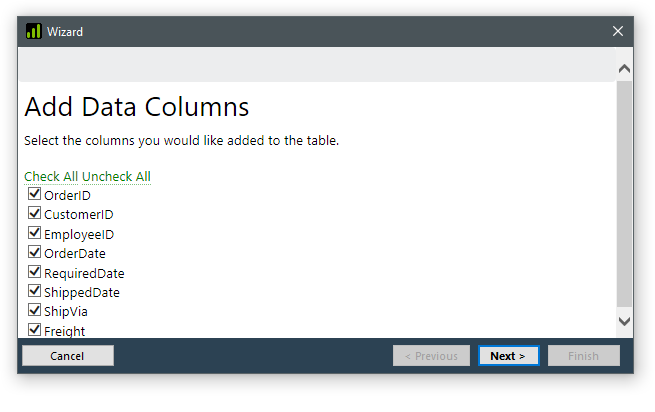
As shown above, the wizard presents a dialog box displaying all of the columns that the SQL query returned. First, we'll click the Uncheck All link, then individually check the boxes for the first four columns, so that the selections look like the example shown above. Then we'll click Next.
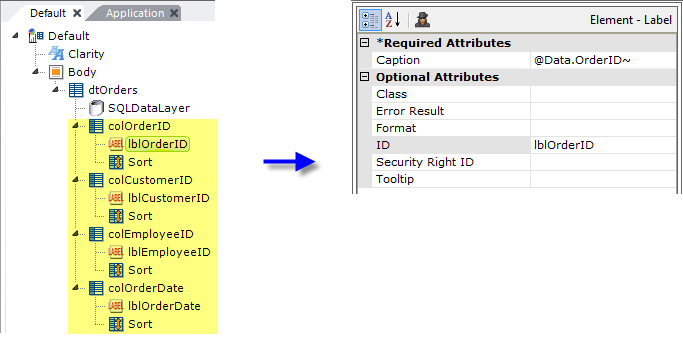
The wizard will insert, and configure, all of the elements necessary for the data table columns we selected, as shown above.
Studio's wizards are a great resource for configuring elements, such as charts, that have a large number of configuration choices. For example, you could use the Add a Chart wizard to get the basic chart set up for you and then you could customize it from there.