Connecting to Applications
Logi DataHub is capable of connecting to and retrieving the data stored by a variety of commercial applications. This topic presents examples of how to create connections to them.
- Create a New Data Source
- Application Source Details:
- Financial Accounts (OFX)
- FreshBooks
- Google Analytics
- Google Spreadsheets
- HubSpot
- Marketo
- Microsoft Dynamics CRM on Premise
- Microsoft Dynamics CRM Online
- Microsoft Dynamics GP
- NetSuite
- OData
- QuickBooks on Premise
- QuickBooks Online
- QuickBooks POS
- Salesforce
- SAP Netweaver
- Managing Data Sources
Connections to standalone databases are discussed in Connecting to Databases.
Create a New Data Source
In DataHub, a connection to data is called a "Source" and can be an application, database, or file connection. In this topic, we'll explain how to create a new application Source. There are multiple paths to the Add Source dialog box, including:
- Sources menu option
 Create New Source.
 - Dataviews menu option
 Create New Dataview
  From Source tab
 Add New Source
The Add Source dialog box will appear; its fields will vary depending on the data provider chosen:
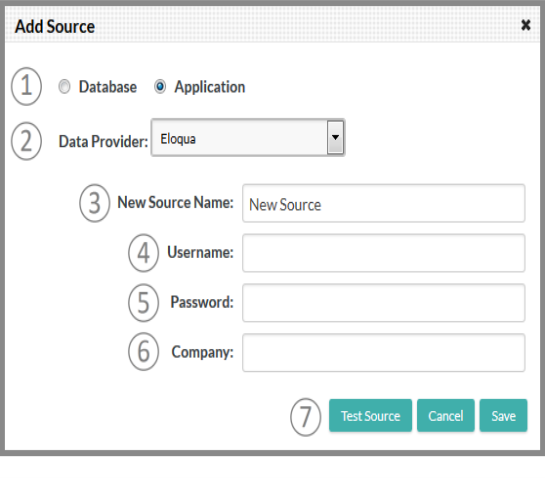
Select or provide the required information, as follows:
- Application - Select the Application radio button.
- Data Provider - Select the desired application. The dialog box fields will change with each selection.
The first nine application options have specific data providers associated with them and these are shipped with DataHub. You must supply an ADO.NET connection string for those applications with an asterisk by their names. See the additional discussion of connection strings below.
- New Source Name - Give the source an arbitrary name for easy recognition later.
- User and Password - Enter the credentials required to access the application.
- Company - Enter any other information required by the target application.
- Visibility - Select the security settings to be applied to the connection: Only Me or Everyone. The user who creates a connection is the manager of the connection and may choose the connection sharing options.
- Test Source - This action will attempt to make the connection specified and provide a status message. In addition to indicating either success or failure, any existing Source with the exact same specifications will be identified so you can decide whether to use it instead or proceed to save your new Source.
Click Save to save your new Source. Repeat as necessary to create the Sources you need.
Connection Strings
A connection string is a series of option=value strings separated by semicolons. If a connection string property value has special characters such as semicolons, single quotes, spaces, etc., then you must enclose the value in either single or double quotes. Connection options are case insensitive unless otherwise noted.
The ConnectionStrings.com web site is an excellent source of connection string examples.
Application Source Details
This section provides the Source details, and helpful links, for each supported application.
Amazon Dynamo DB
The connection to Dynamo DB is made using your AccessKey, SecretKey, and optionally your Domain and Region. Your AccessKey and SecretKey can be obtained on the security credentials page for your Amazon Web Services account. Your Region will be displayed in the upper left-hand corner of the page when you are logged into Dynamo DB.
For additional information about the Amazon Dynamo DB provider, click here.
Eloqua
The Add Source dialog box configuration and fields for Eloqua are shown in the previous section.
Selecting Facebook as the data provider will result in the display of these fields:
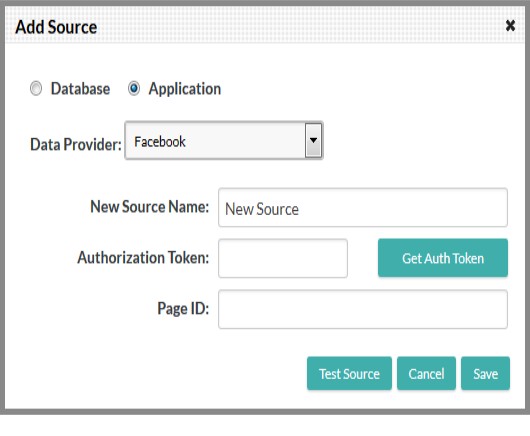
Click Get Auth Token to login to Facebook and copy your authorization token. You'll need to have Platform access turned on in Facebook to do this and you'll be prompted to enable it during this process if it's not.
The Page ID is the unique identifier of the Facebook page whose statistics you'd like to track. You may need to look it up via online tools or the page URL in Facebook. This web page explains how to find it, or a quick Google search for "Facebook Page ID" will lead you to several other sources.
Financial Accounts (OFX)
To specify a location for the database where the table, view, and stored procedures are located, set the Location property in the connection string. In addition you must also set the User and Password properties.
For additional information about the Financial Accounts provider, click here.
FreshBooks
To specify a location to the database where the tables, views, and stored procedures are located, set the Location property in the connection string. In addition, you must also set the CompanyName property.
For additional information about the FreshBooks provider, click here.
Google Analytics
Selecting Google Analytics as the data provider will result in the display of these fields:
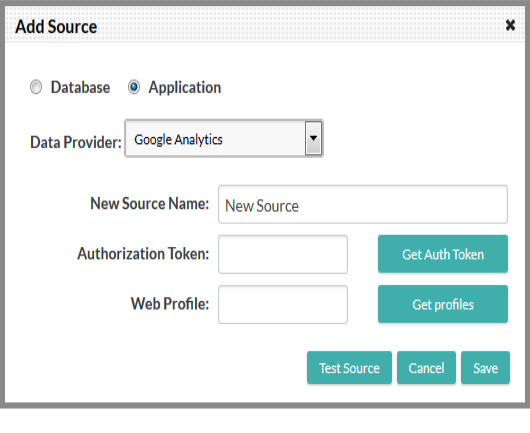
Click Get Auth Token and log into Google Analytics using your credentials. Copy and paste the token into the field provided.
Once you've provided a token, you'll need to select the Web Profile that will provide the data you are interested in. To do that, click Get Profiles to populate a list of web profiles and select one from the list.
Google Spreadsheets
To specify a location to the database where the tables, views and stored procedures are located, set the Location property in the connection string. In addition, you must also set the User and Password, or OAuthAccessToken properties.
For additional information about the Google Spreadsheets provider, click here.
HubSpot
Selecting HubSpot as the data provider will result in the display of these fields:
You'll need to enter your HubID. This web page can help you find it.
And you'll also need to provide an Authorization Token. Click Get Auth Token and log into HubSpot. Copy and paste the token into the field provided.
Marketo
Selecting Marketo as the data provider will result in the display of these fields:
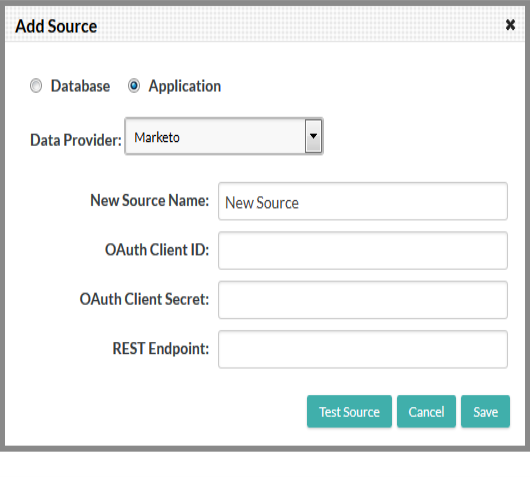
You'll need to enter User ID, Encryption Key, and SOAP Endpoint values in the fields provided in order to access to the data.
Microsoft Dynamics CRM on Premise
To specify a location to the database where the tables, views, and stored procedures are located, set the Location property in the connection string. In addition, you must set the User, Password, and Url properties.
For additional information about the Microsoft Dynamics CRM on Premise provider, click here.
Microsoft Dynamics CRM Online
Selecting Microsoft Dynamics CRM Online as the data provider will result in the display of these fields:
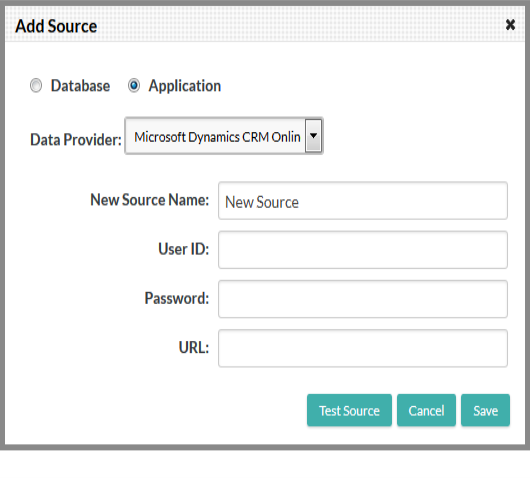
You'll need to enter your User ID and Password credentials that grant access to Microsoft Dynamics CRM Online. Enter the URL of the application that contains the data you want to work with.
Microsoft Dynamics GP
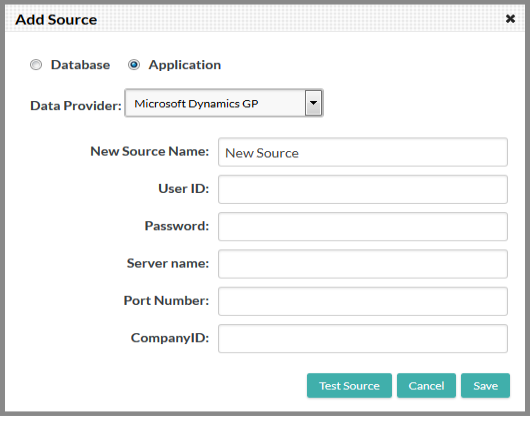
To specify a location to the database where the tables, views, and stored procedures are located, set the Location property in the connection string. You must also supply the required CompanyId, Url, User, and Password properties.
For additional information about the Microsoft Dynamics GP provider, click here.
NetSuite
To specify where the table, view, and stored procedures of the database are located, set the Location property in the connection string. In addition, you must also set the User, Password, and AccountId properties.
For additional information about the NetSuite provider, click here.
OData
You must set the User, Password, and URL properties in the connection string.
For additional information about the OData provider, click here.
QuickBooks on Premise
To specify a location to the database where the tables, views, and stored procedures are located, set the Location property in the connection string. In addition, if QuickBooks is not installed on the local machine and you're using the QuickBooks Remote Connector, you must set the User, Password, and URL properties.
For additional information about the QuickBooks on Premise provider, click here.
QuickBooks Online
Selecting QuickBooks Online as the data provider will result in the display of these fields:
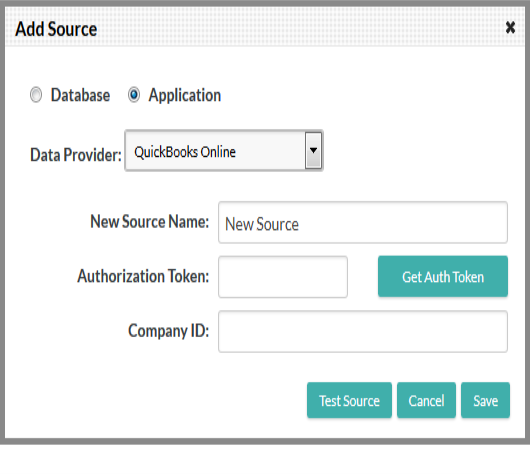
You'll need to provide an Authorization Token. Click Get Auth Token and log into QuickBooks Online using your credentials. Copy and paste your authorization token into the field provided. Enter the Company ID for the organization that contains the data you want to use.
QuickBooks POS
To specify a location to the database where the table, view, and stored procedures are located, set the Location property in the connection string.
For additional information about the QuickBooks POS provider, click here.
Salesforce
Selecting Salesforce as the data provider will result in the display of these fields:
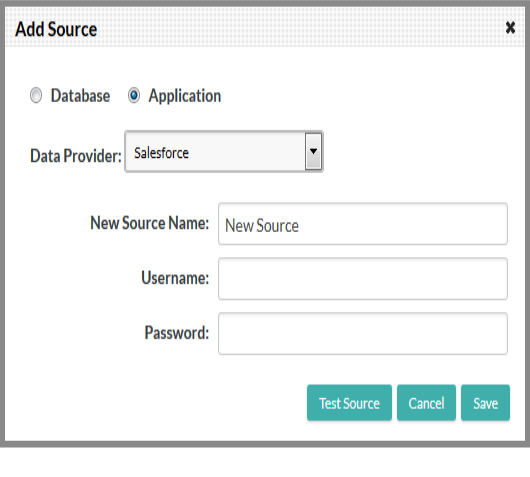
Enter the Username and Password for the Salesforce account whose data you want to use.
SAP Netweaver
To specify a location to the database where the tables, views and stored procedures are located, set the Location property in the connection string. In most cases, you'll also need to set the User, Password, ConnectionType, Client, and SystemNumber properties.
For additional information about the SAP Netweaver provider, click here.
Selecting Twitter as the data provider will result in the display of these fields:
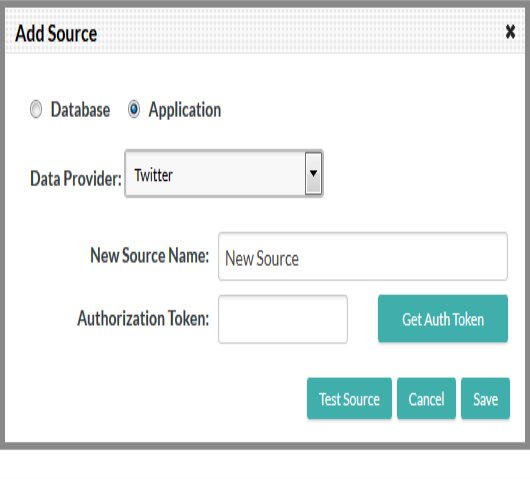
You'll need to provide an Authorization Token. Click Get Auth Token and log into Twitter using your credentials. Copy and paste the authorization token into the field provided.
Managing Data Sources
As you create Sources, they're represented in the Sources page with graphic "pills":
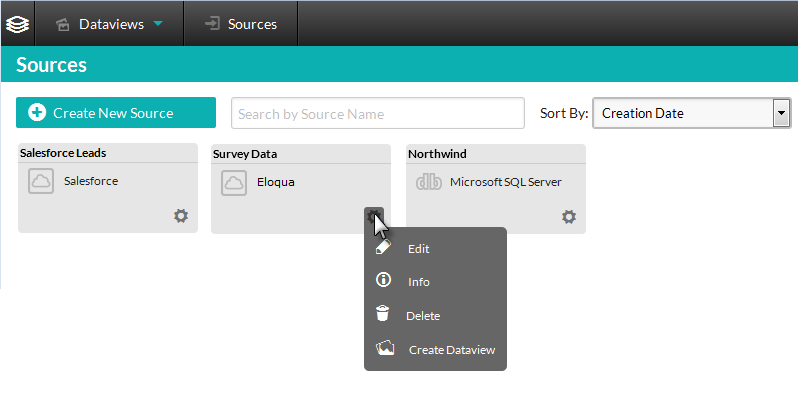
The collection of pills can be searched and filtered using the provided controls.
Each pill displays the Source name and application type, as shown above, and includes a "gear" icon. Hovering your mouse cursor over the icon displays a menu of management actions.
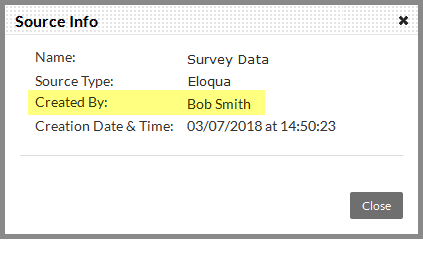
The Info menu option allows you to see, among other details, who created the Source, as shown above. This can be helpful if the Source has been shared with you by another user. The Delete option will only be included if you're the user who created the Source.
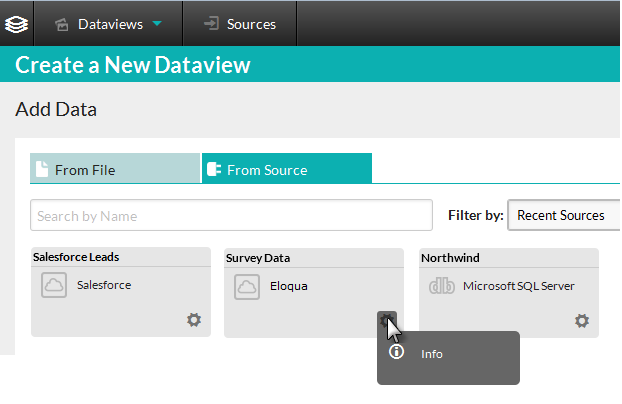
Source pills are also visible in the Create a New Dataview page, under the From Source tab, as shown above. The gear icon, however, only displays an information option from this page.