Crosstab Wizard
The Crosstab Wizard guides you through the process of creating a crosstab. It contains the following screens:
Back
Returns to the previous tab.
Next
Goes to the next tab.
Finish
Creates the crosstab and closes the wizard.
Cancel
Closes the wizard without creating a crosstab.
Help
Displays the help document about this feature.
Data
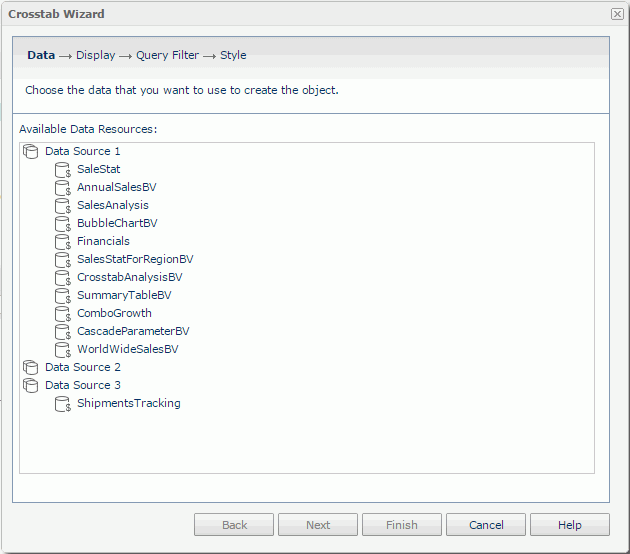
Specifies the business view to use to create the crosstab. This screen is hidden when there is only one business view in the current catalog. See the screen.
Available Data Resources
Lists all the available business views in the current catalog, with which you can create the crosstab.
Display
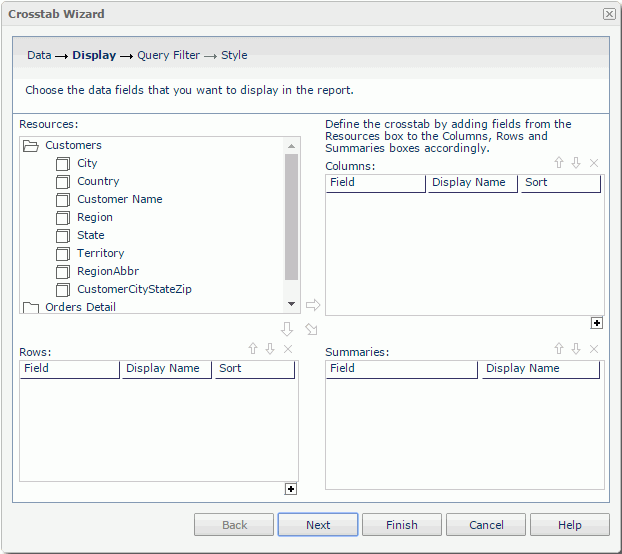
Specifies the fields to be displayed in the crosstab. See the screen.
Resources
Displays the view elements in the selected business view. Select one non-folder resource each time and then select a proper arrow button to add it into the corresponding box.

Adds the selected group object  to be displayed on the columns of the crosstab.

Adds the selected group object  to be displayed on the rows of the crosstab.

Adds the selected aggregation object  to be the aggregate field of the crosstab.
Columns/Rows
- Field
Lists the group objects that will be displayed on the columns/rows of the crosstab. - Display Name
Specifies the display names of the added group objects. You can select the cells to edit them if required. - Sort
Specifies the sort order of the group objects. 
Adds a column/row compound group.
Summaries
- Field
Lists the aggregation objects that will be the aggregate fields of the crosstab. - Display Name
Specifies the display names of the aggregation objects. You can select the cells to edit them if required.

Moves the selected field or compound group one step up. For fields in a compound group, their order can be changed within the current group only.

Moves the selected field or compound group one step down. For fields in a compound group, their order can be changed within the current group only.

Removes the selected field or compound group that is not required from the crosstab.
Query Filter
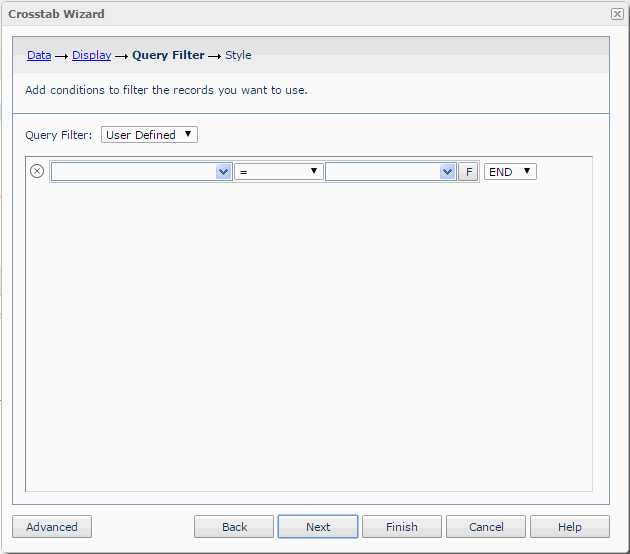
Specifies the filter which you want to apply to the selected business view. See the screen.
In this screen, all the predefined filters of the business view are listed in the Query Filter drop-down list. You can choose one of them to apply. If you prefer to define a filter on your own, select User-Defined from the drop-down list, and then define it according to your requirements.
If the selected business view contains parameters, you would be prompted with the Enter Parameter Values dialog to specify values to the parameters before the Query Filter screen is displayed.
For details about options in the screen, refer to Query Filter dialog.
Style
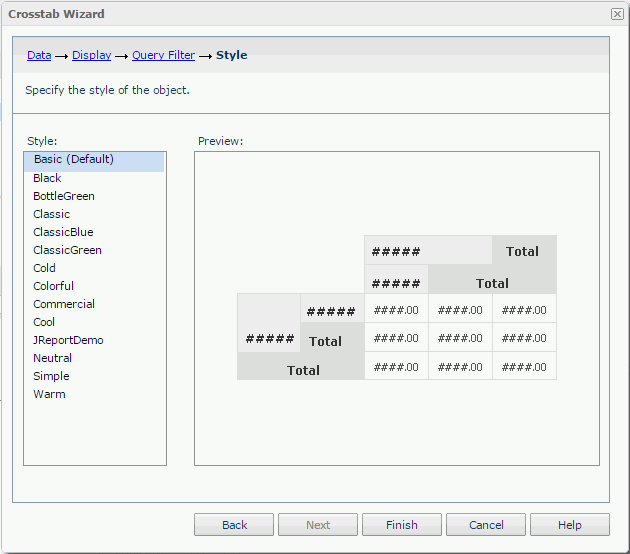
Specifies the style of the crosstab. This screen is hidden when there is only one style available to be applied to the crosstab. See the screen.
Style
Lists all the available styles for you to select from.
Inherit Style
Specifies to take the style of the parent component. The option is available only when you specify to insert the crosstab into a banded object.
Preview
Shows a preview of the selected style.
 Previous Topic
 Back to top


