Windows IIS Configuration
When Logi Studio "registers" a new application with the Internet Information Services (IIS) web server under Windows, it attempts to complete a number of configuration activities to ensure that the application will run correctly. This document provides additional information describing those activities and instructions covering how to complete some of them manually. Topics include:
- Studio's Configuration Steps
- Start the Default Web Site
- Manually Create an IIS6 Virtual Directory
- Manually Create an IIS7 Virtual Directory
- Create an IIS7 Classic Application Pool
- Enable Web Service Extensions
Studio's Configuration Steps
Logi Studio attempts to register a Logi application with the IIS web server under three circumstances: when you create a new application using Studio's New Application wizard, when you click the Register link in Studio's Workspace Application tab, and when you download a DevNet Sample application.

You must be logged-in with an account that has administrator privileges at the time Studio attempts the registration; admin privileges are required in order to create and configure an IIS virtual directory.
Logi applications are registered in IIS as a virtual directory. A virtual directory equates a URL with the physical location of application files and folders on the file system. Logi applications, like other web applications registered in IIS, are accessible from a web browser using the virtual path. Studio configures Logi applications under the Default Web Site section of IIS.
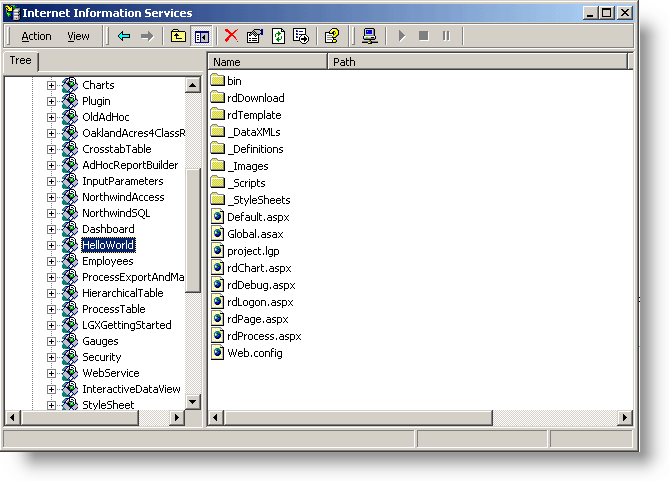
As shown above, in the IIS Manager tool, virtual directories are listed on the left. Removing a virtual directory from the list does not remove the physical application directory or files from the disk.
Studio's registration process includes the following steps:
- If the appropriate version of the .NET framework is not present, it will be installed, with your consent, and configured for the web server.
- If it's not already running, the Default Web Site will be started.
- A new virtual directory will be created for the new Logi application folder.
- The virtual directory will have its .NET version set appropriately.
- The Windows account "Everyone" will be given Full Control access permissions to the standard Logi application folders rdDataCache and rdDownload in the virtual directory.
- (For IIS 7): A "Classic" Application Pool will be created if it doesn't exist.
- (For IIS 7, pre-v10.0.385): The application pool's Managed Pipeline Mode will be configured as Classic mode.
- (For IIS 7, v10.0.385+): The application pool's Managed Pipeline Mode will be configured as Integrated mode.
- (For IIS 7+, v11.0.518+): Application Pools that use .NET 4.0 are required. If such an application pool doesn't exist, Studio will generate a warning when you upgrade an existing Logi application. When you create a new application, Studio will create a new application pool, named "Logi Info .Net v4.0", and will assign the application to it.
- (Windows Server 2003 only) If not already enabled, the ASP.NET will be enabled in Web Service Extensions.
The following sections provide instruction for accomplishing some of these tasks manually, in case a situation occurs in which this is necessary, or in case developers which to ensure that the correct configuration did in fact occur.
![]() In particular, if you have renamed, replaced, or disabled the "Default Web Site" that's created when IIS is installed, Studio's New Application wizard and Registration tool will fail to complete application registration and you will need to do it manually, as described below.
In particular, if you have renamed, replaced, or disabled the "Default Web Site" that's created when IIS is installed, Studio's New Application wizard and Registration tool will fail to complete application registration and you will need to do it manually, as described below.
Start the Default Web Site
To start the IIS "Default Web Site", open the IIS Management Tool:
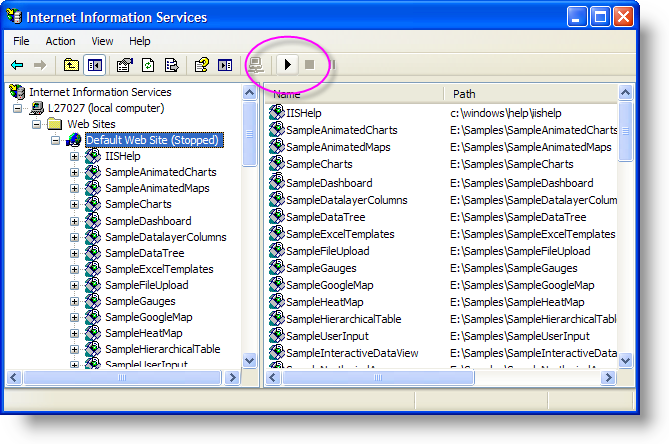
As shown in the IIS6 example above, locate and select the Default Web Site. To start the site, if it's stopped, click the Start button in the toolbar, which is circled above. Or, you can right-click the web site entry and start or stop it from the pop-up context menu that appears.
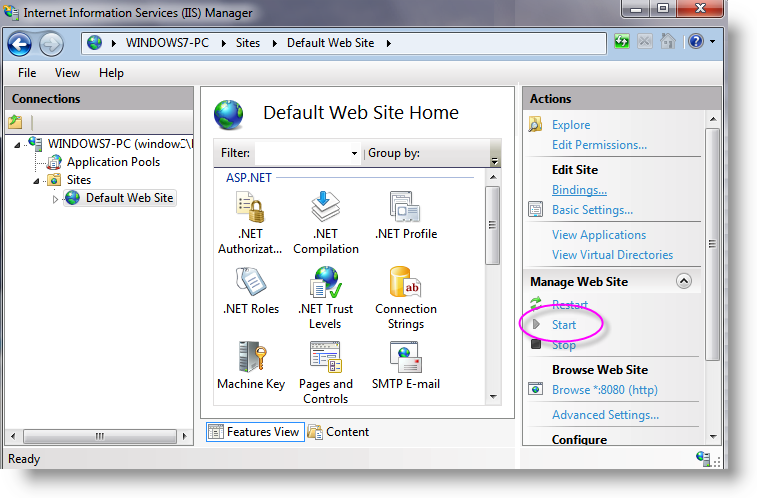
In the IIS Manager tool for IIS7, shown above, the process is similar except the Start link is in the right-hand Actions pane.
Manually Create an IIS6 Virtual Directory
Virtual Directories can be created manually using the IIS Manager tool. To create a new virtual directory, find the Default Web Site in the list of web sites in the management tool, right-click it, and select New, then Virtual Directory.
A wizard will walk you through the process. You simply give the virtual directory an alias or name (usually the name of your Logi application, without embedded spaces), then browse to and select your Logi application root folder, and accept the default access permissions (Read and Run Scripts).
Once the wizard creates the virtual directory, you can examine its properties by right-clicking it. Some of its key values are shown in the next three images.
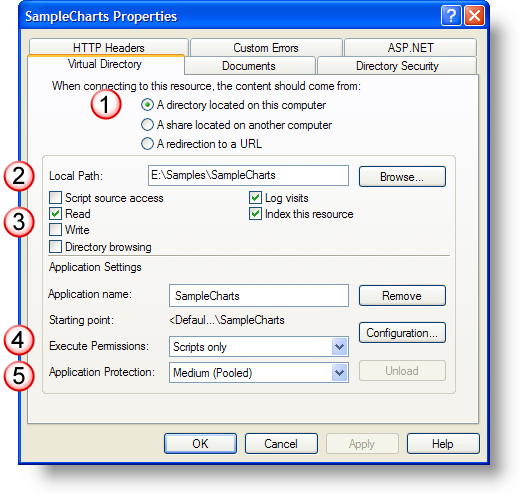
- Content Source - Determines where the content for the web application resides when connecting to the resource in a web browser. Choose the A directory located on this computer radio button.
- Local Path - The physical directory on disk where the application's files and folders reside. Click Browse to choose the location.
- Access Type - Logi applications require Read access to the physical directory on disk. Logging visits and indexing the resource are optional.
- Execute Permissions - Logi applications utilize supporting JavaScript and VBScript files. Choose Scripts only from the drop-down menu.
- Application Protection - Logi applications are configured for Medium (Pooled) protection by default. This setting is where you would select an Application Pool, if you're using them with IIS 6.0.
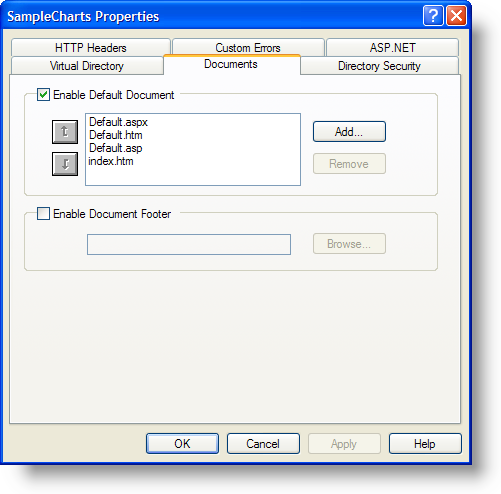
Logi applications are registered with the most common types of default documents supported. Developers integrating Logi applications with their own web applications can choose an alternative document. In the image above, the most common types are shown in the IIS Manager's Documents tab; because Default.aspx redirects to rdPage.aspx, developers can remove the documents pictured above and add rdPage.aspx, if desired, but it's not required.
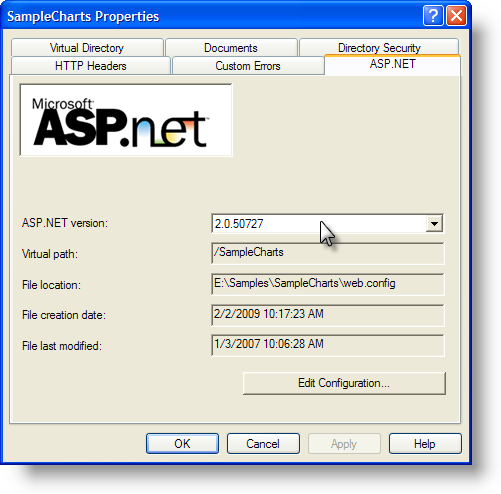
As shown above, developers should also ensure that their Logi applications are running under the .NET 2.0, or later, Framework. This can be verified and configured in the IIS Manager's ASP.NET tab, as shown above.
Incomplete Virtual Directory Creation
For various reasons, you may find that your virtual directory has not been completely configured as a web application. This can may happen, for example, if the New Application wizard in Studio fails part way through the process for some reason. The icon beside your application in IIS Manager indicates the status:
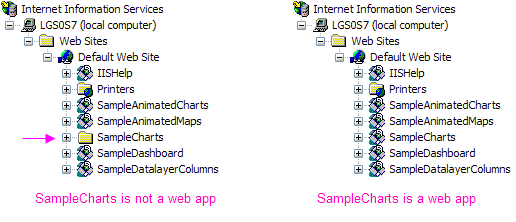
To remedy this situation, you need to right-click your web app entry and select Properties:
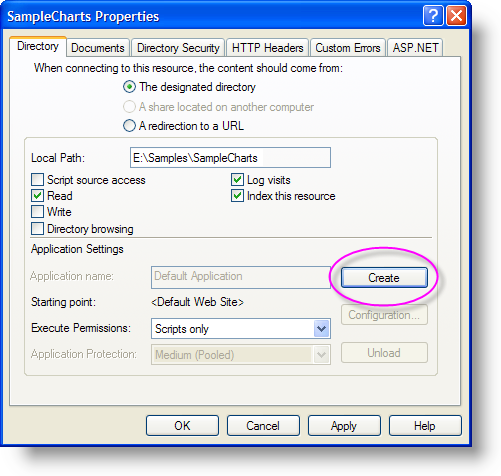
Then, as shown above, click the Create button in the Properties dialog box, then OK. Back in the list of virtual directories, the icon next to your virtual directory should change from a folder to an application.
Manually Create an IIS7 Virtual Directory
Instead of manually creating a virtual directory in IIS7 and then converting it to a web application, we can just directly create the application. Open the IIS Manager tool and find the list of web sites, then select and right-click the Default Web Site. Select Add Application from the pop-up context menu.
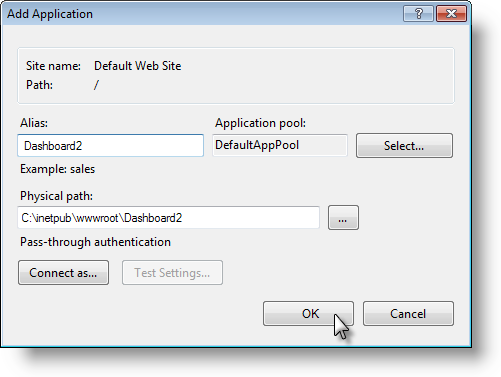
As shown above, fill-in the Alias and correct Physical path to your Logi application. If your application uses a Logi product v10.0.385 or later, for the Application Pool setting use the DefaultAppPool selection shown; if it uses an earlier version, select the Classic .NET AppPool instead. Click OK. Ensure that the new entry was added to the list of virtual directories beneath the Default Web Site.
![]() No Classic .NET AppPool selection? See the following section.
No Classic .NET AppPool selection? See the following section.
Next. select your new virtual directory again in the virtual directory list and, from the ASP.NET options section in the center of the screen, double-click .NET Trust Levels.
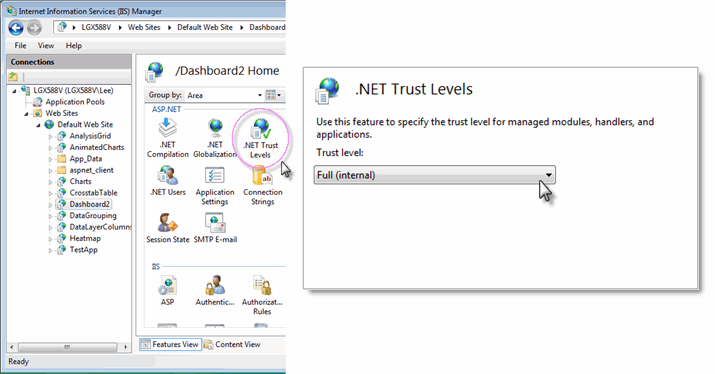
Ensure that the Trust Level setting is Full (internal) and click Apply in the right hand Actions panel and approve the change.
Create an IIS7 Classic .NET Application Pool
If your IIS7 configuration does not include an application pool named "Classic .NET AppPool", create one by right-clicking the Application Pools item in the left panel and selecting Add Application Pool...
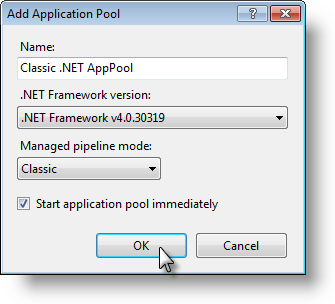
In the dialog box that appears, shown above, enter the name and make the selections shown above (your .NET version may vary). Click OK.
Enable Web Service Extensions
Windows Server 2003 requires the use of ASP.NET web service
extensions in order to correctly run .NET applications.
Ensure that this has been properly configured, as follows:
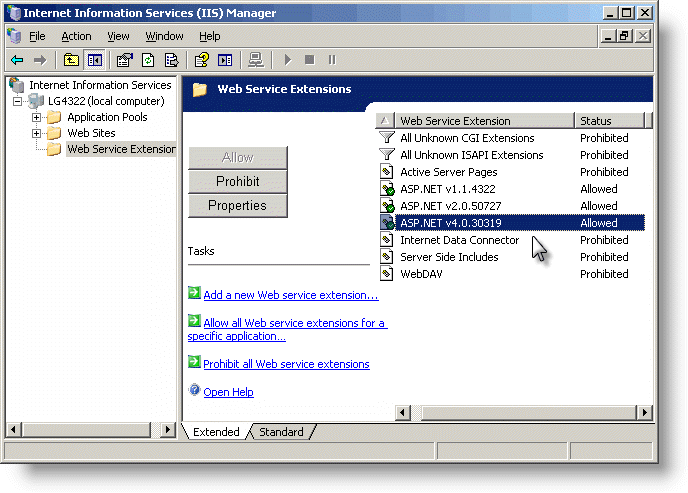
In the IIS Manager tool, select the Web Service
Extensions item in the left hand tree list, as shown above. Ensure that the ASP.NET v2.0.xxxxx (or later) web service extension
has been "Allowed" to operate. Click the Allow button if necessary to
assign this status (if using the Standard view, right-click the entry and select
Allow from the popup menu).
Under Windows 7 and Vista, these extensions also need to be allowed.
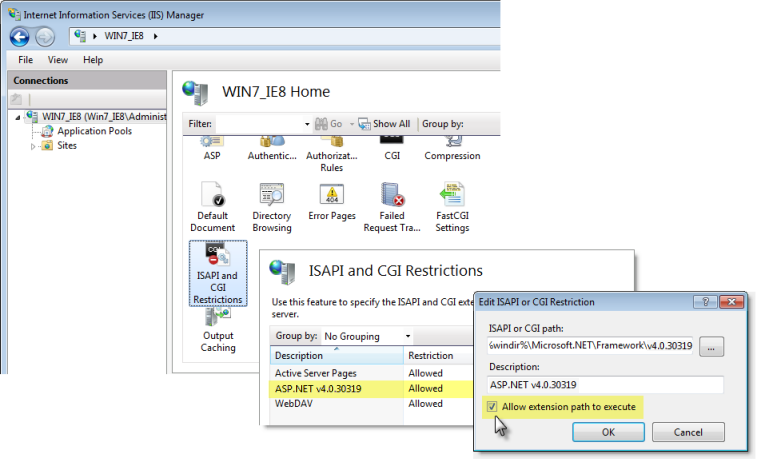
This is done, as shown above, by selecting the Home item in the left panel, then double-clicking the ISAPI and CGI Restrictions item in the center panel. If the ASP.NET entry (or entries) is marked Not Allowed, edit its settings and check the Allow extension... checkbox.