Report Designer/Schedule
The Report Designer/Schedule page allows users to
- View scheduled deliveries
- Add, copy, and remove schedules
Methods of Delivering Scheduled Reports
| Delivery Method | Recipient Options | Delivery Options | Sending Location | Applied Filters |
|---|---|---|---|---|
| Subscription | Self (Current User) |
|
|
Configured in Subscription Scheduler window |
| Scheduled | All Users, Others and Self |
|
|
Configured in Report Scheduler window |
| Instant Delivery | All Users, Others and Self |
|
|
Currently configured filters in report |
View Schedule List
- In Report Designer, click Schedule in the left menu.
- Summaries of existing schedules are listed together with delivery options.
- Each schedule can be edited, copied or deleted using the icons in Action field.
- New schedule can be added using the Add Schedule button above the list.
Note: To delete multiple schedules at the same time, tick the checkbox in front of them then click the delete icon above the list (that looks like a waste basket).
Search for Schedules
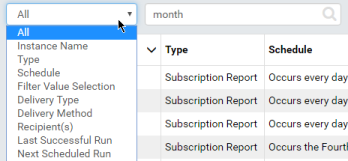
- Select a field to search in from the drop-down, default is All.
- Enter a partial text and click the search icon (🔍).
- Only matching schedules will be displayed.

Add a Schedule
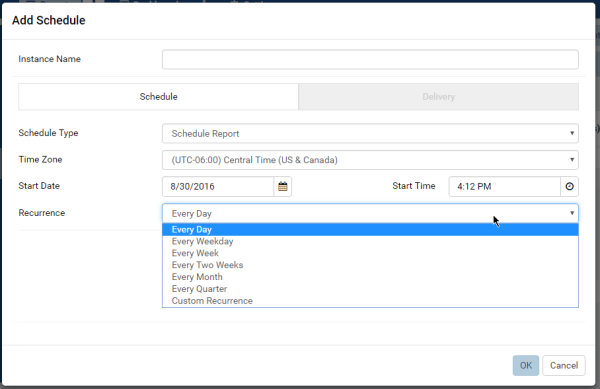
Click the Add Schedule button above the list to open the Add Schedule pop-up.
-
Enter a name for this schedule.
-
In Schedule tab:
- Select Scheduling Type:
- Scheduled Alert: delivered only if report has data at scheduled time.
- Scheduled Reporting Item: delivered regardless whether it has data or not at scheduled time.
- Select desired time zone.
- Select a start date in the future.
- Enter the start time (some common values can be quickly selected from the pre-defined list).
- Select a common recurrence period from the list, or select Custom Recurrence to define a different one.
- Select Scheduling Type:
-
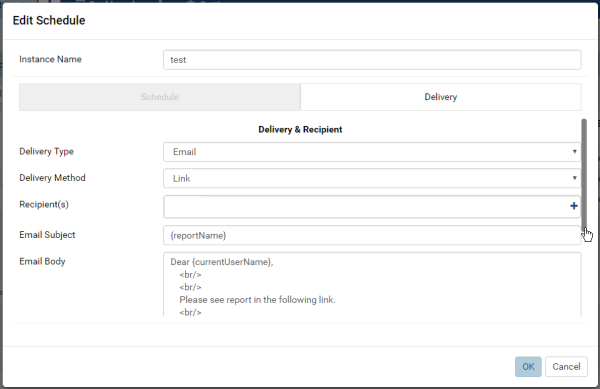
In Delivery tab, select:
- “Email” Delivery Type: send the report to the email address of selected users.
- Select Delivery Method: email a Link, email an Attachment, or email with Embedded HTML body.
- Customize the default template if necessary.
- “File Location” Delivery Type: save the report as a file.
- Delivery Method is Send to disk.
- Select the Export File Type: PDF, Word Doc, Excel or CSV.
- “Email” Delivery Type: send the report to the email address of selected users.
-
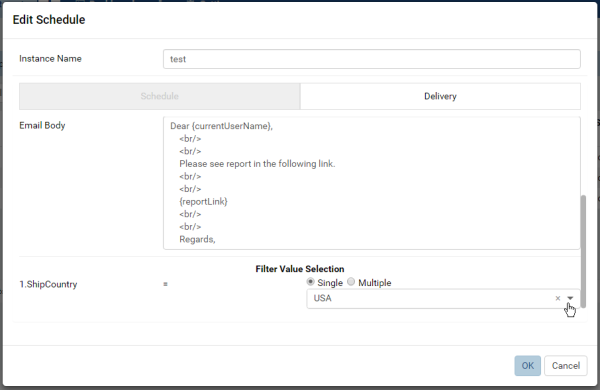
Optionally re-select values for report filters.
-
Click OK to close Add Schedule pop-up.
-
Click Save at the top to save the Report.


