Using the Crosstab Table Wizard
The fastest and easiest way to create a Crosstab Table is to use the Crosstab Table Wizard in Logi Studio. Here's how:

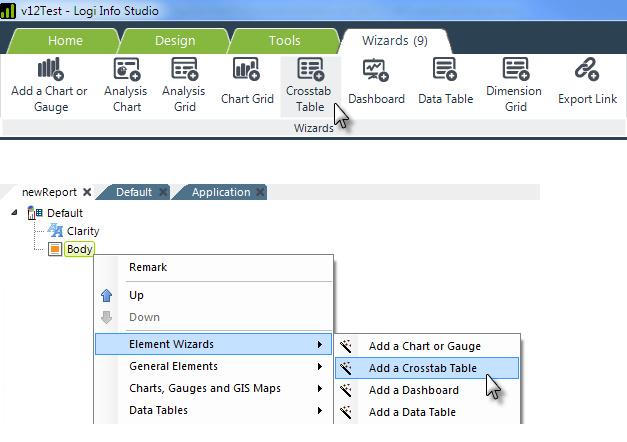
- As shown above, in a definition in Logi Studio, select an element and either click the Crosstab Table item in the main menu's Wizards tab, or right-click the element and select Element Wizards, and then select Add a Crosstab Table from the secondary menu.

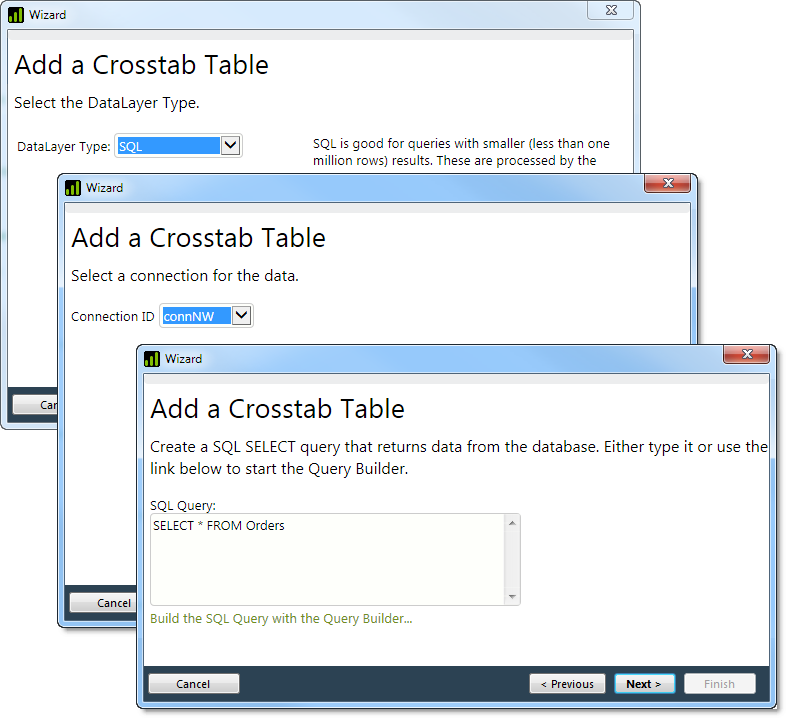
- A series of dialog boxes, shown above, will be displayed. These all relate to the retrieval of the data. Make appropriate selections for your application and click Next to move to the next dialog box.

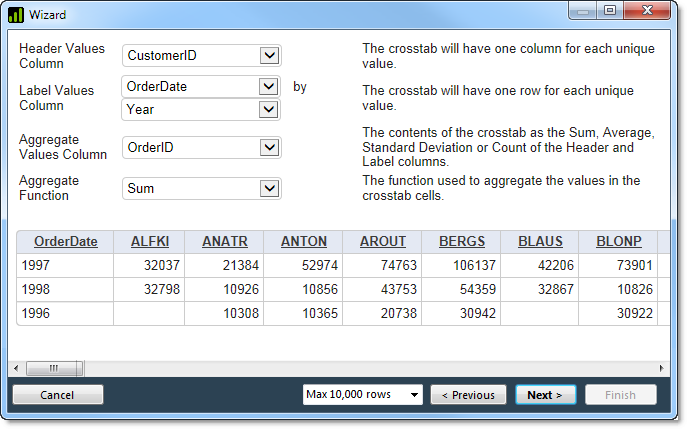
The wizard will display a model Crosstab Table in a dialog box, where you can adjust it, if desired. If the table is just as you want it, click Next to exit the wizard.
In order to prevent creation of unmanageable tables, numeric type columns are not available for use as the Header Values or Label Values columns.
The Max Rows option at the bottom of the dialog box controls the maximum number of rows that will be retained in the table's datalayer.
When you exit the wizard, it will finish inserting all the elements for the table, properly configured, into your report definition. Only the table itself will be added, not any of the configuration controls you've just worked with. Preview your application and you should see your new table.