Granting File Permissions Under Windows
Depending on your OS, you'll use File Explorer or
My Computer to set file permissions.
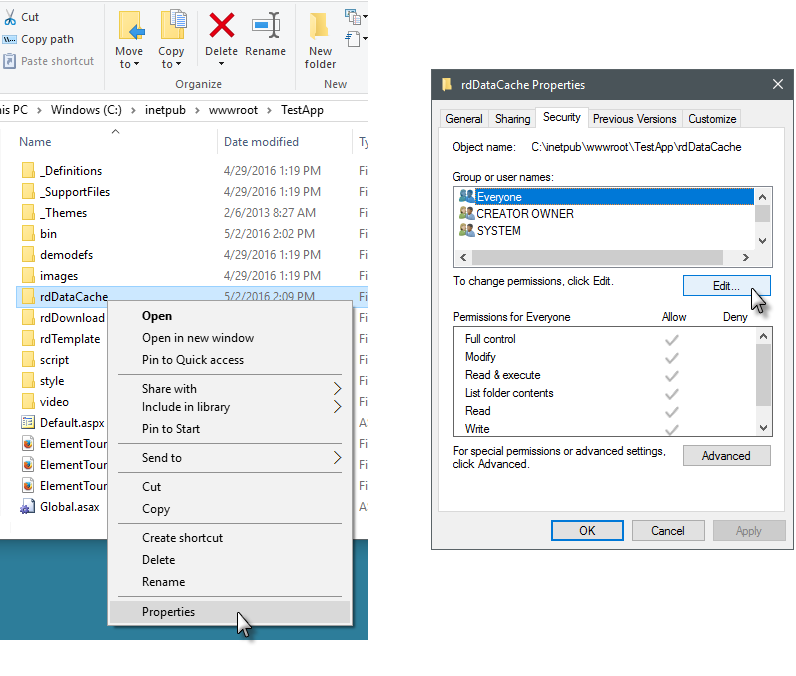
- On the web server, navigate into your Logi application's folder and select the rdDataCache folder.
- Right-click the folder and select Properties from the pop-up menu, as shown above, left.
-
In the Properties dialog box, click the Security tab, as shown
above, right. Click Edit...No Security tab visible? See section below.
-
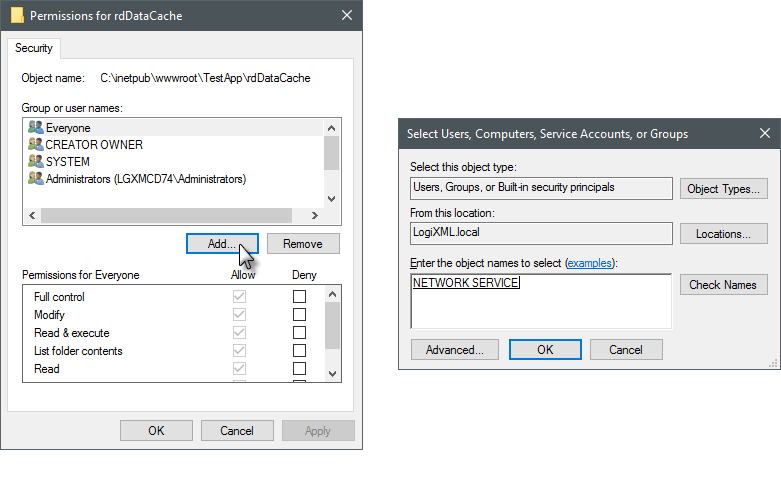
If we're assigning permissions to the NETWORK SERVICE account, click
Add... and then enter the account name in the subsequent dialog box, as
shown above. Click OK.
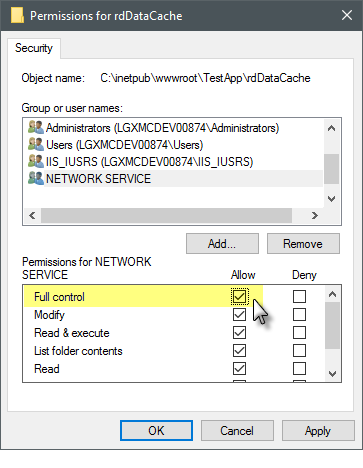
- Back in the Security dialog box, ensure that the NETWORK SERVICE account is selected and click the Full Control check box, as shown above. Then click OK.
Repeat this process for the rdDownload folder and for any other folders that you'll be writing data to.
IIS 6 And Later - Application Pools
In IIS 6 and later, in addition to setting the permissions shown earlier,
you may also need to give permissions to the "Application Pool".
Logi Info applications are generally run by IIS within an application
pool, which provides isolation and performance improvements for web apps
that may use different versions of .NET. To assign file access permissions
to an application pool:
-
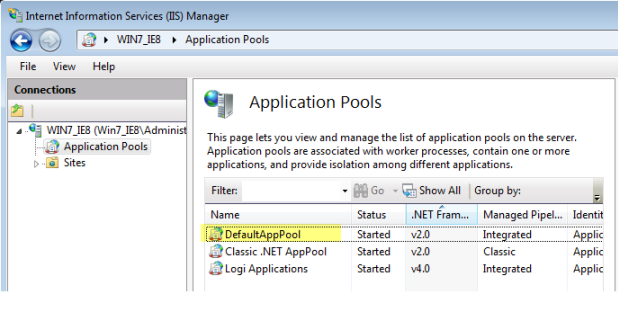
Open the IIS Manager utility, locate your Logi application and
determine, by examining its properties, which application pool it's
assigned to. Note the name of the pool ("DefaultAppPool" in
the example).
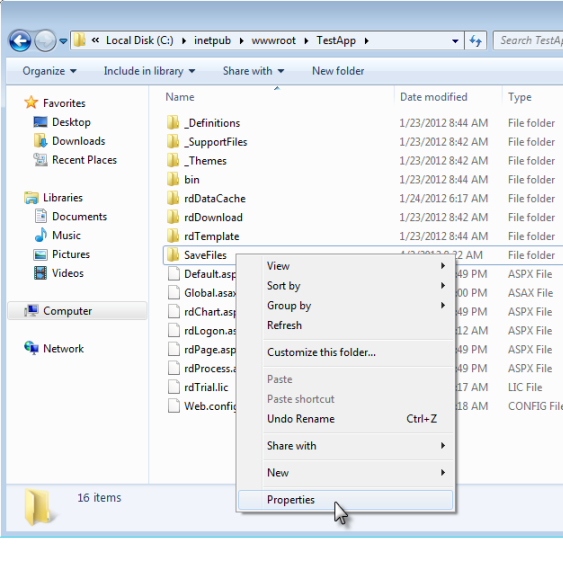
- In the example above, we're setting permissions for the sub-folder "SavedFiles". Use File Explorer to navigate to your Logi app folder, then select and right-click the sub-folder in question, and select Properties.
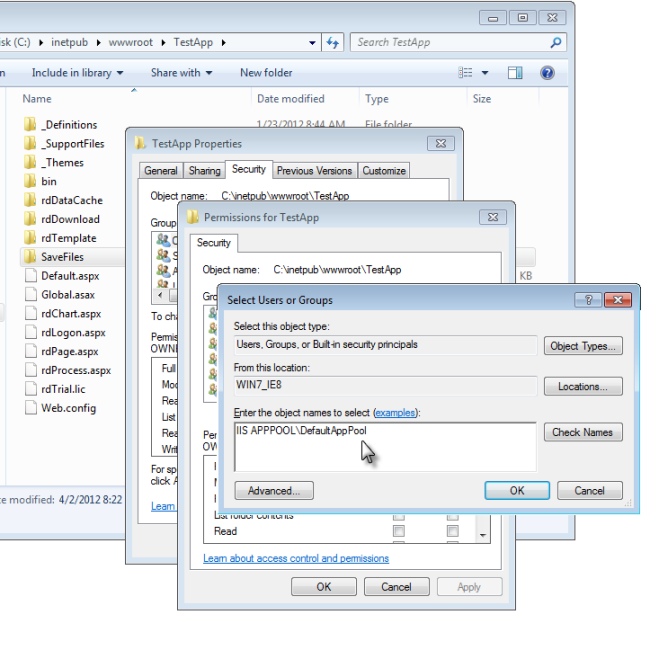
- In the Properties dialog box, click the Security tab, and then the Edit button.
- In the Permissions dialog box, click Add.
- In the Select Users or Groups dialog box, enter "IIS APPPOOL\<the app pool name>" as shown above.
- Click OK, to close the dialog box and return to the Permissions dialog box.
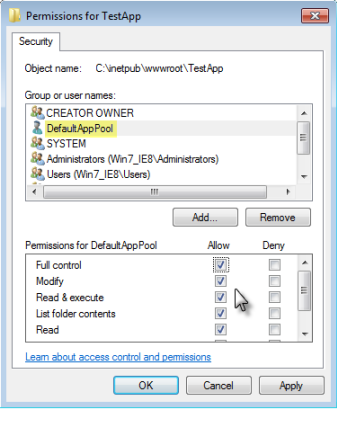
Finally, select the application pool in the names list, and set its
permissions, as shown above. Then click OK.
No Security Tab Visible?
In order to make the Security tab visible in the Properties dialog box, you must turn off Simple File Sharing. This is usually an issue only on stand-alone computers.
- Open Control Panel and locate the Folder Options link. In Windows XP, this is through the Appearance and Themes link. Or, instead, you can access Folder Options through the Tools menu item in My Computer.
- In the Folder Options dialog box, select the View tab.
- At the very bottom of the list of Advancedsettings, un-check the "Use simple file sharing" option. Click OK.
The security tab should now appear when you select a file or folder's properties.