Creating a Dataview
Once you've created one or more Sources, you can create a Dataview. There are multiple paths to the Create a New Dataview page, including:
- Dataviews menu option
 Create a New Dataview
 - Sources menu option
 gear icon in Source pill
 Create Dataview
Once you arrive at the Create a New Dataview page, click the From Source tab:
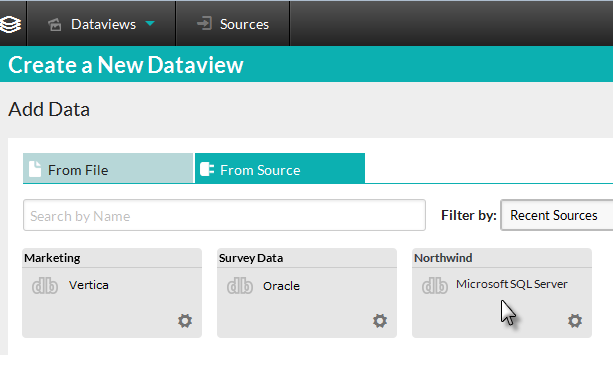
Your data Source pills will be displayed, as shown above. Click
a pill to create a Dataview that uses it, and the Dataview Configuration
tab will appear:
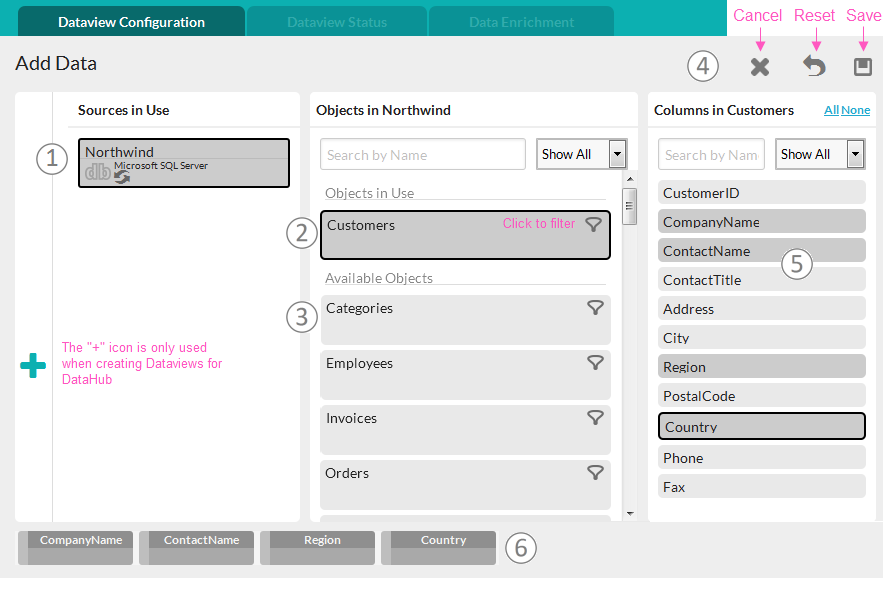
Here are the important features of this tab, keyed to the image shown above:
- Sources in Use - This panel displays the data Source in use by this Dataview. When creating a Dataview for use with DataHub, the "+" icon allows you to add multiple Sources, and create relationships between them.
- Data Objects - This panel displays a list of the data
objects (tables and views) available in the selected Source. The list
can be searched and filtered using the included controls.
Click an object to select it. When you do, its columns appear in the Columns panel. If you select any of an object's columns, the object will be placed in the "Objects in Use" list. Database objects can be filtered by clicking their Filter icons; filtering is discussed in Filtering Data. - Available Objects - This is a list of the data objects that are available for use but haven't been used yet.
- Action Icons - Click an icon to Save your definition, Reset all selections to their defaults, or Cancel Dataview creation.
- Columns - This panel displays a list of the columns available in the selected data object. The list can be searched and filtered using the included controls, and the All and None links can used for bulk selection. Click a column to add or remove it from the Dataview.
- Column Pills - When you select a column in the Columns panel, it will be represented by a "pill" at the bottom of the page. These provide a representation of the data, in tabular form, included in the Dataview.
When you have selected your Sources, Objects, and Columns, click the Save icon...
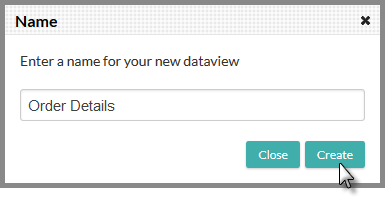
...and you'll be prompted to provide a name for your Dataview. Click Create to save the Dataview.
Creating Custom SQL Objects
When creating a Dataview that uses a SQL database Source, you can created a data object by defining a custom SQL query. This query can only select data from the available data objects.
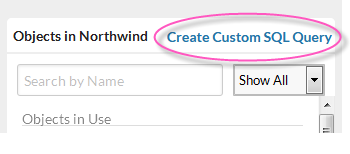
If the data source is a SQL database, at the top of the middle panel in the Dataview Configuration tab, you'll see the Create Custom SQL Query link, shown circled above.
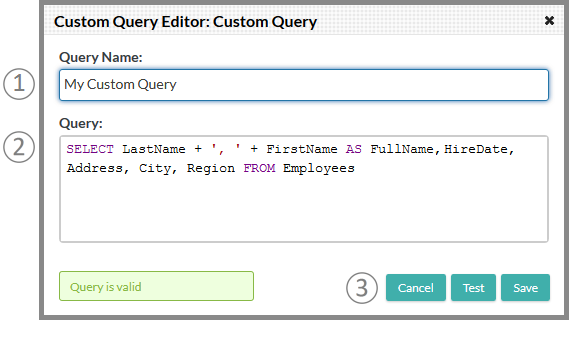
When you click the link, the Customer Query Editor panel, shown above, will be displayed, with these controls:
- Query Name - Enter a name for your custom query.
- Query - Enter your SQL query, using the correct SQL syntax for the Source database.
- Actions - Click the action buttons to Test your query or Cancel the operation. You must successfully test your query before the Save button will be enabled. A Delete button (not shown) will only be visible if you're editing an existing custom query and you can use it to delete the custom query.
When you click Test, the query will be validated and the results shown in a message adjacent to the buttons.
Once you test and save your custom query, the new object will appear in the list of objects in the middle panel:
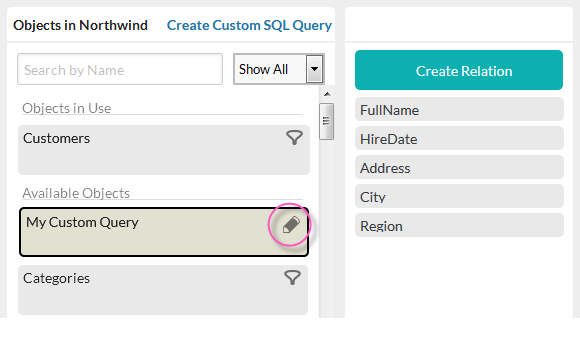
Its columns will appear in the right-hand panel. Like other columns, they can be used to create relationships with other data.
To edit or delete a custom query, click the Edit icon, shown circled above. ![]() You can only modify or delete a custom query if no Dataviews are dependent upon it.
You can only modify or delete a custom query if no Dataviews are dependent upon it.