Using the Chart Grid Wizard
The following examples walk you through using the Chart Grid wizard.
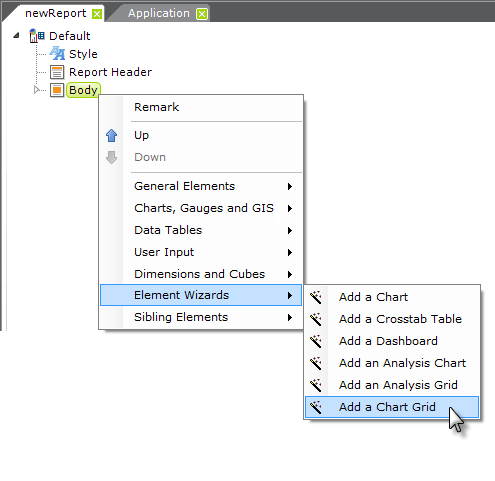
-
Start the wizard by right-clicking the grid's parent and selecting
Element Wizards
 Add a Chart Grid, as shown above.
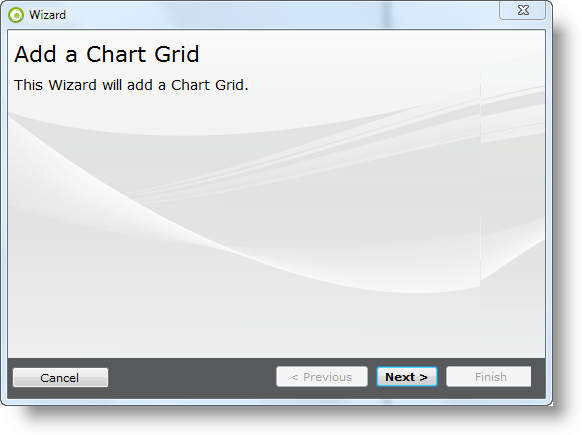
- Add aChart Grid Wizard - Click Next to start the wizard.
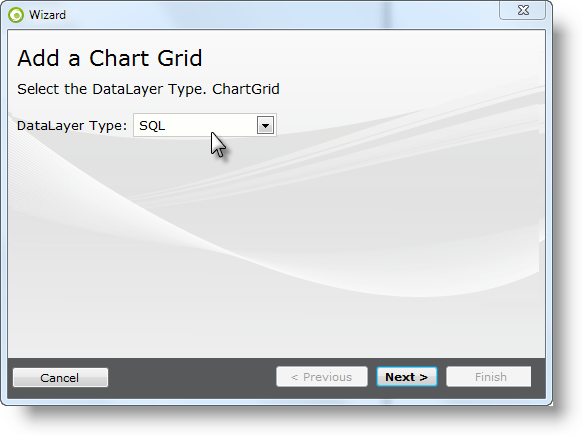
- Datalayer Type - Select the appropriate datalayer type for your
datasource. Click Next.
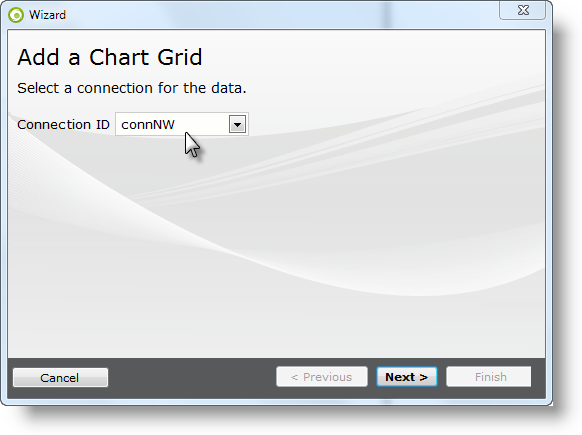
- Connection ID - Select the desired connection from the list of
connections defined in the _Settings definition. Click
Next.
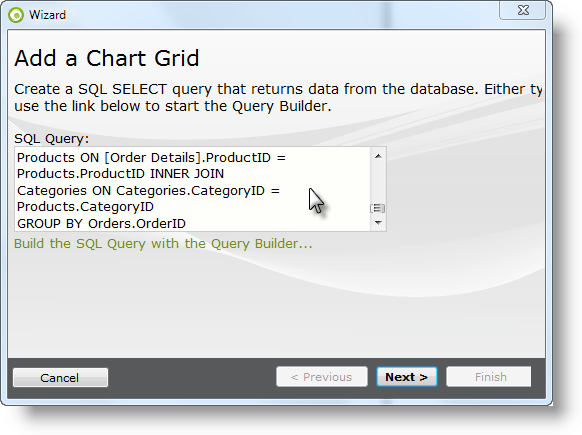
- SQL Query - If you 're using a SQL datasource, enter the query (or use the query wizard to build one) and click Next. This example uses the following T-SQL query: SELECT Orders.OrderID, MIN(Orders.Freight) AS Freight, MIN(Orders.ShippedDate) AS ShippedDate, MIN(Orders.OrderDate) AS OrderDate, SUM([Order Details].UnitPrice) AS sumUnitPrice, SUM([Order Details].Quantity) AS sumQuantity, MIN(RTRIM(Products.ProductName)) AS ProductName, MIN(Categories.CategoryName) AS CategoryName, MIN(RTRIM(Employees.LastName)) AS LastName, MIN(Employees.EmployeeID) AS EmployeeID, MIN(Orders.CustomerID) AS CustomerID, MIN(Customers.CompanyName) AS CompanyName, MIN(RTRIM(Customers.Country)) AS Country
FROM Orders INNER JOIN
[Order Details] ON [Order Details].OrderID = Orders.OrderID AND
Orders.OrderID = [Order Details].OrderID INNER JOIN
Employees ON Employees.EmployeeID = Orders.EmployeeID INNER JOIN
Customers ON Customers.CustomerID = Orders.CustomerID INNER JOIN
Products ON [Order Details].ProductID = Products.ProductID INNER JOIN
Categories ON Categories.CategoryID = Products.CategoryID
GROUP BY Orders.OrderID
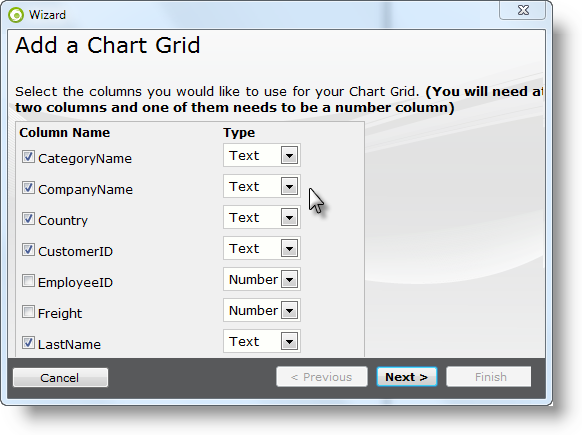
- Select Columns - Select at least two data columns, one of which
must be a numeric data type. Set the data type indicator for each
selected column, then click Next. In this example, the columns
selected are:
- CategoryName
- CompanyName
- Country
- CustomerID
- LastName
- ShippedDate
- sumQuantity
- sumUnitPrice
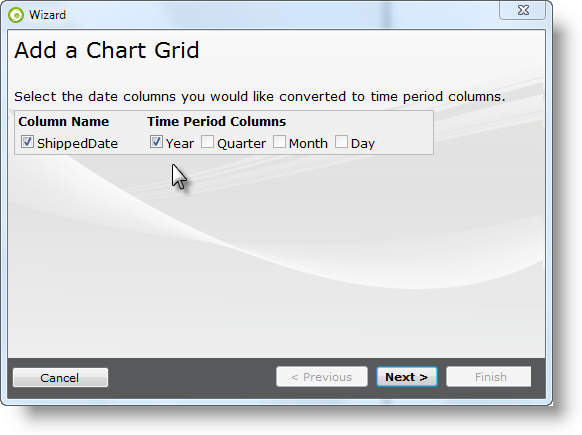
- Process Date Columns - If your data includes date type data
columns, the wizard will give you the option of including a Time Period
Column for the Day, Month, Quarter, or Year represented in the data in
each of them. This is necessary if you want to use date data in the
X-axis labels of the charts. In this example, the Year portion of the
ShippedDate column is used. Click Next to continue.
- Done - Click Finish to close the wizard.
As you've completed these steps, you may have noticed that the wizard has added all the appropriate elements to your report definition. Save the definition and run it.
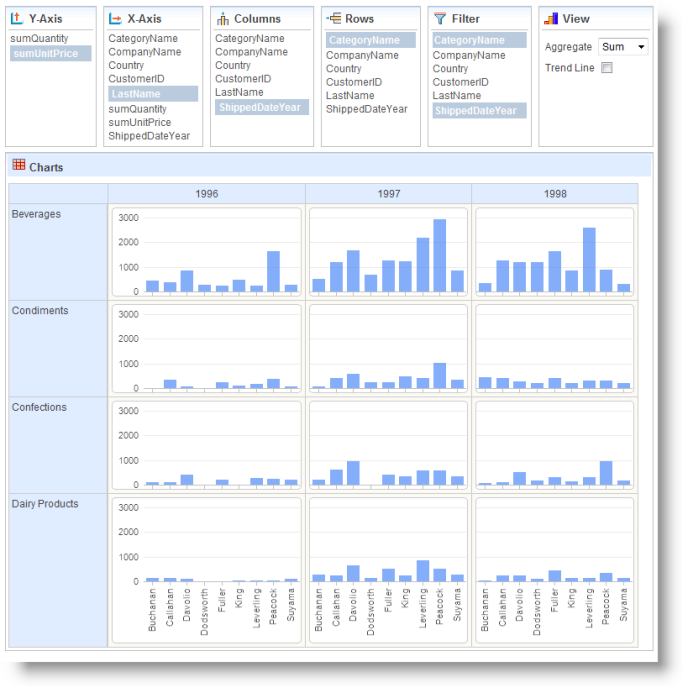
When it appears, select Y-Axis, X-Axis, Column, and Row options, as shown above, and view your new Chart Grid. The example shown above has also had two filters applied to it, on the CategoryName (limits grid to four rows) and the ShippedDateYear (to remove null data). Finally, you should examine the elements inserted into the definition by the wizard to review formatting, fine-tune captions, etc. Remember that Chart Grid configurations are automatically saved with session variables, which can lead to frustration if you're trying to make a lot of changes during development. You may need to reset these variables to make changes occur; to do this, see Refresh, Reset, and Save Grid Settings.