Analysis Filter - Using the Analysis Filter Elements
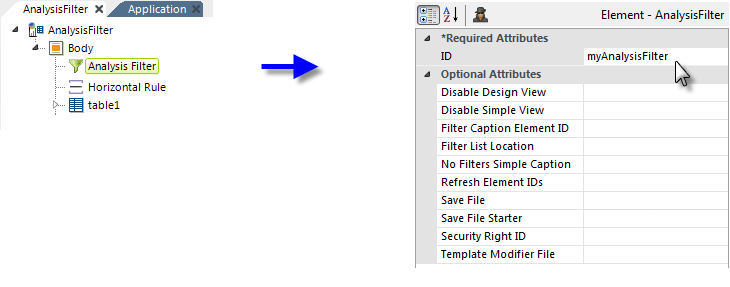
The Analysis Filter works by adding an automatically-generated Condition Filter element beneath existing datalayer elements (Sql Condition Filter for DataLayer.ActiveSQL). To implement it, you need to add an Analysis Filter element (and its child elements) and the Analysis Filter Insert element. Here's an example:

The report definition shown above includes a data table, with datalayer and columns. An Analysis Filter element has been added and configured with an element ID. This configuration will cause the whole page to be refreshed when the filter changes.
If, instead, we wanted to refresh only the data table and not the whole page, we could enter its element ID in the Refresh Element IDs attribute.

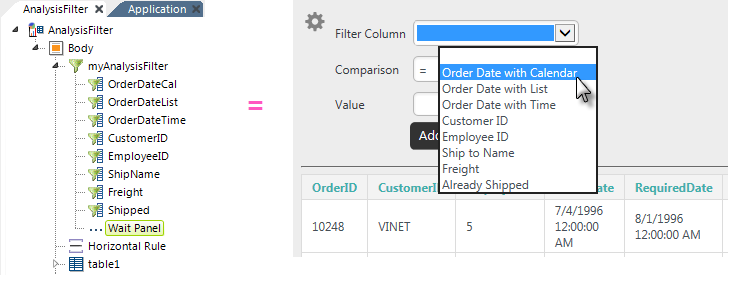
Next, we'll add Analysis Filter Column elements beneath the Analysis Filter element. Each of these adds a column into the list of columns that can be used when defining a filter in Design view. It's important to accurately specify the data type as this affects which user controls are displayed later.

Additional Analysis Filter Column elements have now been added and, as shown above, you can see how they produce entries in the drop-down list of filter columns in Design view. In addition, an optional Wait Panel element has been added, in case the filtering operation takes some time to complete.
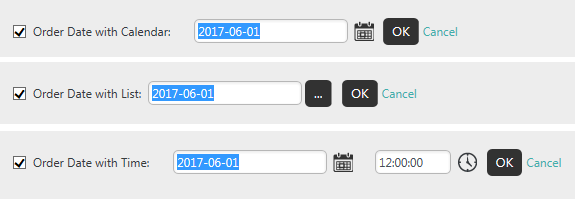
Date- and DateTime-type columns can be configured, using the Popup Values for Filter attribute, to offer users different filter value selection methods, in addition to direct entry: selection from a list, from a calendar, and from a time picker. Different input controls are displayed for each method:

For illustration purposes, in the example above, we've created separate filters for each of these methods - a real implementation would probably not include this. The Order Date column can only be represented by one Analysis Filter Column element so to produce the variety of selection methods in the example, we added columns to the datalayer using Calculated Column elements, configured
using @Data.OrderDate~
tokens, and then added Analysis Filter Columns for these calculated columns.

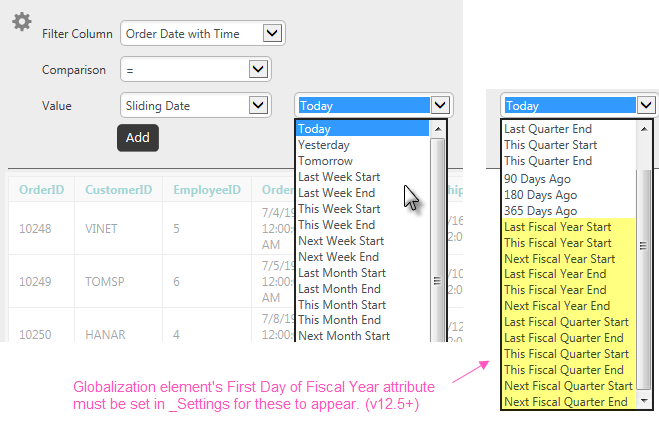
When working with Date- and DateTime-type data, you can select a comparison against a specific date or a "Sliding Date" time window. A drop-down list of options appears, with date options, as shown above.
If the Globalization element's First Day of Fiscal Year attribute has been set in the _Settings definition, the drop-down list will include a set of Fiscal options, highlighted above.

Finally, we've added an Analysis Filter Insert element, as shown above, beneath our table's datalayer. Its sole attribute is configured with the ID of the Analysis Filter element. This is the element that connects the datalayer and filter.
We now have a fully-functional filtering mechanism for our data table.
Passing Parameters
You may need to pass parameters when the Analysis Filter updates the page or visualization. The element's Request Forwarding attribute allows you to pass all the request parameters received by the page (but doesn't include any values from Default Request Parameters). You can also be more selective about what's passed by using a Link Parameters element as a child of the Analysis Filter.
More information about passing parameters can be found in Pass Information.