Adding Conditional Formats to Fields
You can add conditional formats to the data fields in a report. Then when a specified condition is fulfilled, the format defined on the condition will be applied to the field values automatically. This is very useful to highlight values that might need to be acted.
To add conditional formats to a field:
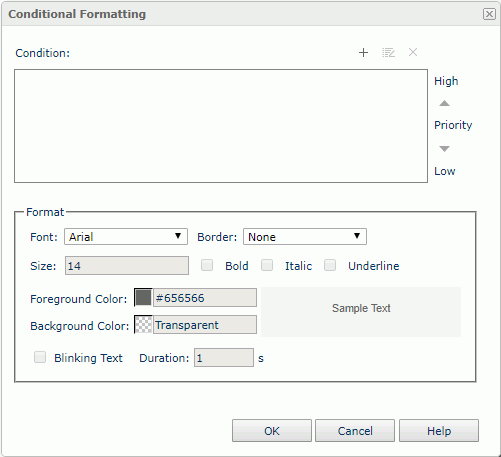
- Right-click the field and select Conditional Formatting from the shortcut menu. Report Server displays the Conditional Formatting dialog box.

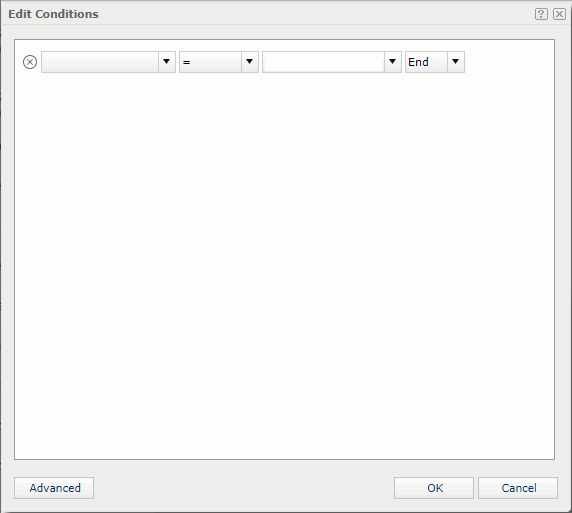
- Select the button
 to open the Edit Conditions dialog box to define the condition as required.

There are the basic and advanced modes of the dialog box for you to define either simple or complex condition expressions. See Applying a Filter to the Business View for a Data Component for more information on how to define a condition.
When you are adding conditional format to a data field in a crosstab, you can find the button
 next to the value text box of a condition line. Select the button and you can select an object from the drop-down list to use its value in the condition. The following objects that are of the same data type as the field on which the condition is based are provided in the drop-down list:
- Crosstab formulas if the crosstab is created on a query resource
- Dynamic resources and aggregation objects if the crosstab is created on a business view
- Select OK to save the condition.
The newly added condition is now displayed and highlighted in the Condition box in the Conditional Formatting dialog box.
- In the Format box, set the format which will be applied to values of the field when the specified condition is fulfilled, for example, the font face, font size, font color, and so on. Select Blinking Text if you want to make the values blink, then in the Duration text box, set how long it takes the values to complete the transition from the foreground color to the transparent color, in seconds. The blink settings work in the HTML result of the report too.
- Repeat the above steps to add more conditions and define the format for each condition as required.
To edit a condition, select the condition in the Condition box, then select
 . In the Edit Conditions dialog box, edit the condition expressions as required.
To remove a condition and the corresponding format, select the condition in the Condition box and select
 .
.To adjust the priority of a condition, select the condition in the Condition box and then select
 or
or  .
. - Select OK to apply the conditional formats to the field.
Note: To make the blink settings of a conditional format take effect, you need to make sure the web browser you use supports CSS3 animation, such as Firefox, Safari, Chrome and Internet Explorer 10 or above.
 Previous Topic