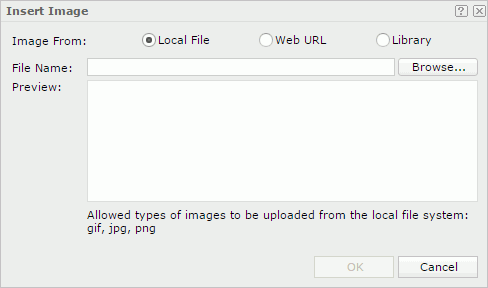
Insert Image
The Insert Image dialog box is used to select the image you want to use in a report. It appears in the following cases:
- Drag Image from the Components panel to a report.
- Select
 on the Page screen of the Web Report Wizard.
 - Select Customized in the Value Pointer or Target Pointer drop-down list in the Format Bar Gauge, Format Dial Gauge, or Format Solid Gauge dialog box.
- Select Customized in the Value Pointer drop-down list in the Style List dialog box.

Image From
Specifies the source of the image file.
- Local File
Specifies to use an image from the local file system.- File Name
Specifies the path and name of the image file. You can select the Browse button to locate the image file.
- File Name
- Web URL
Specifies to use an image via URL.- File URL
Specifies the URL of the image file.
Note: If your Logi Report Server is in an intranet which requires a proxy, to successfully access the image via URL, you need to add the parameters
-Dhttp.proxyHost=XXX -Dhttp.proxyPort=XXto the server's startup file JRServer.bat, which is located in<install_root>\bin. - File URL
- Library
Specifies to use an existing image.- My Pictures
The My Pictures folder is a virtual location where Logi Report Server stores the images that have once been inserted into reports. Select the one you want to use.
- My Pictures
Preview
Displays a preview of the selected image.
OK
Inserts the image into the report and closes the dialog box.
Cancel
Cancels the insertion and closes the dialog box.

Displays the help document about this feature.

Ignores the setting and closes this dialog box.
 Previous Topic