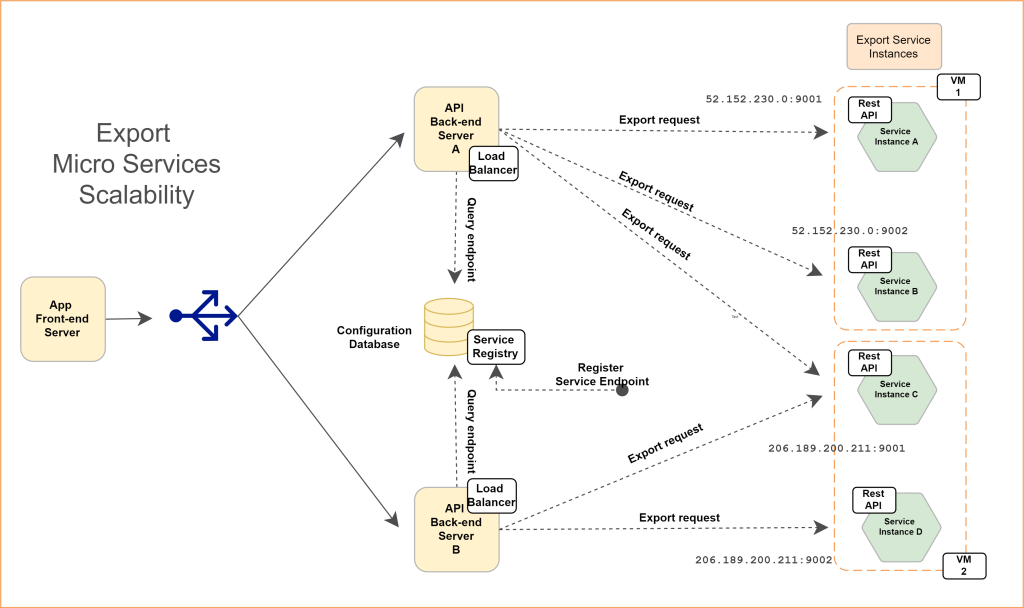
Export Micro Service Reverse Proxy
Deploying Export Micro Service on Separate Linux Server
Export micro service can also run on the same server as Izenda back-end application. For installation on same server, follow the steps mentioned here Export Micro Service
Pre-deployment steps
Node JS
-
Izenda Export service needs Node JS runtime environment to execute. Login as root user and run following commands.
sudo curl -fsSL https://deb.nodesource.com/setup_12.x | sudo -E bash -
											sudo apt-get install -y nodejs
											sudo nodejs -v
PM2
-
Izenda Export service leverages PM2 as process manager. Login as root user and run following commands.
sudo npm install pm2@4.5.0 -g
											sudo pm2 --version
Deployment steps
-
Login as root user and copy Export Service at desired location. Run following commands.
tar -xvf <export service archive>
											cd package
											sudo pm2 start app.js -- --port 5775
											sudo pm2 startup systemd
											sudo pm2 save
											sudo pm2 list
-
On successful completion of these commands, Export Service will start listening on specified port number.

Post-deployment steps
Apache Reverse Proxy
-
Login as root user and run following commands.
-
Update Ubuntu packages to the latest stable version:
sudoapt-getupdate -
Install the Apache web server on Ubuntu:
sudoapt-getinstallapache2-y -
Enable the Apache required modules
sudo a2enmod rewritesudo a2enmod proxysudo a2enmod proxy_httpsudo a2enmod headerssudo a2enmod ssl –- if you want to configure as SSLsudo service apache2 restart
-
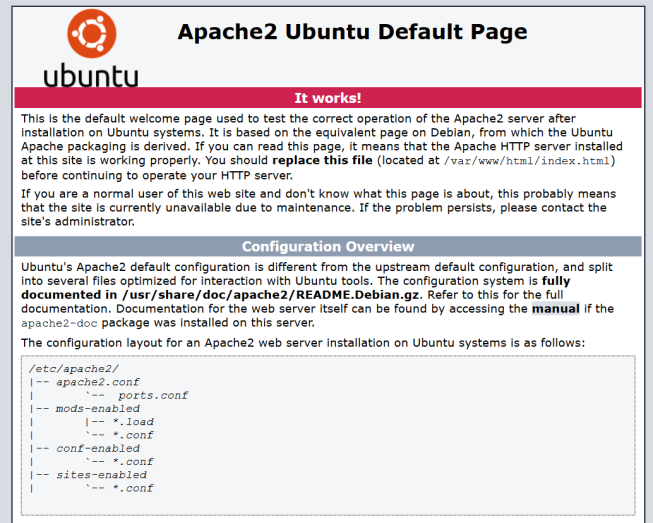
Verify Apache installation by running localhost.
-
Enter domain name in to apache2.conf file
sudo nano /etc/apache2/apache2.confServerName localhost
-
Enter port in to ports.conf file
Sudo nano /etc/apache2/ports.confListen 9001
-
Create 9001.conf under /etc/apache2/sites-available:
sudonano/etc/apache2/sites-available/9001.conf<VirtualHost *:9001> ProxyPreserveHost On ProxyRequests Off ProxyPass / http://localhost:5775/ ProxyPassReverse / http://localhost:5775/ ServerName localhost ErrorLog /var/log/apache2/9001-api-error.log CustomLog /var/log/apache2/9001-api-access.log common </VirtualHost>
-
Active the service site.
sudo a2ensite 9001.conf
-
-
Verify the configuration:
sudoapachectlconfigtest. If the configuration is correct, the result will beSyntaxOk. If not, there is an issue in the configuration. -
Restart the website:
sudoserviceapache2restart
Deploying Export Micro Service on Separate Windows Server
Export micro service can also run on the same server as Izenda back-end application. For installation on same server, follow the steps mentioned here Export Micro Service
Pre-deployment steps
Node JS
- Izenda Export service needs Node JS runtime environment to execute. Download and install Node JS from
node-v12.21.0-x64.msiby navigating to https://nodejs.org/dist/latest-v12.x/
Deployment steps
-
Copy export service at desired location and unzip Export Service archive. Open command prompt in administrative mode and navigate to extracted location. Run following command.
cd package
											node app.js --port 5775
-
On successful completion of these commands, Export Service will start listening on specified port number.

Post-deployment steps
IIS Reverse Proxy
-
Install Application Request Routing and URL Rewrite Components
-
Open Microsoft Web Platform Installer’s download page. This can also be opened from IIS Manager Actions panel, “Get New Web Platform Components” link.
-
Download and run the installer.
-
Open Microsoft Web Platform Installer.
-
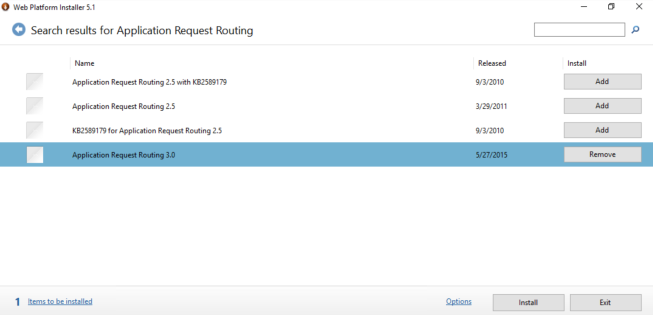
Search for “Application Request Routing” and click Add.
-
Similarly search for “URL Rewrite 2.0” and click Add.
-
Click Install.
-
Setup Reverse Proxy in IIS. Open IIS Manager.
-
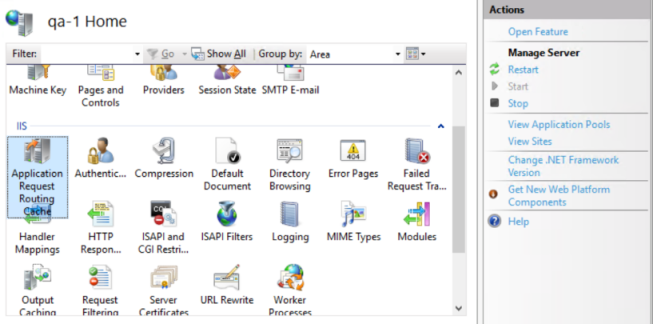
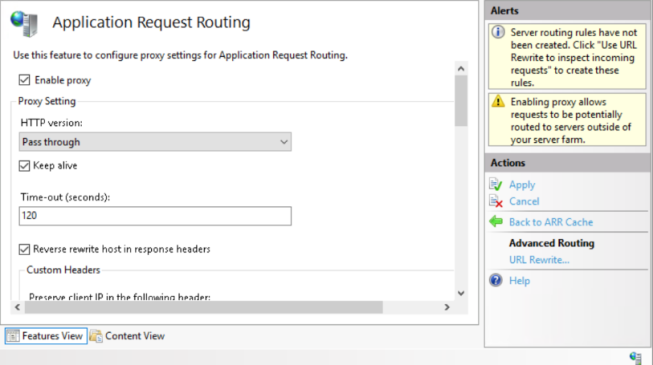
Select a server node in the tree view on the left hand side and then click on the “Application Request Routing” feature.
-
Check the “Enable Proxy” check box. Leave the default values for all the other settings on this page:
-
Select Apply.
-
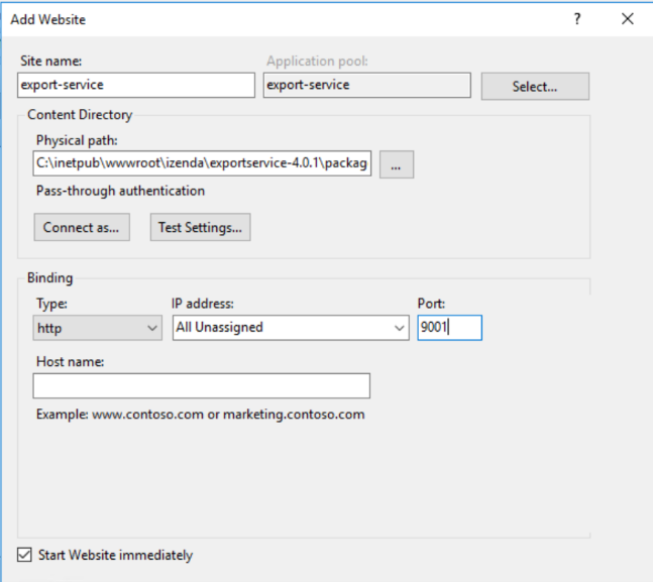
Right-click on a server node in the tree view and add a new website.
-
Click the ellipsis (…) button to select the location of the extracted Izenda export service containing the app.js file.
-
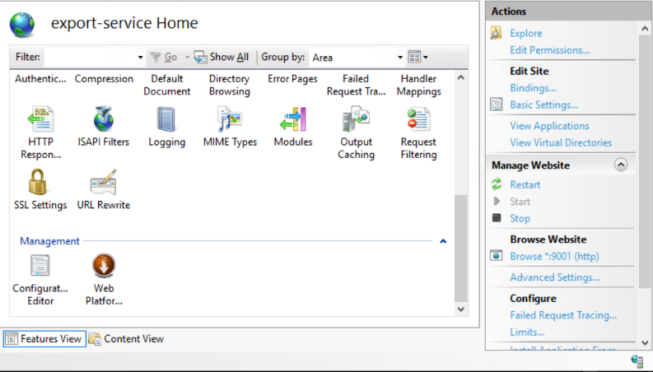
Select your website under sites in left side section. Now select “URL Rewrite” option.
-
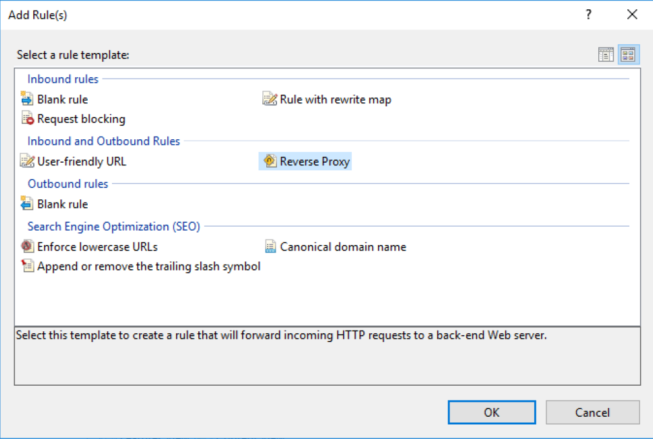
Now click on “Add Rule(s)…” in actions section on the right side.
-
Now select Reverse Proxy under inbound and outbound section.
-
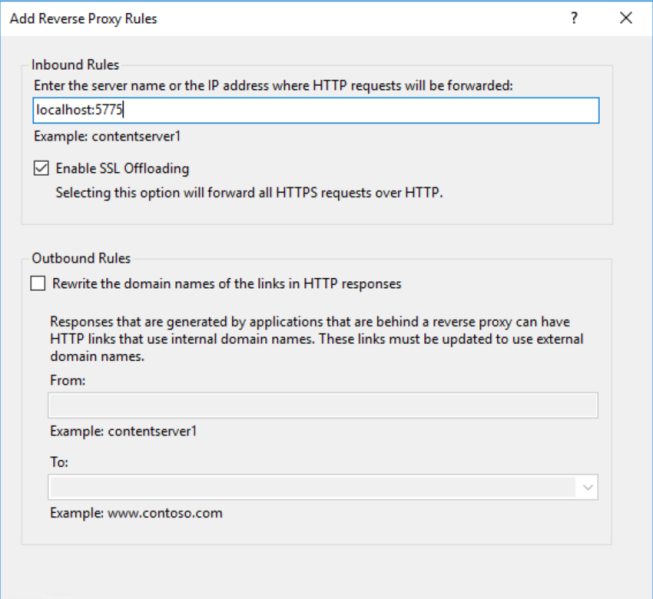
Add the server name or IP address with port under inbound rules input box. This is the URL of the export service running locally on the server.
-
At this point, the reverse proxy setup has been done.
BI Application changes
-
Export micro service can be enabled by setting
EnableExportServiceto1inIzendaSystemSettingtable. -
Additionally, make an entry into
IzendaExportServicetable specifying URL of Export Service. For example:INSERT INTO [IzendaExportService]([Id],[Url],[RequestCount]) VALUES ('9195E7BE-96A3-4529-985A-C4DC88646FFE','http://52.152.230.0:9001',0);
Service Scalability
-
This is an optional step.
-
Export micro service is designed to scale out horizontally into multiple instances. A typical use case scenario would be a heavy load on export functionality. In such situations the load will be shared among multiple instances and multiple simultaneous exports will take relatively lesser time.
-
Deployment Steps
- Navigate to the location where service is extracted and simply start the service on a different port.
- Additionally, make an entry into IzendaExportService table specifying URL of Export Service. For example, if new service got started on http://52.152.230.0:9002, make an entry as following.
INSERT INTO [IzendaExportService]([Id],[Url],[RequestCount]) VALUES ('5A93C3B8-56CF-409E-B45C-2F288732A53F','http://52.152.230.0:9002',0);