Working with JSON Connections in a Catalog
This topic describes how you can set up JSON connections in a catalog, and add and manage tables transformed from JSON data sources in the catalog via the connections. It also introduces how you can use formulas to send requests to RSET Web Services to fetch paginated JSON data for your reports.
This topic contains the following sections:
- Setting Up JSON Connections in a Catalog
- Adding More Tables to a JSON Connection
- Managing Tables in a JSON Connection
Setting Up JSON Connections in a Catalog
To set up a JSON connection to connect a catalog to a JSON data source, take the following steps:
- Create a catalog or open a catalog.
- In the Catalog Manager, do either of the following:
- To set up the connection in an existing data source in the catalog, right-click the data source node and select New JSON Connection from the shortcut menu.
- To set up the connection in a new data source in the catalog, select any of the existing catalog data sources, select New Data Source on the Catalog Manager toolbar, then in the New Data source dialog box, specify the name of the data source, select the JSON connection type and select OK.
Designer displays the JSON Connection Wizard dialog box.
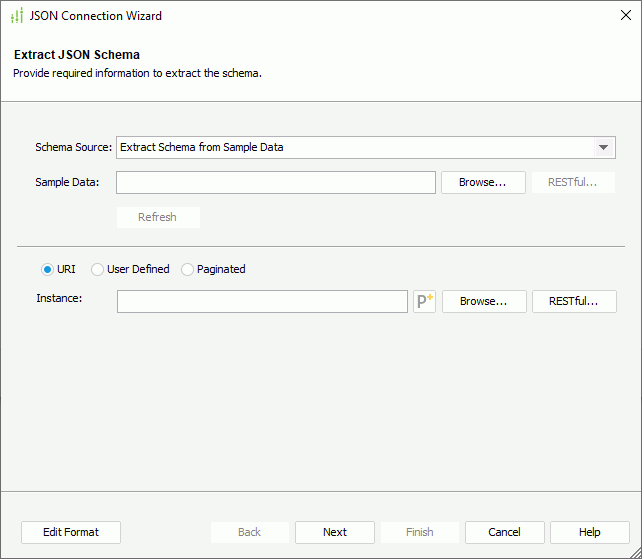
- In the Extract JSON Schema screen, select the schema source from the Schema Source drop-down list: Extract Schema from Sample Data or Extract Schema from Instance Data.
- Provide information for extracting the JSON schema.
- When you select the schema source as Extract Schema from Sample Data
- In the Sample Data text box, type the URI string of the sample data file or select Browse to select the file.
- In the URI string, you can reference parameters and constant level formulas in the current catalog data source in the format @FieldName, and the special field "User Name" as @username. For example, if a URI string is
http://localhost:8080/rest/getData?startDate=2016-01-01, and you want to use the parameters pHost, pPort, and pStartDate to dynamically generate the URI, type the URI string ashttp://@pHost:@pPort/rest/getData?startDate=@pStartDate. - When the URI string contains characters, such as "@", ":", and double quotation marks, or other strings that do not need to be parsed, you should quote them with double quotation marks.
- If you use the special field "User Name", when you select Next in the connection wizard, Designer displays the Security Identifier dialog box for you to specify the user name that you want to use to generate the stream. When a user runs a report that uses data from the JSON data source at runtime, Server applies the user's ID.
- In the URI string, you can reference parameters and constant level formulas in the current catalog data source in the format @FieldName, and the special field "User Name" as @username. For example, if a URI string is
- When the URI string you specify begins with the "http://" or "https://" protocol, Designer enables the RESTful button. Select the button to specify RESTful options for the sample data in the RESTful Data Source Options dialog box.
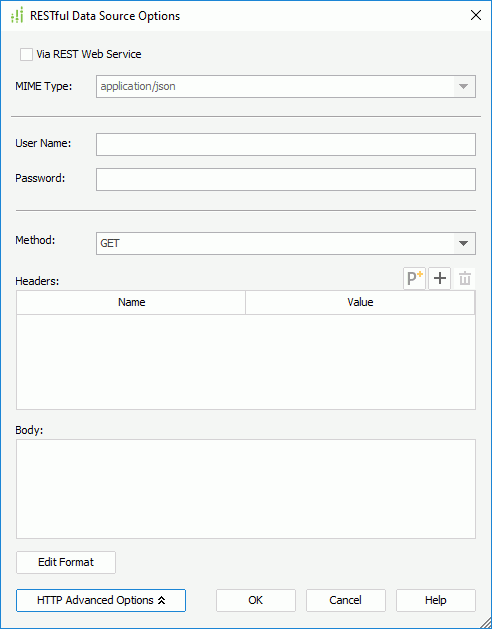
- To receive the remote data via REST Web Service on the application server, select Via REST Web Service, then from the MIME Type drop-down list, select the MIME type for the REST Web Service data source. You can also specify the type in the text box manually. The REST Web Service Client API (such as the JAX-RS Client API of Java EE) will then be used to get the remote data. When you use a proxy to connect to the REST Web Service, you need to configure the proxy parameters so that the proxy can work successfully.
 If you do no select Via REST Web Service, Designer receives the remote data via the protocol in the URL you specify in the Sample Data text box in the connection wizard.
 - Specify the user name and password for remote data authentication.
- Select HTTP Advanced Options to specify the advanced HTTP options.
- Select an HTTP method from the Method drop-down list to send the request, GET or POST.
- Select Add
 above the Headers box to add a header line, then specify the name and value of the user-defined HTTP header. Repeat this to edit more headers. To delete a header, select it and select Remove
 .
. - In the Body box, specify the user-defined HTTP body.
- When editing the HTTP headers and body, you can reference parameters, constant level formulas, and the special field "User Name" as described earlier. When the predefined parameters cannot meet your requirements, you can select
 to create the parameter.
 - If you reference parameters and formulas in the HTTP headers and body, you can select Edit Format to edit the format of their values.
- Select OK to apply the RESTful data source options and return to the JSON Connection Wizard dialog box.
- Specify how to get instance data for the JSON schema.
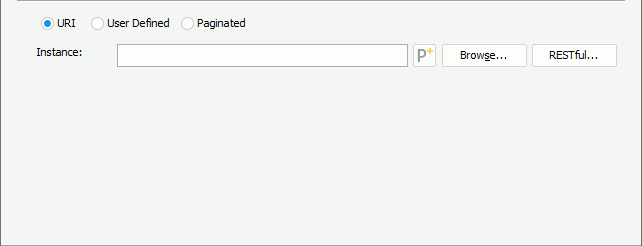
- To get instance data from a URI, select URI, then type the URI string in the Instance text box or select Browse to select the instance file. The instance should match the JSON schema that you have defined in the specified sample data file. You can also reference parameters, constant level formulas, and the special field "User Name" in the URI string as described earlier, and when the predefined parameters cannot meet your requirements, you can select
 to create the parameter. Select RESTful to specify RESTful options for the instance data, when you use a URI based on the "http://" or "https://" protocol.
- To get instance data from a user-defined interface, select User Defined, then provide the class name with package name in the Class Name text box. You can also select Browse to find the class file. The class you specify should exist and can be found by Designer, which means the class should be in the class path of the system environment or in the ADDCLASSPATH variable of setenv.bat/setenv.sh stored in
<install_root>\bin. After you fill in this text box, Designer automatically displays the class name of the interface that the class implements behind "The class implements:". Specify the parameter string for the user-defined interface in the Parameter box. The parameter string must match the format defined in the class. You can also reference parameters, constant level formulas, and the special field "User Name" in the parameter string as described earlier.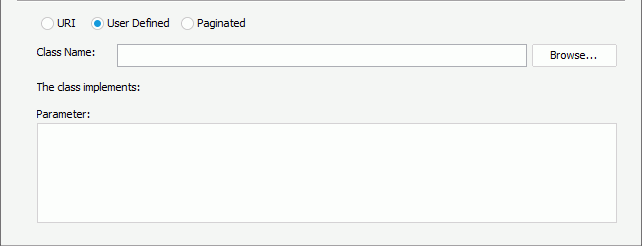
 To get paginated instance data from a REST Web Service, select Paginated. In the User Name and Password text boxes, type the user name and password for remote data authentication, then specify the main formula that defines how you want to fetch paginated data.
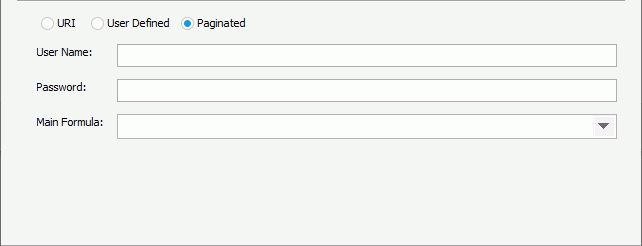
- From the Main Formula drop-down list, select New Formula.
- In the Enter Formula Name dialog box, type the name of the formula and select OK. Designer displays the Formula Editor dialog box.
- Compose the formula. The formula should call the _client.send(Request) method for sequential fetch or _client.send(Request[], integer) for concurrent fetch. You can apply the same formula syntax as with other Logi Report formulas, for example, you can reference parameters (type-in parameters only) in the current catalog data source and some special fields in the formula.
- You can create several formulas and reference them in each other.
- Select the formula that specifies the process to access the paginated JSON data as the main formula. Then, when you run a report using data from this JSON data source, Logi Report Engine sends the request in the main formula to the REST Web Service and fetches data from the response to display in the report. Logi Report Engine executes other formulas this main formula references internally.

- You can only create and edit formulas used for fetching paginated data from this Main Formula drop-down list. Designer does not save the formulas in the catalog, meaning, you cannot access them from the catalog resource tree.
- Logi Report Engine handles the formulas for fetching paginated data all in memory, so you should make sure you have enough memory and align the number of concurrent fetching threads carefully.
- To get instance data from a URI, select URI, then type the URI string in the Instance text box or select Browse to select the instance file. The instance should match the JSON schema that you have defined in the specified sample data file. You can also reference parameters, constant level formulas, and the special field "User Name" in the URI string as described earlier, and when the predefined parameters cannot meet your requirements, you can select
- In the Sample Data text box, type the URI string of the sample data file or select Browse to select the file.
- When you select the schema source as Extract Schema from Instance Data, type the URI string of the instance file in the Instance text box or select Browse to select the file. In the URI string, you can reference parameters, constant level formulas, and the special field "User Name" as described earlier. When the specified URI string begins with the "http://" or "https://" protocol, Designer enables the RESTful button. Select the button to specify RESTful options for the instance data.
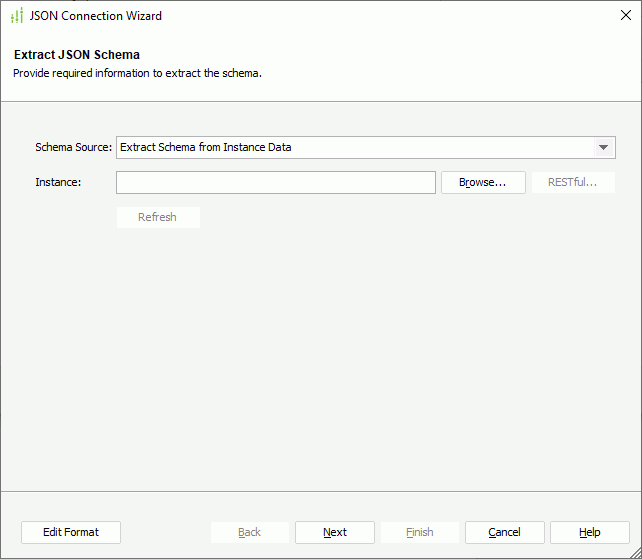
- When you select the schema source as Extract Schema from Sample Data
- When you reference parameters and formulas in the URI/parameter string, you can select Edit Format to edit the format of their values.
- Select Next. Designer displays the Modify Schema Properties screen.
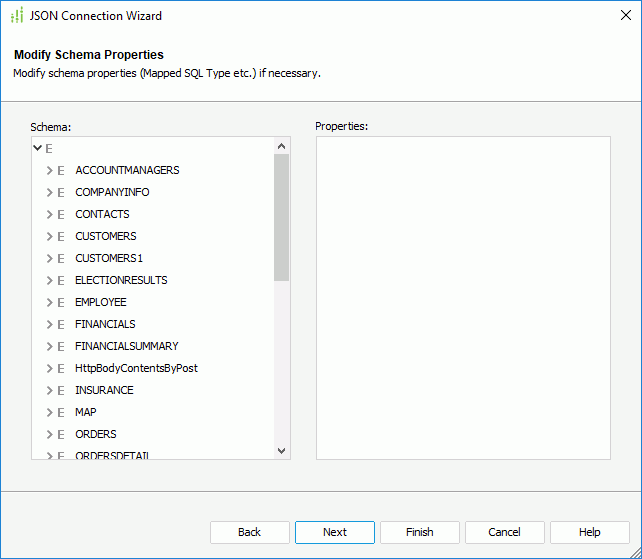
- The Schema box lists the elements in the JSON schema. Select an element and modify its properties in the Properties box.
- Select Next. Designer displays the Transformed Relational Schema screen, showing the relational tables it builds based on the transformed relational schema structure.
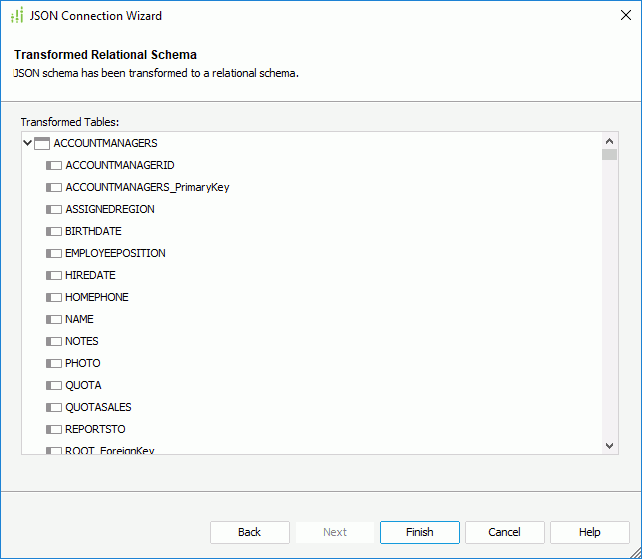
- Select Next. Designer displays the Add Table screen.
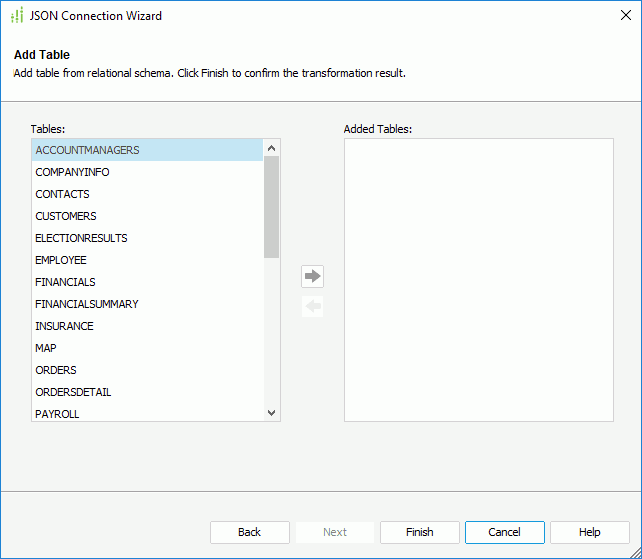
- In the Tables box, select the tables you want to use in the connection and select Add
 to add them to the Added Tables box. You can create queries and business views using these tables and then develop reports based on the queries and business views.
 - Select Finish to complete the transformation process.
 Creating Formulas for Fetching Paginated JSON Data
Logi Report provides several objects for fetching paginated JSON data. See the classes Client, JsonArrayBuilder, JsonObjectBuilder, and JsonPatch in the jet.formula.object package, and the classes fJsonArray, fJsonObject, fRequest, and fResponse in jet.formula in the Logi Report Java API Documentation for more information.
To enable easy using of the objects, Logi Report also publishes some global accessible objects. You can reference them in your formula expressions directly. For example, for the JsonObjectBuilder object, you can use _job, for JsonArrayBuilder you can use _jab, for JsonPatch use _jp, and for Client use _client.
The following explains the objects briefly.
- The Client object is for sending requests. You should call the _client.send(Request) method for sequential fetch or _client.send(Request[], integer) for concurrent fetch in each formula that you create for fetching paginated JSON data.
- The JsonObjectBuilder and JsonArrayBuilder objects are for building a JSON instance from scratch. You can use either of them to launch a chained call as: _job.start().add(…)……add(…).end(); or _jab.start().add(…)……add(…).end();. You should call both objects in the sequence started by start() and ended by end() and call other methods in between.
- The JsonPatch object implements the JSON Patch RFC 6902 for updating an existing JsonObject. You should call it in the sequence started by start() and ended by end() and call other methods in between.
- The fJsonArray object implements the JsonArray data type in the formulas.
- The fJsonObject object defines a new data type with a set of accessors to express JSON instances.
- The fRequest object represents a request of certain protocol, which could be http, https, ftp, or file.
- The fResponse object implements the Response data type in the formulas.
Formula Examples of Sequential Fetch
The following example shows how you can set the request header property and the request body, send sequential requests to get response, and specify the condition for ending the requests according to some element value in the response body.
String url = "xxxxx";
Request req = _client.createRequest(url);
req.addHeaderProperty("Content-Type", "application/json");

JsonObject body = _job.start().add("size", 100).add("query",
        _job.start().add("match",
          _job.start().add("message", "foo").end()
        ).end()
      ).end();

req.setBody(body);// Todo: need some overloaded version for String, file arguments?

Response resp = _client.send(req);

JsonObject responseBody = resp.getBody();
String scroll_id = responseBody.getString("\scroll_id");

while(!isNull(scroll_id)){
    req.setUrl("some other url");
    body = _job.start().add("scroll", "1m").add("scroll_id", scroll_id).end();
    req.setBody(body);
    //
    resp = _client.send(req);
    scroll_id = responseBody.getString("\scroll_id");
}
The following example retrieves value for nextCursorMark from the response and passes it back to Solr as value of the cursorMark parameter for the next request. The process repeats until the value of nextCursorMark matches that of cursorMark.
===========================
String url = "http://localhost:8983/solr/techproducts/select?indent=on&q=*:*&rows=10&sort=id+asc&cursorMark=";
String nextCursorMark = "*", lastCursorMark = "";"
request r;
r.setMethod("GET");
while(nextCursorMark != lastCursorMark) do{
            lastCursorMark = nextCursorMark;
       r.setUrl(url + nextCursorMark);
       response resp = _client.send(r);
       JsonObject body = resp.getBody();
       nextCursorMark = body.getString("/nextCursorMark");
};

return "";
Formula Example of Concurrent Fetch
This example assumes you know the total page number of the JSON data source, so you can control the requests you want to execute concurrently. The example uses the _client.send(requests, bufferNumber) method to send these concurrent requests.
Request requests[];
for(integer i = 0; i < totalPages; i=i+1){
    String url = "xxxxx";
    Request req = _client.createHttpRequest(url);
    req.addHeaderProperty("Content-Type", "application/json");

    integer from = // calculate the from
    integer size = // calculate size

    JsonObject body = _job.start().add("from", from).add("size", size).add("query",
            _job.start().add("match",
              _job.start().add("user.id", "kimchy").end()
            ).end()
          ).end();

       req.setBody(body);

       requests[i] = req;
}

integer bufferNumber = 10;

//
_client.send(requests, bufferNumber);
Adding More Tables to a JSON Connection
After you have set up a JSON connection in a catalog, you can add more tables transformed from the JSON data source into the catalog via the connection.
- Do one of the following:
- Right-click the JSON connection and select Add Tables from the shortcut menu.
- Right-click the Tables node of the JSON connection and select Add Tables from the shortcut menu.
- Right-click an existing table in the JSON connection if there is and select Add Tables from the shortcut menu.
- Right-click any folder in the Tables node of the JSON connection if you have already created some and select Add Tables from the shortcut menu.
- Select the Tables node of the JSON connection, or any existing table or folder in the connection and select Add Tables on the Catalog Manager toolbar.
Designer displays the Add Tables dialog box.
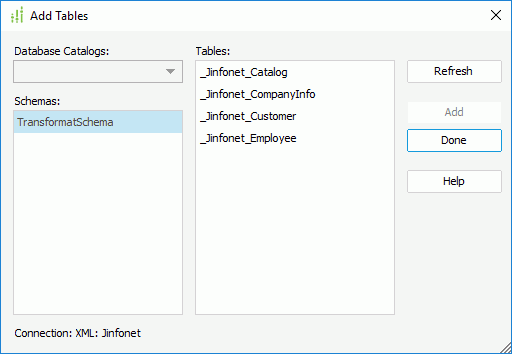
- Select Refresh.
- Designer displays the tables contained in the schema that it transforms from the JSON data source in the Tables box. Choose the required tables and select Add.
- Select Done to finish adding the tables and close the dialog box.
Managing Tables in a JSON Connection
For the tables you have transformed from a JSON data source and added into a catalog via a JSON connection, you can refresh them, organize them into folders, and remove and add the table columns the same as you do with tables from a JDBC database.
 Previous Topic