Configuring for Google Maps
This topic describes how to configure an API Key for a Logi Info application that uses Connection.Google Maps and the other Google Map elements.
![]() In July 2018, Google changed its licensing scheme, ending the free API access previously offered at some usage levels. This specifically affected geocoding in Logi applications. If you're using Google Maps and geocoding in your Logi application you will need to:
In July 2018, Google changed its licensing scheme, ending the free API access previously offered at some usage levels. This specifically affected geocoding in Logi applications. If you're using Google Maps and geocoding in your Logi application you will need to:
- Review the new billing requirements outlined in Google's Pricing and Billing Changes page.
- Enable a "billing account" for use with your Google API key.
- Generate a new API key for use in your Logi application.
- Upgrade your application to Logi Info v12.5 SP9 or later, and use the new key in it.
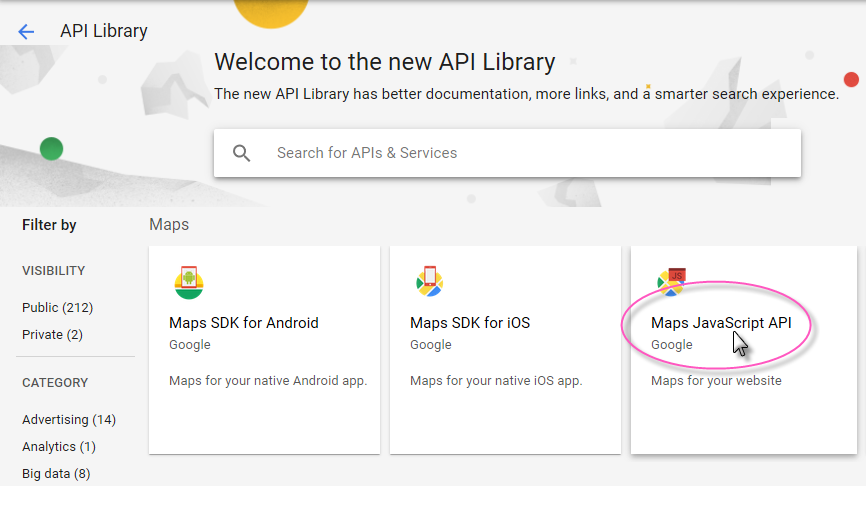
- In the Dashboard page, click ENABLE APIS AND SERVICES, which takes you to the API Library page. In the Maps section, find and click the Google Maps JavaScript API item, as shown above.
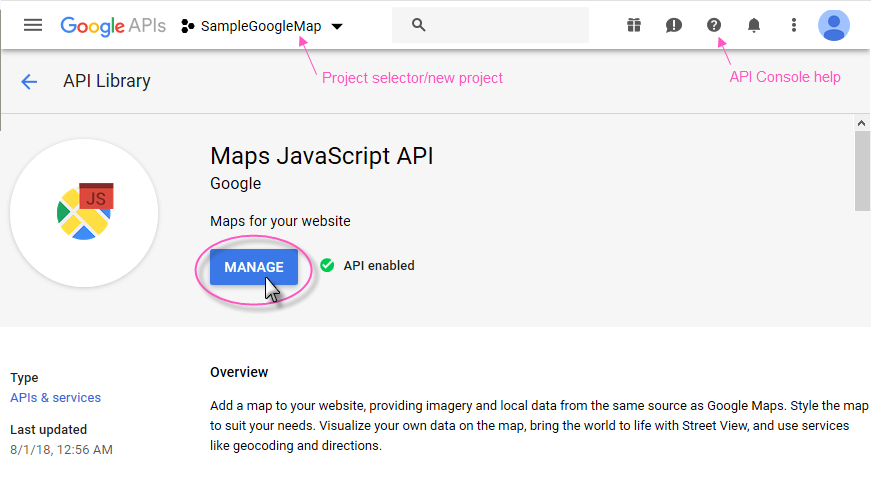
- You'll be shown a page with information about the API, as shown above. Use the control at the top of the page to add a new project, or to select an existing project. Click MANAGE to configure the project.

- The Maps JavaScript API details page will be displayed. Click the Overview menu item, as shown above.
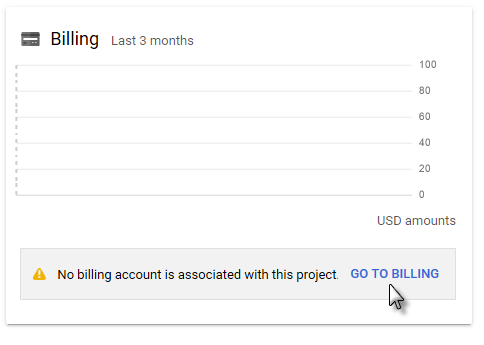
- On the Overview page, find the Billing panel, shown above. Click the GO TO BILLING link to configure billing for this project. Link an existing billing account to this project, or create a new billing account and link it.
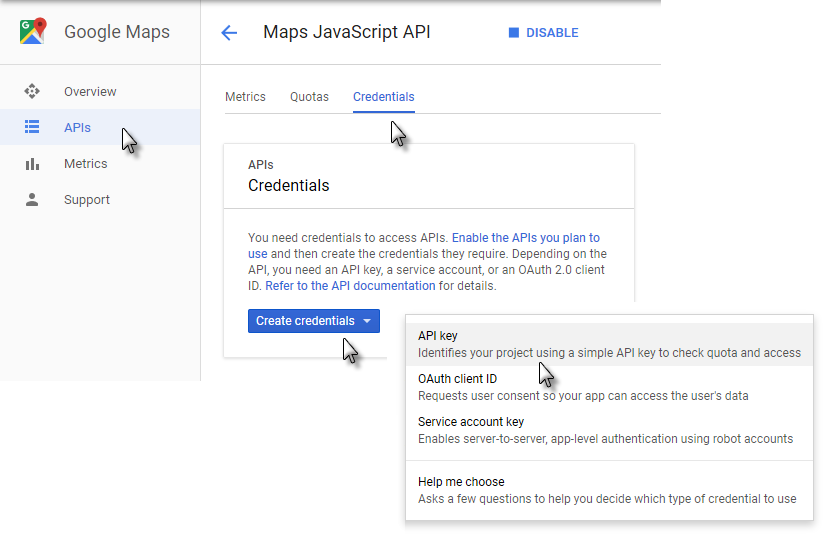
- In the Maps JavaScript API page, select the APIs menu item, then the Credentials tab, as shown above. If you have no existing keys, click Create credentials, then API Key, as shown above. (If you have existing keys, select the one used with your Logi application and click REGENERATE KEY on its details page).
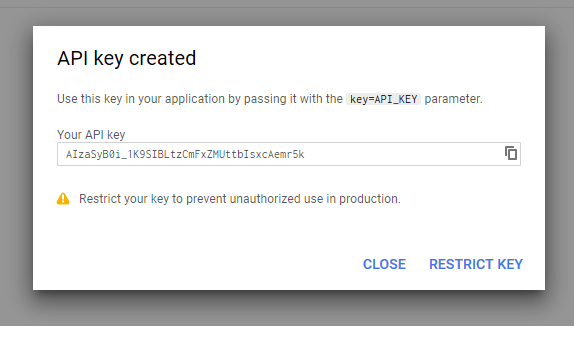
- A pop-up panel will display your new API Key, as shown above. Click the icon to copy the key to your clipboard. If desired, click RESTRICT KEY to provide your own key name and/or apply referrers, IP address, and other usage restrictions.
 It may take up to 5 minutes for this setting to take effect.
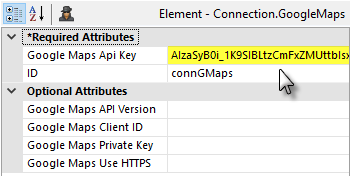
- In Logi Studio, paste your API key into the Connection.Google Maps element's Google Maps Api Key attribute, as shown above. Be sure there are no leading or trailing spaces around the key. Also set the required ID attribute as desired.
Your connection is now configured and you can proceed to develop and test your Logi Info application with Google Maps.
The API Console's Dashboard page allows you to monitor the number of requests and other performance details of the Google API.
Other Connection Attributes
The Connection.Google Maps element also has these attributes:
| Attribute | Description |
|---|---|
Google Maps API Version | Specifies the Google Maps JavaScript API version to use. The API is regularly updated with new features, bug fixes, and performance improvements. If left blank, the latest version will be used. Information is available about API versions and release notes. |
Google Maps Client ID | Specifies the Client ID value that Google provides to its "Google Maps API for Business" license customers. This ID is used with the Geocode Columns element, which works under DataLayers to geocode addresses. You will need a Google license in order to use this. |
Google Maps Private Key | Specifies the Private Key value that Google provides to its "Google Maps API for Business" license customers. This key is used with the Geocode Columns element, which works under DataLayers to geocode addresses. You will need a Google license in order to use this. |
Google Maps Use HTTPS | Specifies whether the Google Maps API should be accessed using HTTPS. The default value is: False. |