Manual Installations under Linux
Many of the commands used here are the same as those shown in the Manual Installations Under Windows topic, so screenshots of the resulting terminal or command line output will not be duplicated in this topic. The examples shown are based on Centos 7, you may need to adjust them for your specific Linux OS variant. File and folder names and command line arguments are, of course, case-sensitive.
To install the DM:
- Ensure that you're logged into your computer as an administrator.
- Download the Discovery .zip file using the link provided by Logi staff and save it to a convenient location.
- Create a new folder for the new instance and give it a name that's relevant to you. Assuming you logged in as user "logi", the default for a single installation would be: ~/Discovery and for a multi-instance installation we'll use ~/Discovery2 in these instructions.
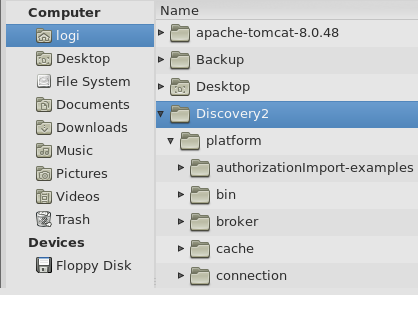
- Extract the downloaded .zip file contents into that new folder - it requires 600+ MB of space and will take several minutes. The resulting folder structure should be similar to that shown above.
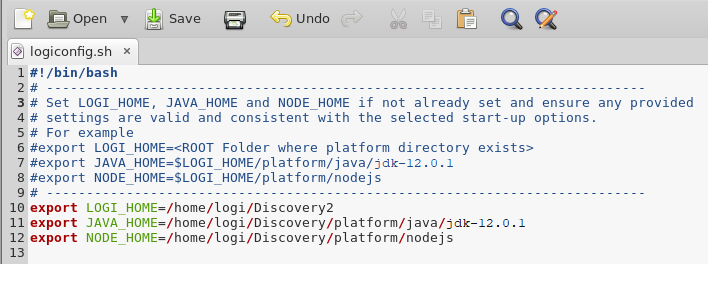
- Once the extraction completes, use a text editor like pluma or nano to open the ~/Discovery.. or ~/Discovery2/platform/bin/logiconfig.sh file and edit the three environment variable paths, as shown above. LOGI_HOME will be the /Discovery folder for a single installation or /Discovery2
for a multi-instance installation.
If you want to use the JRE and Node.js installed for your first instance by the standard installer, edit their paths here to point to their folders, as shown above. Or, if you want separate instances of them, too, you can download them, install them, and edit the paths here appropriately (see the Requirements section in Installing Discovery Module Instances Manuallyfor version information). - Generate Master Key data by opening a terminal or command line window, navigating to the ~/Discovery2/platform/bin folder, and executing:
sudo chmod +x keygen.sh
sudo ./keygen.sh -alg aes -default -install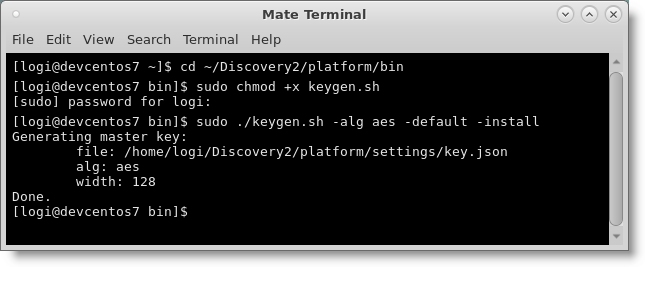
A successful execution will look like the image shown above. You'll use the command line window again later, so leave it open.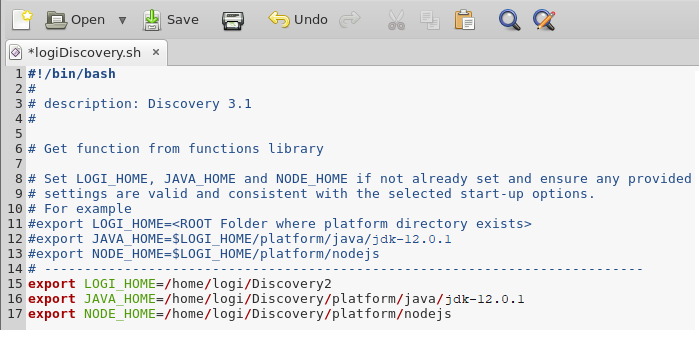
- Open the ~/Discovery2/platform/bin/logiDiscovery.sh file and edit the environment variable paths, as you did in Step #5.
- Save and then copy the edited logiDiscovery.sh file to the /etc/init.d folder, using the appropriate source path:
sudo cp ~/Discovery2/platform/bin/logiDiscovery.sh /etc/init.d/logiDiscovery.sh - An installation of the DM is configured to use a number of
communication ports. If you're installing a single instance and would like to use the default settings, skip ahead to the next step. These ports must be unique for each DM
instance and so you'll need to configure them. These ports must be above
5000 and, obviously, can't already be in use.
Use the following commands and your text editor to change the instance name and the port numbers in the following configuration files, on or near the specified line numbers. You can use the netstat -an command in your command line window to see what ports are already being used. Some of the values shown below have been truncated and ellipses added to conserve space. The example values shown are just suggestions and may not work on your system.
cd ~/Discovery2/platform/settings/
sudo chmod 755 logiDataService.json
sudo pluma logiDataService.jsonLine # Default Value Example New Value 3
"instanceName": "NGP_1",
"instanceName": "NGP_2",
77
"uri": "tcp://localhost:61616?..."
"uri": "tcp://localhost:51616?..."
81
"uri": "stomp://localhost:61613"
"uri": "stomp://localhost:51613"
118
"url": "jdbc:h2:tcp://localhost:9092/LogiDB",
"url": "jdbc:h2:tcp://localhost:5092/LogiDB",
166
"port": 7654,
"port": 5654,
176
"port": 7654,
"port": 5654,
sudo chmod 755 logiApplicationService.json
sudo pluma logiApplicationService.jsonLine # Default Value Example New Value 13
"uri": "stomp://localhost:61613"
"uri": "stomp://localhost:51613"
26
"port": 8443,
"port": 5443,
40
"port": 3000,
"port": 5000,
cd ../bin
sudo chmod 755 clientSecret.js
sudo pluma clientSecret.jsLine # Default Value Example New Value 40
"port": 3000,
"port": 5000,
 The port values on Line #40 in the last two files must be the same. If you make changes to these settings in the future, you'll need to stop and restart the services for the changes to take effect.
 Still in ~/Discovery.. or ~/Discovery2/platform/bin, grant full permissions to the logiApplicationService.sh and logiDataService.sh files, using these commands:
sudo chmod 755 logiApplicationService.sh
sudo chmod 755 logiDataService.sh- Open and run the Logi services using the following commands:
cd /etc/init.d
sudo chmod +x logiDiscovery.sh
sudo ./logiDiscovery.sh start - Next, you need to import the product license. For a single instance installation, download a Logi product license file, which is similar to lgx030504.lic, from DevNet and save it to ~/Discovery.
For a multi-instance installation, copy the Logi product license file, which is similar to lgx030504.lic, from your first DMinstallation (or download it from DevNet) and save it to ~/Discovery2.
Stop the services and import the license using the following commands, providing the correct path and license file name.:
sudo ./logiDiscovery.sh stop
cd ~/Discovery2/platform/bin
sudo chmod +x licenseTool.sh
sudo ./licenseTool.bat createlicense --inputfile=/home/logi/Discovery2/lgx030504.lic --user=admin --password=password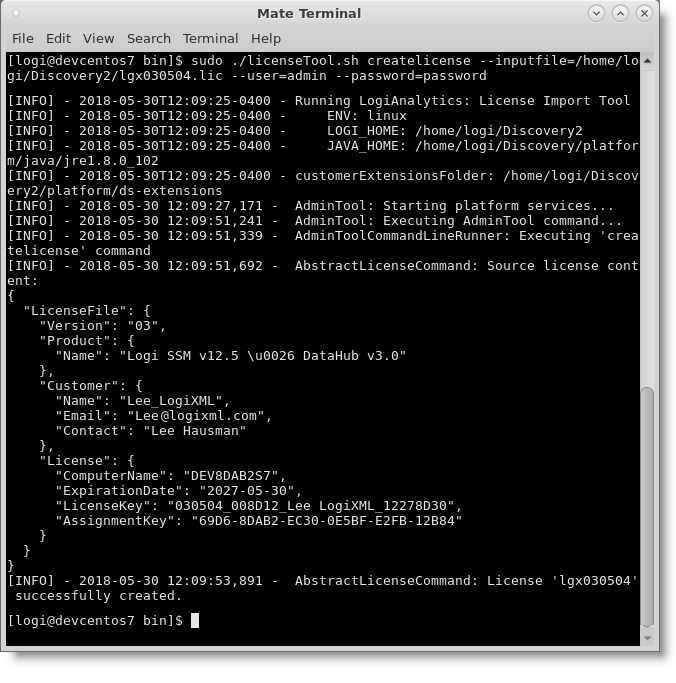
The user and password values are literally "admin" and "password" - do not substitute your own values here. - Restart the Logi services, using the following commands:
cd /etc/init.d
sudo ./logiDiscovery.sh start - Update the "Client Secret", using the following commands and providing the correct path:
cd ~/Discovery2/platform/bin
sudo chmod +x clientSecret.sh
sudo ./clientSecret.sh --username=admin --password=password
as shown above. Again, use the literal "admin" and "password" argument values. - By default, only an Admin user is allowed to login and create Dataviews, Widgets, and Dashboards. If that's satisfactory, skip ahead to the next step. Otherwise, to allow all other users to also login and create these objects, while still in the /platform/bin folder, run the following two commands from your Command Window.
The first command reads an Excel spreadsheet file containing the object authorizations. We've provided an example Excel file with the authorizations for "syspublic" or all users. Use the correct, fully-qualified path and filename for that file as an argument in the command:
sudo chmod +x authorizationImportTool.sh
sudo ./authorizationImportTool.sh --authorization-file=/home/logi/Discovery2/platform/authorizationImport-examples/syspublic-authorization.xlsx --user=admin --password=password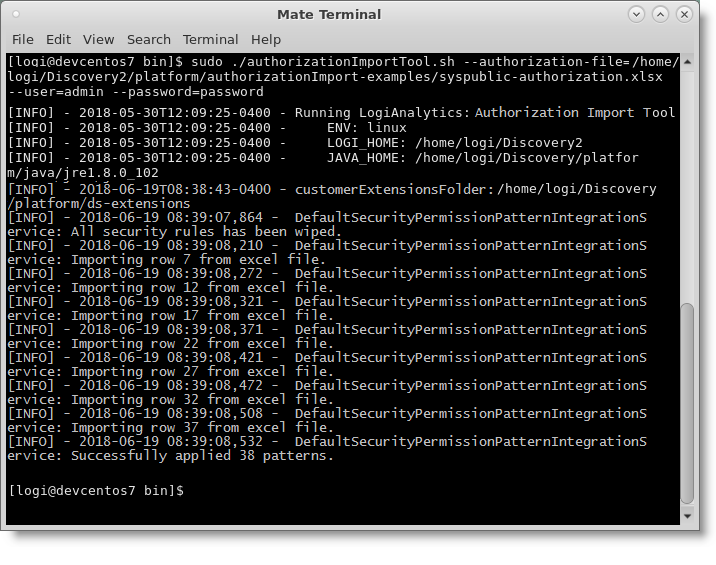
and the output is shown above. Then run the second command:
sudo chmod +x setDefaultPermissions.sh
sudo ./setDefaultPermissions.sh --username=admin --password=password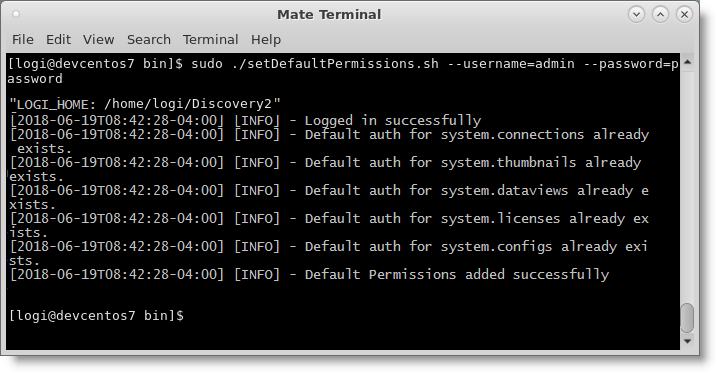
as shown above. You can close the Command Window now. - Stop and restart the Logi services again.
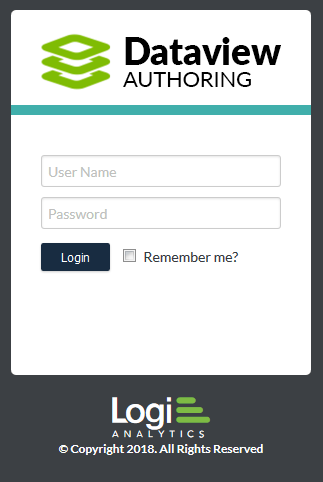
- In your browser, navigate to localhost:5000/Datahub (using whatever port value you entered in Line #40 in Step #9, 3000 is the single instance default) and then login as "admin" with "password".
That completes the installation and configuration. Repeat the process for each new instance you add.