Identifying Files to Upload
The upload process begins with the user identifying the file to upload. This can be done very easily using the Input File Upload element in a report definition. This element displays both an input text box and a "Browse" button that allows users to browse their local file system.

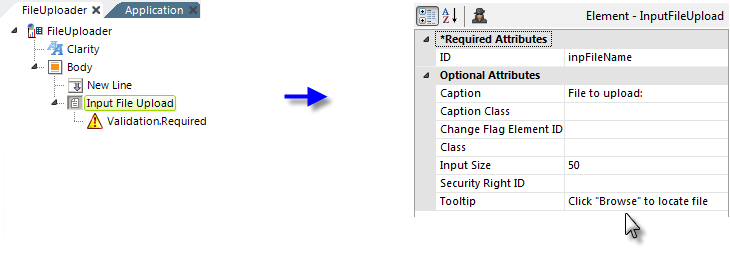
- As shown above, add an Input File Upload element to a report and set its attributes as desired.
- Add a Validation.Required element beneath it to ensure that the filename value is not empty.

The example above shows what the Input File Upload element looks when displayed. Clicking the Browse... button opens a file explorer window, allowing the user to find and select a local file. The fully-qualified file name (drive letter, complete path, and full file name) is entered into the text box. It's not possible to enter this information by typing. Only one file at a time can be uploaded per Input File Upload element.

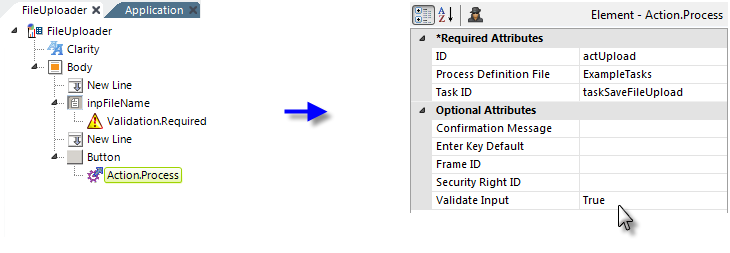
- Add New Line and Button elements, as shown above, and beneath the Button, add an Action.Process child element which calls the appropriate Process task. Note that its Validate Input attribute is set to True to cause the Validation.Required element to check to see if a file name was entered.
When the user clicks the button and submits the page, the upload will take place immediately and the uploaded file will be stored as a temporary file in your application's rdDownload folder on the web server.
At the same time, the Process task specified will be called; its role is discussed in Saving Uploaded Files.