Creating Data Relationships
You can define data relationships between data objects in a Dataview. These are the support relationships:
| Join | Description |
|---|---|
 | A Left Join will return all of the data from the left object and the data from the right object where the data in the related columns match. Where there isn't matching data, return Null information for the right object's columns. |
 | An Inner Join will return all of the data from the left and right objects where the data in the related columns match. Exclude the data from both objects if the data in the related columns doesn't match. |
 | A Right Join will return all of the data from the right object and the data from the left object where the data in the related columns match. Where there isn't matching data, return Null information for the left object's columns. |
 | An Outer Join will return all of the data from both the left and right objects. Where there are matches in the related columns, return the data from both left and right objects. Where a match can't be found, return Null information. All records from both data objects will be represented in the final dataview. |
 |
A Union All will return all of the data from both the left and right objects where there are matches in column names and data types. The non-matching columns will be appended to the rows. |
In the following examples, we'll use the Northwind database
as our primary data source and go through the process of
creating a
Dataview that includes a relationship. Once you understand the user
interface basics, the techniques used to select the
objects and columns, and establish relationships is relatively simple.
We'll being by navigating to DataHub's Create a New Dataview, selecting or creating a Northwind data source (not shown here), and displaying the Dataview Configuration tab.
We're going to need Customer information and Order information, so let's start by selecting the
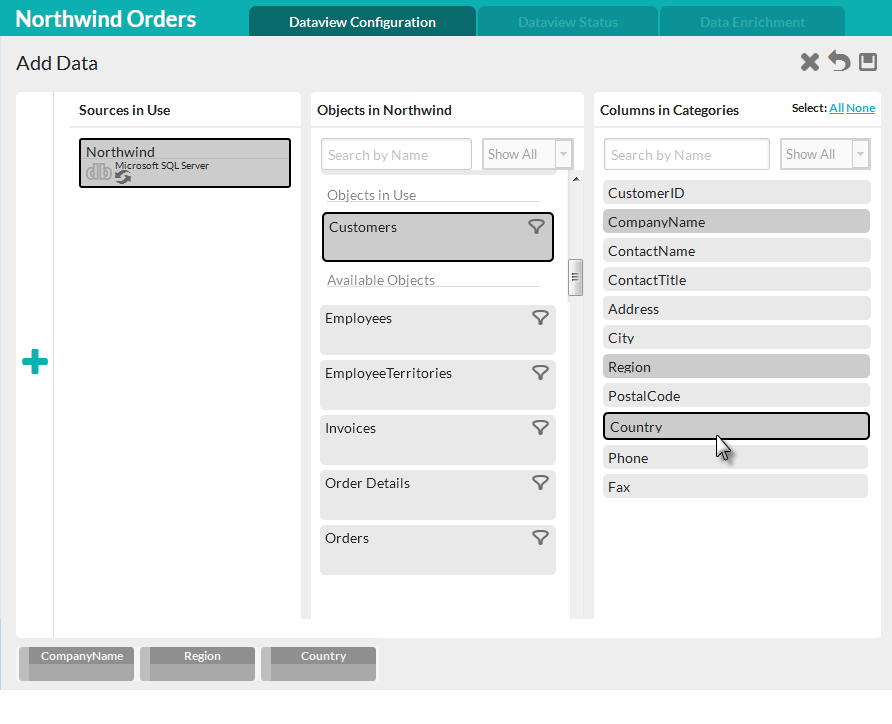
Customers data object and identifying the customer data that we need.

We clicked on the Customers data object and clicked on the CompanyName, Region, and Country columns, as shown above. Notice at the bottom-left of the tab, the current definition of the columns in the Dataview is taking shape.
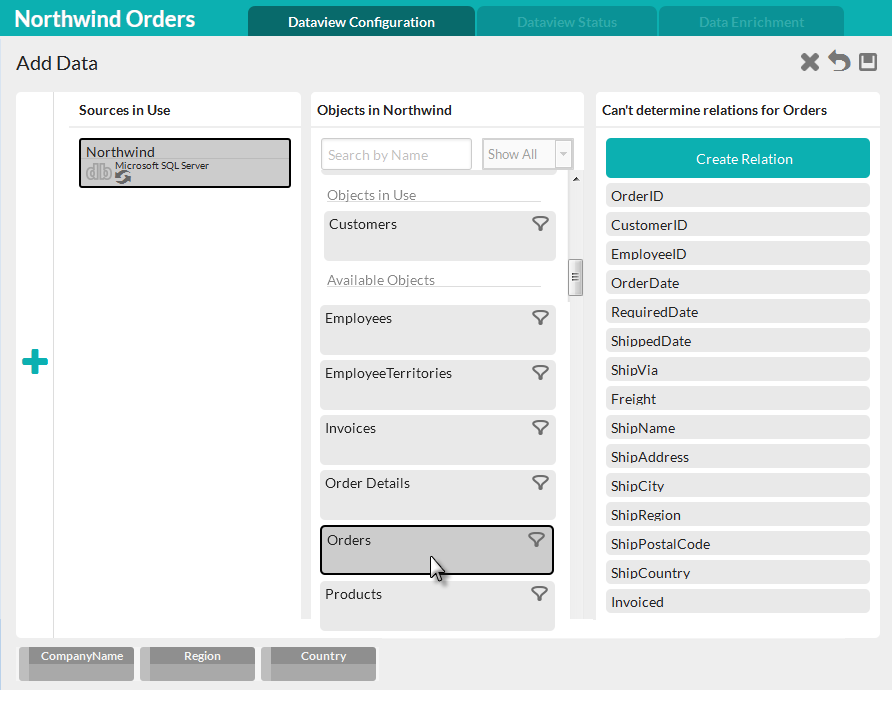
Our next step is to identify the Order information we need in the Dataview. If we click on the Orders object, the Dataview Configuration tab will look like:

Notice that the Customers columns are still in the Dataview, the Orders columns are available for selection, but no relationship between them has been defined yet.
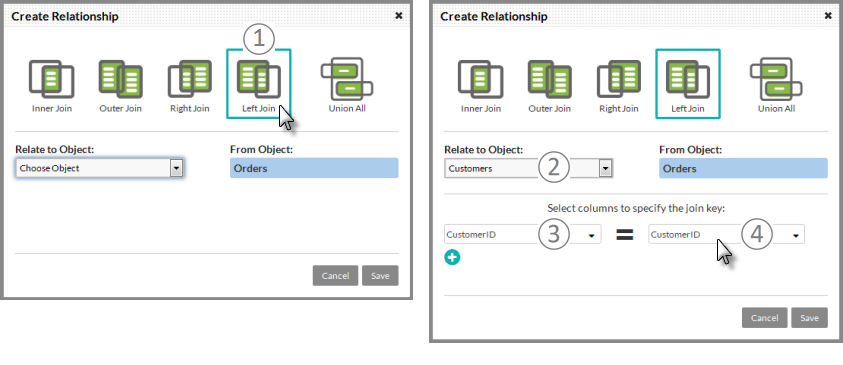
If we click Create Relation in the Columns panel, the Create Relationship panel is displayed:

In order to create a relationship, do the following:
- Relationship Type - Click the type of relationship you want to use; in our example, it's a Left Join, which is selected by default.
- Relate To Object - Select the object we want to relate the Orders object to; we want to relate to Customers.
- Select "Left" Key Column - Select the column in Customers that we want to relate to one in Orders; we'll use CustomerID.
- Select "Right" Key Column - Select the column in Orders that we want to relate to the one we selected in Customers; we'll use CustomerID.
It's not necessary for this example, but we can create multiple key column pairs by clicking the "+" icon. Click theSave button to save the relationship.

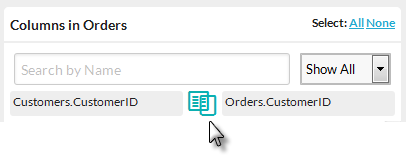
The relationship description has been added to the top of the Columns panel, as shown above. To modify it, click the Join icon in the middle.
It's possible to create additional relationships between these and other objects by repeating the process described above.
Click the Save icon in the upper right-hand corner of the tab to save the Dataview with its relationship.