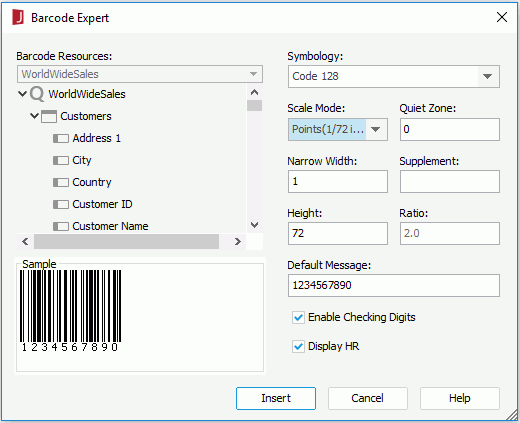
Barcode Expert Dialog
The Barcode Expert dialog appears when you select Insert > Barcode. It helps you to create and edit a barcode object and then insert it into your report. See the dialog.
The following are details about options in the dialog:
Barcode Resources
Lists the resource that can be used as the data source for the barcode. The data source of a barcode can be database data, formulas, parameters, or a string typed by a user.
Symbology
Specifies the barcode type. You can choose from the following: UPC-A, UPC-E, EAN-13, EAN-8, Code39, Code128 and Codabar.
Scale Mode
Specifies the unit for values of Quiet Zone, Narrow Width, Supplement, Height, and Ratio. Can be Mils (0.001 inch), Metric (0.01 millimeter), and Points (1/72 inch).
Quiet Zone
Specifies the space around the barcode where there are no dark marks. Most of symbology requires a quiet zone which precedes the following barcode.
Narrow Width
Specifies the barcode bar width.
Supplement
Specifies the supplement (if necessary). Some barcode types, such as CODE39, CODE128 and Codabar, do not have supplements.
Height
Specifies the height of the barcode.
Ratio
Specifies the width ratio of the thick bar to the thin bar in the CODE39/ Codabar barcode. The ratio box can have only 2 effective values, 2.0 and 3.0. Any ratio values that are not equal to 2.0 or 3.0 will be regarded as 2.0. Enabled only for CODE39 and Codabar.
Default Message
Specifies the default value for the barcode.
Enable Checking Digits
If checked, the checking digits will be enabled.
Display HR
Specifies whether to display the barcode numbers together with the barcode. Enabled only for CODE39, CODE128, and Codabar.
Insert
Accepts the changes and inserts the barcode into your report.
Cancel
Does not retain the changes and closes the dialog.
Help
Displays the help document about this feature.
 Previous Topic
