Creating Application Pools in IIS 6
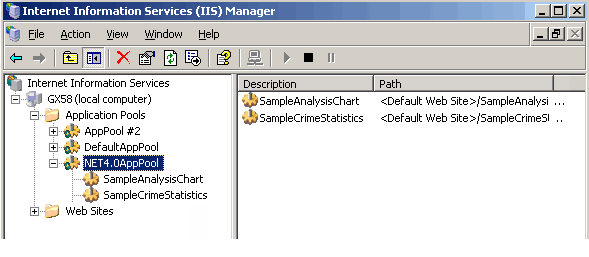
Microsoft IIS 6 introduced Application Pools as a method of isolating different applications within the server, in order to provide improved reliability. The "Default Application Pool" is created by default at installation and all virtual directory applications, when created, are assigned to this default pool.
However, applications using different .NET versions can't be run at the same time in the same pool. If they are, error messages will appear for whichever application is started last. The recommended practice is to create a new application pool and assign all applications that use the same .NET version to it.

To create a new application pool:
- Open the IIS Manager (see All Programs
 Administrative Tools )
 - Select and right-click the Applications Pools item in the list on the left. Select New Application Pool... from the pop-up menu.
- Enter the new name of your choice as the Application Pool ID and leave the default pool settings selected. Click OK
- Expand the Application Pools item in the list on the left to see your new pool.

To assign an application to the new Application Pool:
- Expand the Web Sites item in the list on the left.
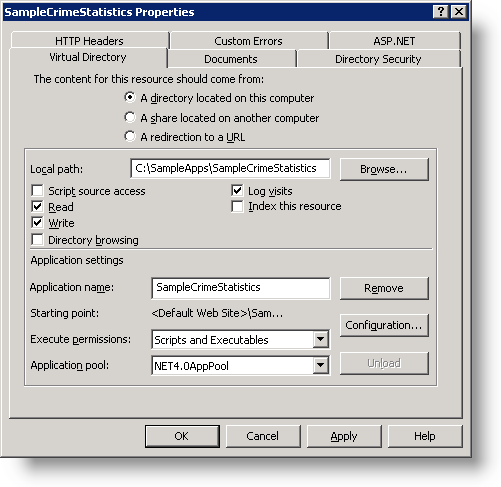
- Select and right-click the virtual directory representing your application. Select Properties from the popup menu.
- Select the new application pool you just created from the list of Application Pools in the Properties dialog box.
- Click OK
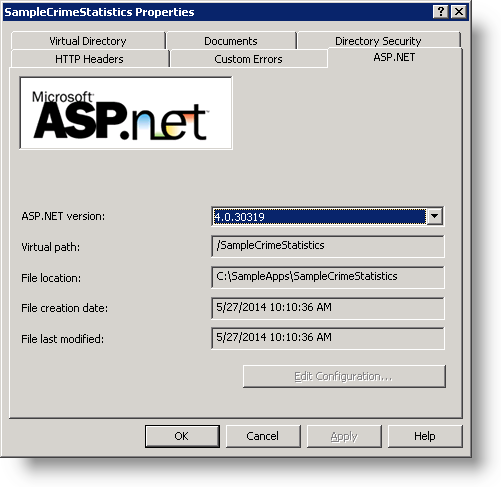
If you have any doubt about which version of .NET your application is set to use:

Click the ASP.NET tab on the Properties dialog box and inspect the ASP.NET version selection.