Configuring IIS for Exago BI
This guide covers the IIS configuration details necessary in order to install Exago BI. First-time users are highly encouraged to use this guide during their installation process. Following these steps in order will reduce the amount of troubleshooting necessary to get Exago running.
- Install Prerequisites
- Install Exago
- Set the Application Pool
- Set Folder Paths and Permissions
- Check that the Web Site is Running
- Open the Admin Console
This accompanying video is from the Technical Training Series. To see the other videos in this series, start with the Introduction to Technical Training Series.
1. Install Prerequisites
Exago BI requires the following Windows Features to be installed:
- Internet Information Services
- Web Management Tools
- IIS Management Console
- World Wide Web Services
- Application Development Features
- .NET Extensibility
- ASP.NET
- ISAPI Extensions
- ISAPI Filters
- Common HTTP Features
- Optional: WebDAV Publishing
- Application Development Features
- Web Management Tools
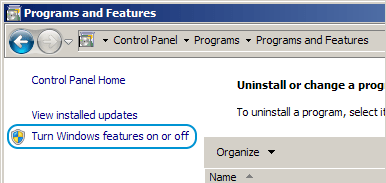
Before installing Exago BI, ensure that these features are present on the system. To verify, access the Windows Features panel via Control Panel > Programs > Programs and Features, and click Turn Windows features on or off.
In the Windows Features dialog, expand Internet Information Services and ensure that the prerequisite features are selected. If any are not installed, check the relevant boxes, press OK, then restart the server.
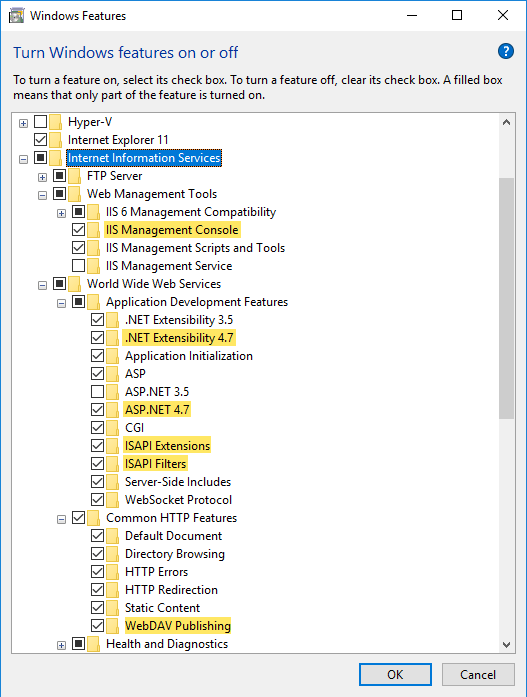
These features are necessary in order for the proper Application Pools to be available.
2. Install Exago BI
At this point, install Exago BI on the server. See Installing Exago on Windows.
3. Set the Application Pool
Verify that Exago BI is using a valid application pool.
Open IIS Manager via Control Panel > Administrative Tools > Internet Information Services (IIS) Manager.
In the Connections pane, select the Exago BI application.
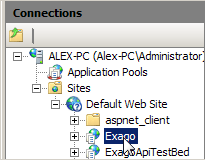
In the right-most Actions pane, click on Advanced Settings…
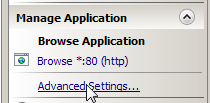
In this menu, click on the […] button to the right of the Application Pool.

In the Select Application Pool menu, determine which of the app pools has the properties:

Select this app pool, then press OK to close the App Pool menu, and then OK to close the Settings menu.
Next, ensure that the app pool is running. In the left-most Connections pane, select Application Pools.
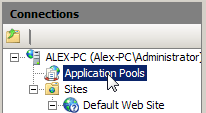
Check the Status column for the selected app pool.

If it does not say Started, select the app pool and in the right-most Actions pane, press Start.

4. Set Folder Paths and Permissions
Exago BI uses a Temp and Report (pre-v2020.1) folders to store working data and the reports file system, respectively. Create folders in locations suitable for the environment.
The Reports folder should not be within the Exago application directory. This could cause timeout errors while using the application.
The Temp folder may contain sensitive report and database information. It should be in a secure location, inaccessible to web users.
Several Exago folders require you to set additional permissions for the application pool user. First, determine the user: Open IIS to the Application Pools pane, and look at the app pool which is running Exago. The Identity property indicates the application user:

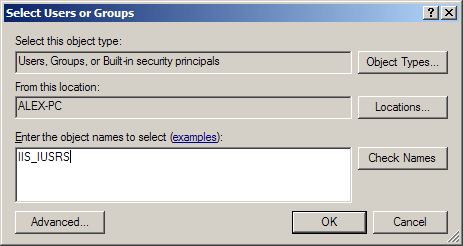
By default, this is set to ApplicationPoolIdentity. This corresponds with the built-in user IIS_IUSRS. If this is a different user, then set permissions for that user account instead.
The following folders require the app pool user to have read/write permissions:
This process may differ slightly depending on the version of Windows. For a list of supported operating systems, see Technical Specifications
First, right-click on the folder and select Properties.
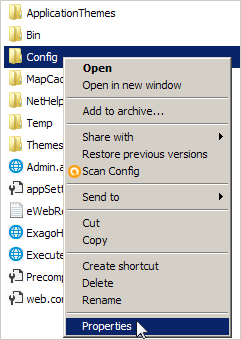
Open the Security tab. Then click the Edit… button.

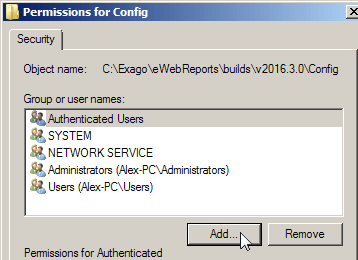
If the application pool user is not available to select, you need to add it. Press the Add… button.
Then enter the user name in the dialog box, and press OK (the default app pool user is IIS_IUSRS).
With the user selected, check the box for Allow Full control. Then press OK.
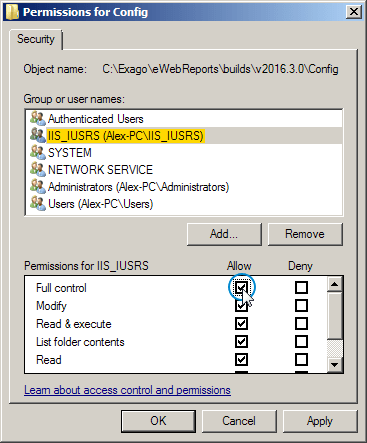
Repeat this process for every folder listed above.
5. Check that the Web Site is Running
Before starting Exago BI, ensure that the Web Site is running. Open IIS, and in the Connections pane, locate and select the web server under which Exago BI was installed
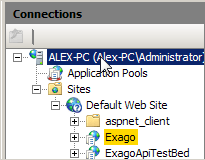
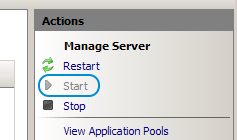
Verify in the right-most Actions pane that the Start button is unavailable, and the Restart and Stop buttons are available. If the Start button is not grayed out, press it to start the web server.
Next, in the left-most Connections pane, locate and select the web site under which Exago BI was installed.
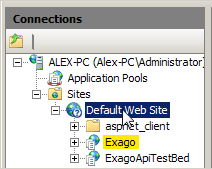
Verify in the right-most Actions pane that the Start button is grayed out, and the Restart and Stop buttons are available. If the Start button is not grayed out, press it to start the web site.

6. Open the Admin Console
You’re almost done! To verify that Exago BI was installed correctly, open a web browser and navigate to http://[ServerAddress]/[ExagoVirtualPath]/Admin.aspx. If you see the Admin Console, then the installation was successful.
In the Admin Console > General Settings, set your Temp and Reports paths to the folders you previously created. Then click Okay.
For versions v2020.1+:
Setup the Storage Management for storing reports, templates and themes.
Finally, navigate to http://[YourServerAddress]/[YourExagoVirtualPath]/ExagoHome.aspx. If you can see the Exago BI Web Application user interface, depending on version the Report Tree should be:
- empty for versions pre-v2020.1
- empty except for a My Reports and Public folder for versions v2020.1+
Congratulations! The Exago BI installation is complete!
Additional Notes
We highly recommend Setting up a State Server to handle Exago BI sessions.
If you need more information, contact Exago Support.