Procedure.XML Modifier - Usage Example: Prepend Child Element
This example demonstrates appending a child XML element: we'll update a report definition to add a new column to a Data Table.

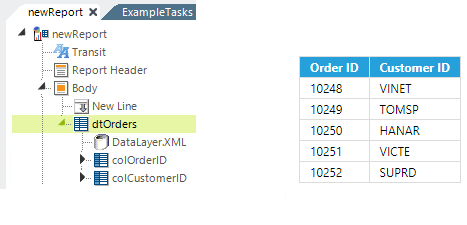
As shown above, our report definition has a Data Table ("dtOrders") and it currently has two columns.

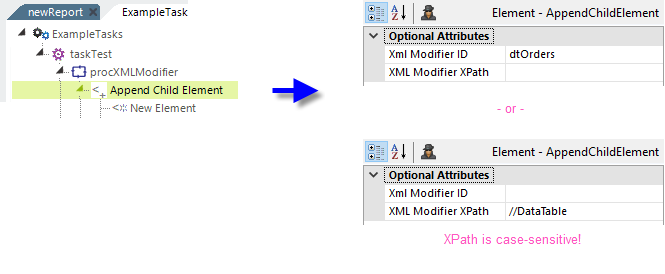
And now we see the Process Task with Procedure.XML Modifier and Append Child Element elements above. The Procedure.XML Modifier element's Filename attribute has been set as shown in the previous example. Two methods of using the Append Child Element element's attributes to identify the target Logi Info element (the Data Table) are shown.
![]() The XPath notation shown above will find the first Data Table in the definition.
The XPath notation shown above will find the first Data Table in the definition.

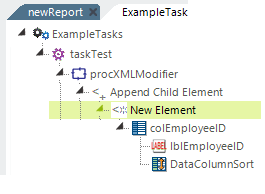
Next we need to manually enter or paste the source code for a Data Table Column into the New Element element, as shown above. Select the element and use the Source tab at the bottom of the editor in Studio to see its source code. Enter or paste your code as shown. If you only see a <NewElement /> tag, you'll also need to edit it into two tags, as highlighted in yellow above. Where can you get the source code to paste into the NewElement tag? You can select any element in Studio and copy it, then paste it into any text editor (or Studio's Source tab) and you'll get its complete XML source code, including its child elements. For example, you can select and copy one of the existing Data Table Column elements in the report definition, paste its code, and then edit it as needed.

When you switch back to the Definition tab in Studio, you'll see the added Logi elements appear beneath the New Element element, as shown above.

If we were updating an XML data file, instead of a report definition, the resulting elements would look something like the above in Studio.

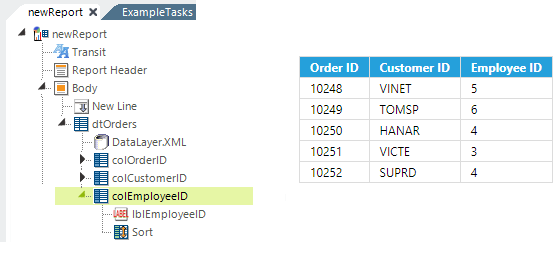
After the task runs, we can refresh the report definition in Studio, we can see that it's been updated to include the new Data Table column.