Data Menu Example: Simple Menu
The following example demonstrates how to construct a simple, one-level main menu in a Mobile Report.
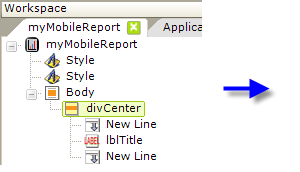
- Begin by configuring a theme and adding a title. Add a Style element and select a theme, as shown above, and, if desired, add a second Style element and select the Rounded theme.
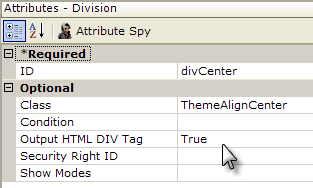
- Add a Division element and set its attributes as shown above. Beneath it add New Line and Label elements to provide a menu title.
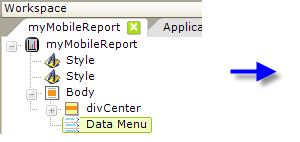
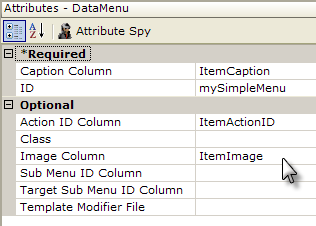
- Add a Data Menu element beneath the Body element and set its attributes as shown above. Although we recommend you use the values in this example for now, the text that's used in these attributes is completely arbitrary; you may use any value that makes sense to you.
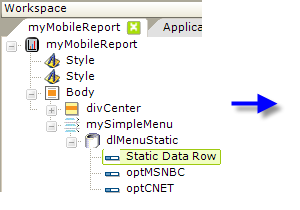
- Next, add a DataLayer.Static element beneath the Data Menu, as shown above.
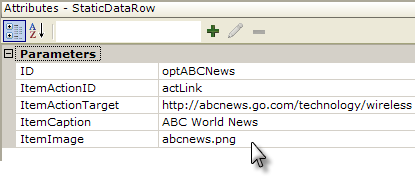
- Add a Static Data Row element beneath the datalayer, and set its dynamic attributes as shown above.

 The Data Menu element's attributes match the data row's "column" names. One additional column not found in the Data Menu attributes has also been added: ItemActionTarget. This is used by Action elements we'll add later.
 - Repeat the previous step a few times to create additional menu items.
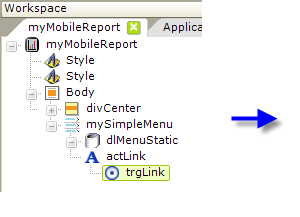
- Add an Action.Link element beneath the Data Menu element, and give it an element ID that matches the value of the ItemActionID attribute in the Static Data Rows (i.e. "actLink"). This identifies the action to be executed when the menu item is tapped.
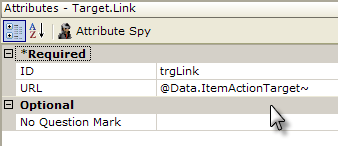
- Finally, add a Target.Link element beneath the Action element and set its URL attribute as shown above. This is where that "extra" Static Data Row attribute is used. In general you can add any number of extra attributes and access them using @Data tokens in this manner. This might be useful, for example, for passing data to the target URL or report using Link Parameters.
Your menu is now ready. Click the Preview button in Studio and an image similar to the one at the top of this topic should be displayed.
Navigating to Another Report
If you want your users to tap a menu item and load a different Mobil Report definition, you can substitute Action.Report and Target.Report for Action.Link and Target.Link in our example. But, what if some menu items need to point to report definitions and some to URLs? In that case, you can "mix and match":
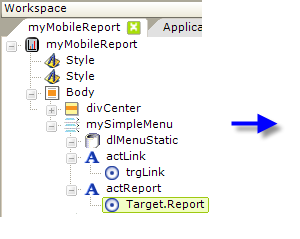
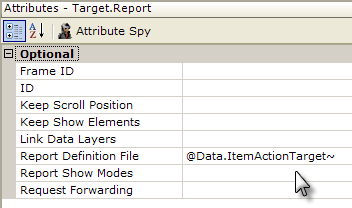
Add both Action.Link and Action.Report elements beneath the Data Menu, as shown above, then set the ItemActionID attribute value for each menu item to use the desired action element.