Creating Dataviews
Logi DataHub v3 expands the number of data sources available for use with Dataviews and provides the ability to cache data from them. This topic discusses how this caching capability affects Dataview creation and management.
For basic information about Dataviews, see Dataview Authoring.
About Logi DataHub v3
Logi DataHub v3 is a data virtualization product that connects to multiple sources, retrieves and caches data for high-performance, and prepares data in intuitive ways, so you can deliver efficient reporting and analysis that doesn't affect transactional systems.
When Logi DataHub v3 is installed, it extends the functionality of Dataviews, specifically by expanding the data sources available for use and by providing a high-performance, self-tuning data store for caching data. Caching the data lets you work with data "snapshots" and eliminates the need to constantly query large, transactional systems. Applications that use cached Dataviews will use the cached data rather than retrieving data from the source.
Logi DataHub v3 includes data profiling that automatically identifies the types and formats of your data and provides easy ways of enriching it through new calculations and manipulation of multi-part data.
The following sections discuss how Logi DataHub v3 affects operations when creating and using Dataviews, and assumes you've already read Dataview Authoring.
Creating a Dataview
When Logi DataHub v3 3.0 is installed and you're adding data for a Dataview, you have the option of adding multiple data sources:
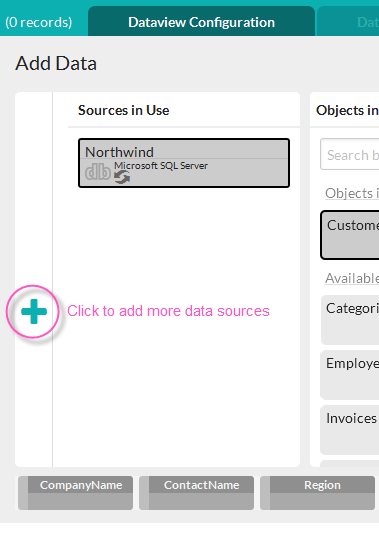
As shown above, the Add Data panel includes a "+" icon that can be used to add more Sources. Click it once to open the Sources panel (it will change to a "-" icon), select additional Source(s), and then click it again to shrink the panel back to its original form. You'll then be able to select objects from all of the items in the "Sources in Use" list.
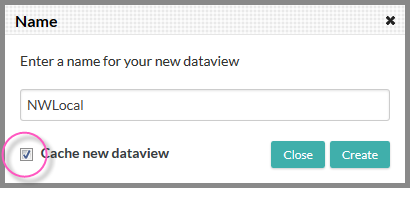
When you've finished configuring a Dataview and click the Save icon and are prompted to provide a Dataview name, you'll now also see a "Cache new dataview" checkbox, as shown above. Check this box to load and cache the data for this Dataview, or leave it unchecked to create an "In Place" Dataview, then click Create.
Dataview Loading
If you checked the "Cache new dataview" checkbox described in the previous section, data will be loaded for the first time as soon as you click Create. Loading progress and actions will be seen in the Dataview Status tab:
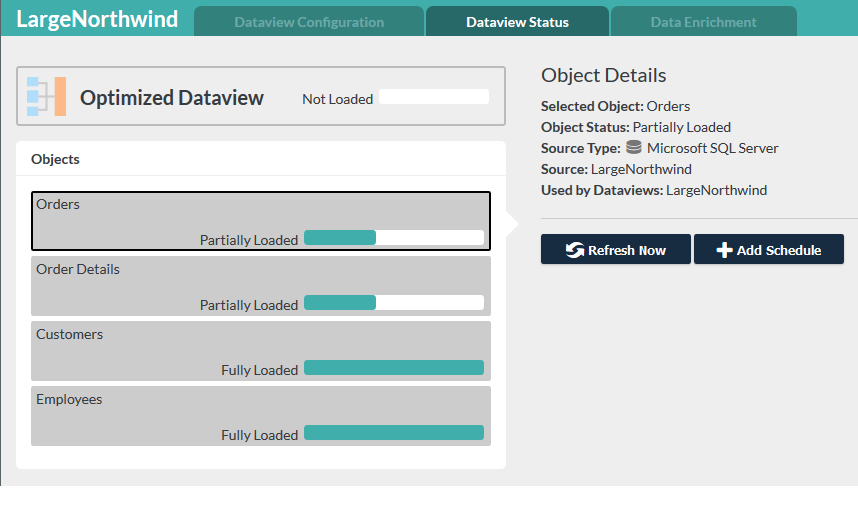
Several indicators will show you the progress of the loading process, which includes three steps:
- Initialize the Connection - Logi DataHub v3 initializes the connection with the source.
- Import Data - The data is retrieved and then written to the data store.
- Optimize Data - If, in the course of loading the data, Logi DataHub v3 detects the right conditions, the "Optimized Dataview" banner shown above will be displayed and optimization processing will occur. This action consolidates all the underlying objects into a single table in the Logi DataHub v3 repository database, considerably improving performance. It also identifies column types, designates look-up columns, and sets the correct column order and sorting.
When loading completes, the Object Details will be updated...
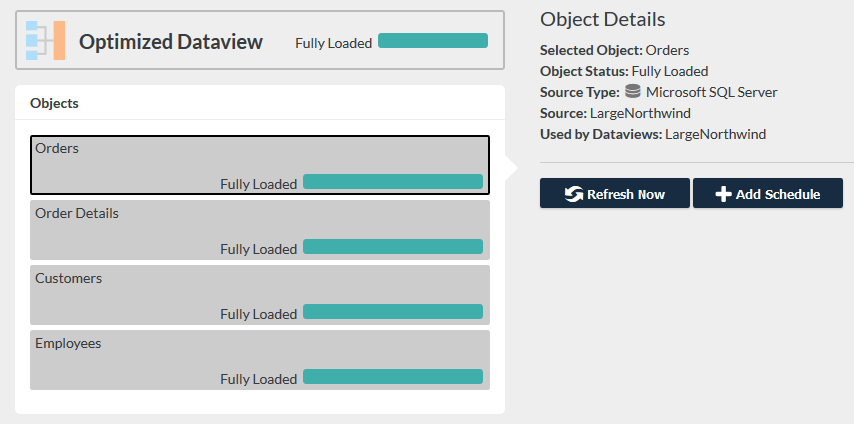
...and you'll receive a notification email if you provided an email address in your account details. This can be very helpful when loading large datasets: you don't need to remain logged-in to the Dataview Authoring tool during loading and you can return later after receiving the notification email to check loading status.
Refreshing the Data
Once the data has been loaded for the first time, you can refresh it manually or periodically. Two buttons are displayed beneath the Object Details for this purpose.
Clicking Refresh Now will display a panel, prompting you to select the type of refresh:
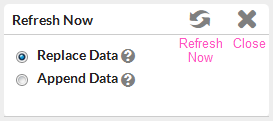
If you select Replace Data and click the Refresh Now icon ![]() , a new loading process will start and all data in the cache will be replaced by new data retrieved from the source. Click the Close icon
, a new loading process will start and all data in the cache will be replaced by new data retrieved from the source. Click the Close icon ![]() to hide the panel without loading any data.
to hide the panel without loading any data.
If you select Append Data, the panel expands:
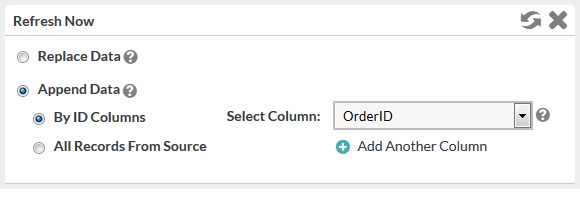
When you choose to append data, the existing data in the cache will not be affected and you have two append options:
By ID Columns - Specify one or more numeric or temporal columns to act as an index. During loading, only records whose values in these columns are greater than the values in records already in the cache will be appended. This has the effect of appending only data that is "newer" than data already in the cache.
All Records from Source - All of the data from the source will be appended to the existing data in the cache.
Click the Refresh Now icon ![]() to start the data loading operation immediately. Click the Close icon
to start the data loading operation immediately. Click the Close icon ![]() to hide the panel without loading any data.
to hide the panel without loading any data.
Click Add Schedule to define a scheduled refresh, which is discussed in the next major section.
Managing Dataviews
As you create Dataviews, they're represented in the Dataview page with graphic pills:
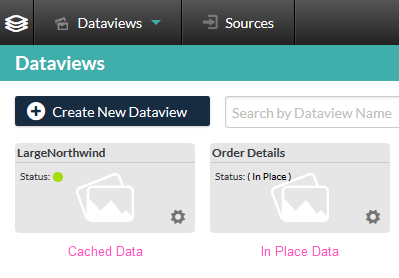
The pills for Dataviews using Cached and In Place data are somewhat different, as shown above.
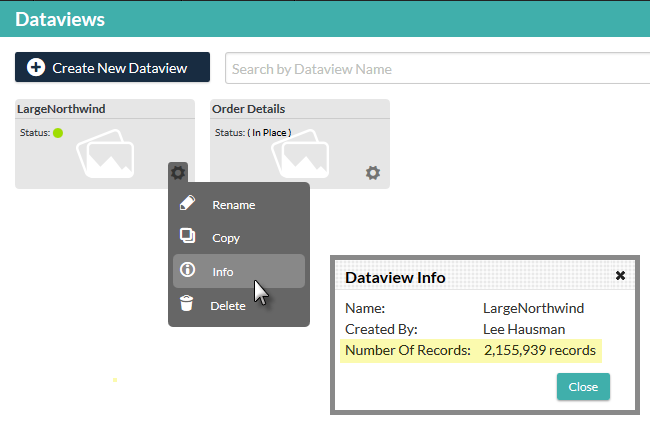
You can examine the details for a cached Dataview and see the total number of records loaded for it, as shown above.
Scheduling a Data Refresh
A convenient way to refresh data is to schedule loading to occur at regular intervals.
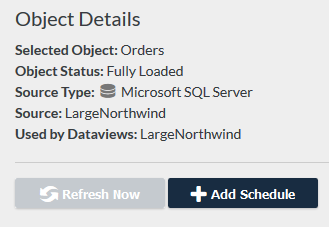
After a Dataview has been loaded for the first time, the Object Details in the Dataview Status tab will include the Add Schedule button shown above.
If there are multiple objects, select the desired object. To schedule a data refresh, click Add Schedule, and these controls will be displayed:
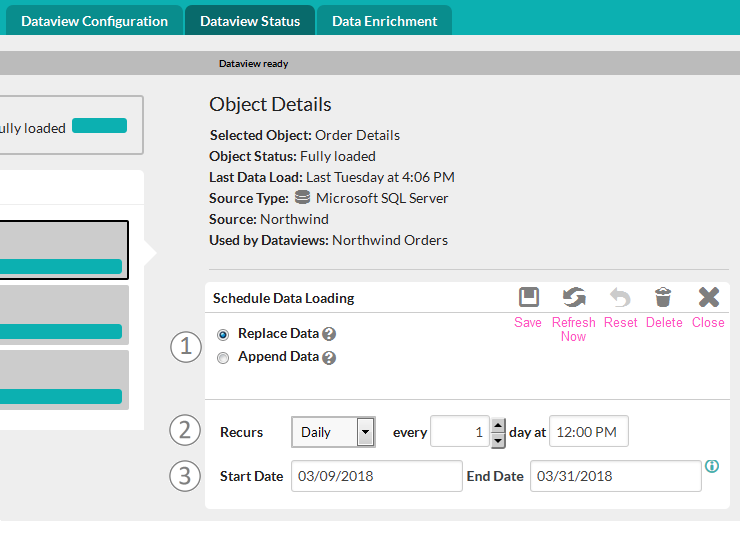
Use these steps to create a scheduled refresh:
- Refresh Type - Select the desired refresh type. See the previous section for a detailed discussion of the options.
- Recurs - Select the frequency (Daily, Weekly, Monthly), interval, and start time for the loading operation.
- Start and End Date - Enter the Start Date (required) and End Date (optional) for the loading operation. Leaving the End Date blank will cause loading to continue to occur at the specified frequency and interval until the schedule is modified or deleted.
![]() Remember that, when the refresh occurs, the Dataview will be unavailable to other users until the operation completes.
Remember that, when the refresh occurs, the Dataview will be unavailable to other users until the operation completes.
Click the Save icon ![]() to save the schedule.
to save the schedule.
Click the Refresh Now icon ![]() to refresh the data immediately.
to refresh the data immediately.
Click the Reset icon ![]() to clear any changes in the controls during this sequence.
to clear any changes in the controls during this sequence.
Click the Delete icon ![]() to delete this schedule.
to delete this schedule.
Click the Close icon ![]() to hide the controls.
to hide the controls.
Once the schedule has been saved, you'll notice some changes in the Dataview Status tab:
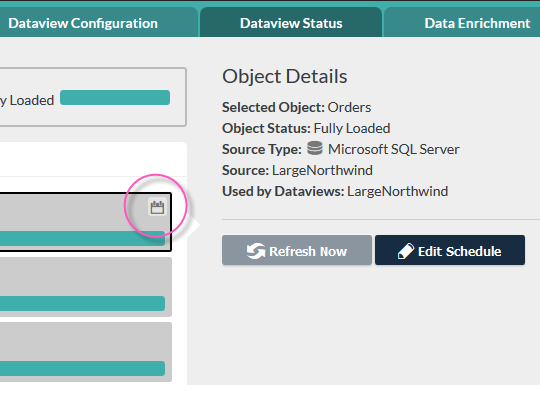
As shown above, a special "scheduled" icon (circled above) appears in the selected data object pill and an Edit Schedule button is now available.