Data Menu Example: Complex Menu (with sub-menus)
The following example demonstrates how to construct a more complex menu, with sub-menus, in a Mobile Report. Here's the menu hierarchy we'll build:
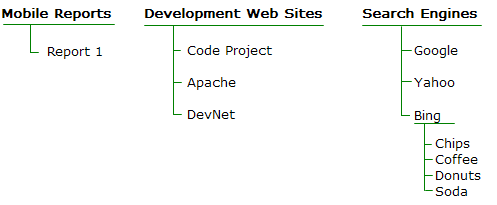
The first main menu item will point to a different mobile report, and the second to a sub-menu of web sites. The last main menu item will point to a sub-menu that will have an item that points to another sub-menu.
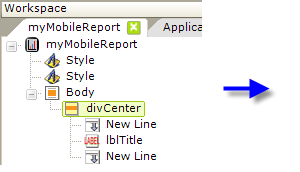
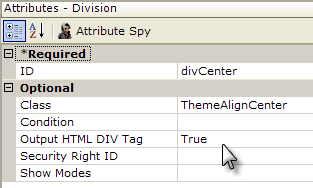
- As before, begin by configuring a theme and adding a title. Add a Style element and select a theme, as shown above, and, if desired, add a second Style element and select the Rounded theme.
- Add a Division element and set its attributes as shown above. Beneath it add New Line and Label elements to provide a menu title.
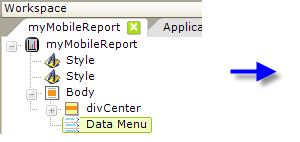
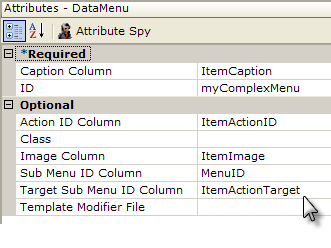
- Add a Data Menu element beneath the Body element and set its attributes as shown above.
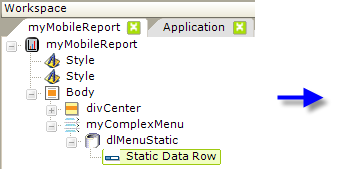
- Next, add a DataLayer.Static element beneath the Data Menu, as shown above.
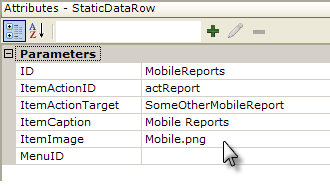
- Add a Static Data Row element beneath the datalayer, and set its dynamic attributes as shown above. The data for this menu item is similar to that used for the Simple Menu example. This completes the first main menu item.
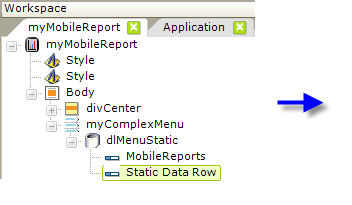
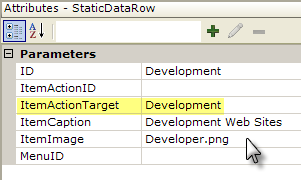
- Add a second Static Data Row and set its column data as shown above. This item will point to a sub-menu, so note that its ItemActionTarget column is set to a value, "Development", that we'll use in the next steps to identify the sub-menu.
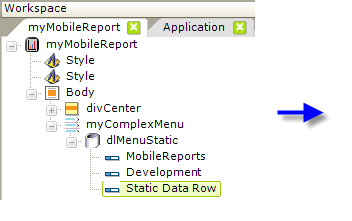
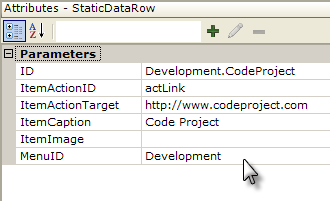
- Add another Static Data Row and set its column data as shown above.
 The ID column contains a "dot" in it - this will make things easier to read in the Element Tree - and that the MenuID column is used to indicate that this item is in a sub-menu called "Development", which relates to the ItemActionTarget discussed in the previous step.
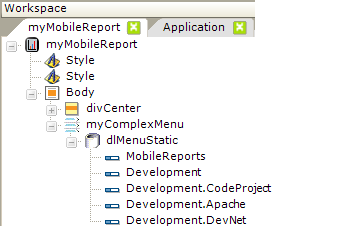
- Add two more Static Data Rows and set their columns data in the same fashion as the previous row. These become the menu items in the sub-menu. This completes the second main menu item and its sub-menu.
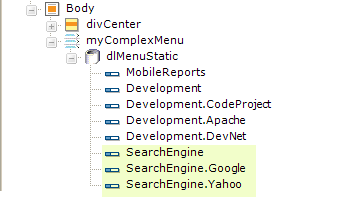
- Repeat the last three steps to add three Static Data Rows for the Search Engines main menu item and two of its sub-menu items. Their column data values will be similar to those set previously. At this point, you can see the value of the "dotted" element IDs.
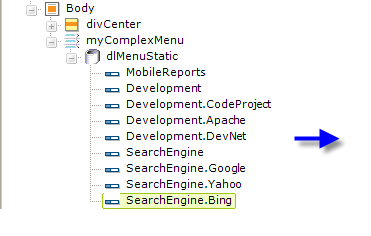
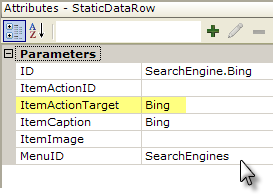
- Add another Static Data Row and set its column data as shown above. This sub-menu item is going to point to another sub-menu, so note that its ItemActionTarget column value is "Bing", the ID of the next sub-menu.
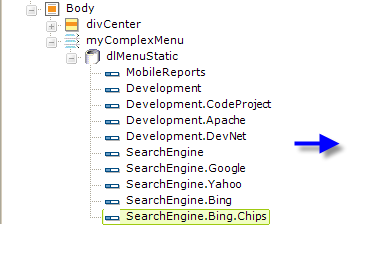
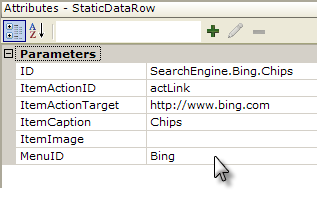
- Add another Static Data Row and set its column data as shown above. This is the first menu item in the second-level sub-menu. Its ItemActionID and ItemActionTarget column values will be used by the Action elements we'll add in a few steps.
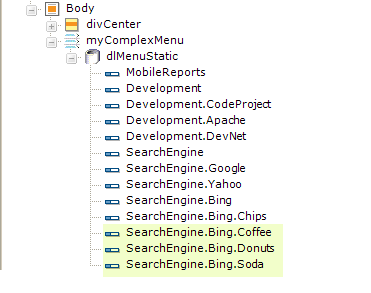
- Repeat the last step to add Static Data Rows for three more Bing sub-menu items. Their column data values will be similar to those set previously.
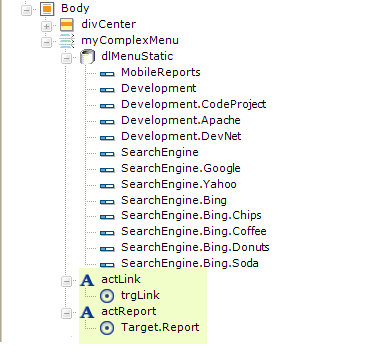
- Finally, add the Action.Link and Action.Report elements, with child Target elements, as shown above, to provide an action when a menu item (which does not point to a sub-menu) is tapped. Be sure to set the Action elements' ID attribute to match the ItemActionID column value in the Static Data Rows, as appropriate (see Step #7 in the Simple Menu example).
Your menu is now ready. Click the Preview button in Studio and test out the menu, sub-menus, and menu items.