
Add and Remove Supervisors
More than one Composer supervisor user can be defined for your Composer instance.
Add a Supervisor
To add a supervisor:
Log into Composer as a supervisor (make sure you have selected the superaccount). The Manage Users page appears, listing all the user definitions in the Composer instance. If you move from this page, you can always access it by selecting Users on the supervisor menu (
 ).
).On the left side of the page, select the name of the user definition that you would like to make a supervisor. The user definition appears on the right side of the page.
Alternatively, define a new user to be a supervisor. See Add User Definitions.
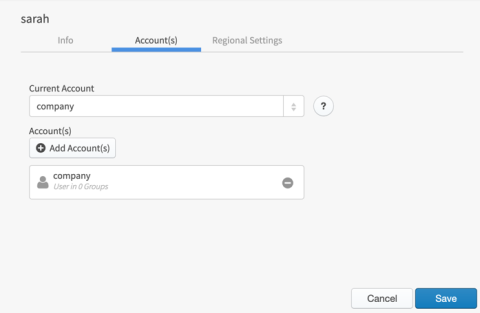
Select the Account(s) tab of the user definition. This tab lists all the accounts to which the user is assigned and the number of groups to which the user is assigned in each account.
Select
 . The Select Account(s) dialog appears.
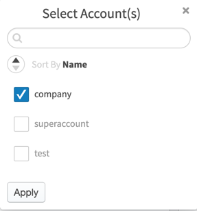
Select (check) the superaccount.
Users assigned to the superaccount have full access to the Composer supervisor UI and its supervisory functions. See About the Supplied Composer Accounts.
Select Apply when finished. The list of accounts on the Account(s) tab adjusts to show your selections.
Optionally, in the Current Account field, select the account that should be used the next time the user logs in. See Set the Current Account for a User.
Select
 to save the user definition.
The user is now a supervisor.
Remove a Supervisor
You can remove a supervisor by removing them from the superaccount or by simply deleting the user definition of the supervisor. See Delete User Definitions to learn about deleting user definitions.
To remove a supervisor from the superaccount:
Log into Composer as a supervisor. The Manage Users page appears, listing all the user definitions in the Composer instance. If you move from this page, you can always access it by selecting Users on the supervisor menu (
).On the left side of the page, select the name of the user defined as a supervisor. The user definition appears on the right side of the page.
Select the Account(s) tab of the user definition. This tab lists all the accounts to which the user is assigned and the number of groups to which the user is assigned in each account.
Remove the user from the superaccount in one of two ways.
In the list of accounts on the Account(s) dialog, select the
 icon associated with the superaccount. When you do, a small
  button appears. Select this button to remove the user from the superaccount.
Select
to view the Select Account(s) dialog. Clear (uncheck) the checkbox associated with the superaccount and select Apply.
The list of accounts on the Account(s) tab adjusts to show your selections.
Select Apply when finished. The list of accounts on the Account(s) tab adjusts to show your selections.
Optionally, in the Current Account field, select the account that should be used the next time the user logs in. See Set the Current Account for a User.
Select
 to save the user definition.
Comments
0 comments
Please sign in to leave a comment.